

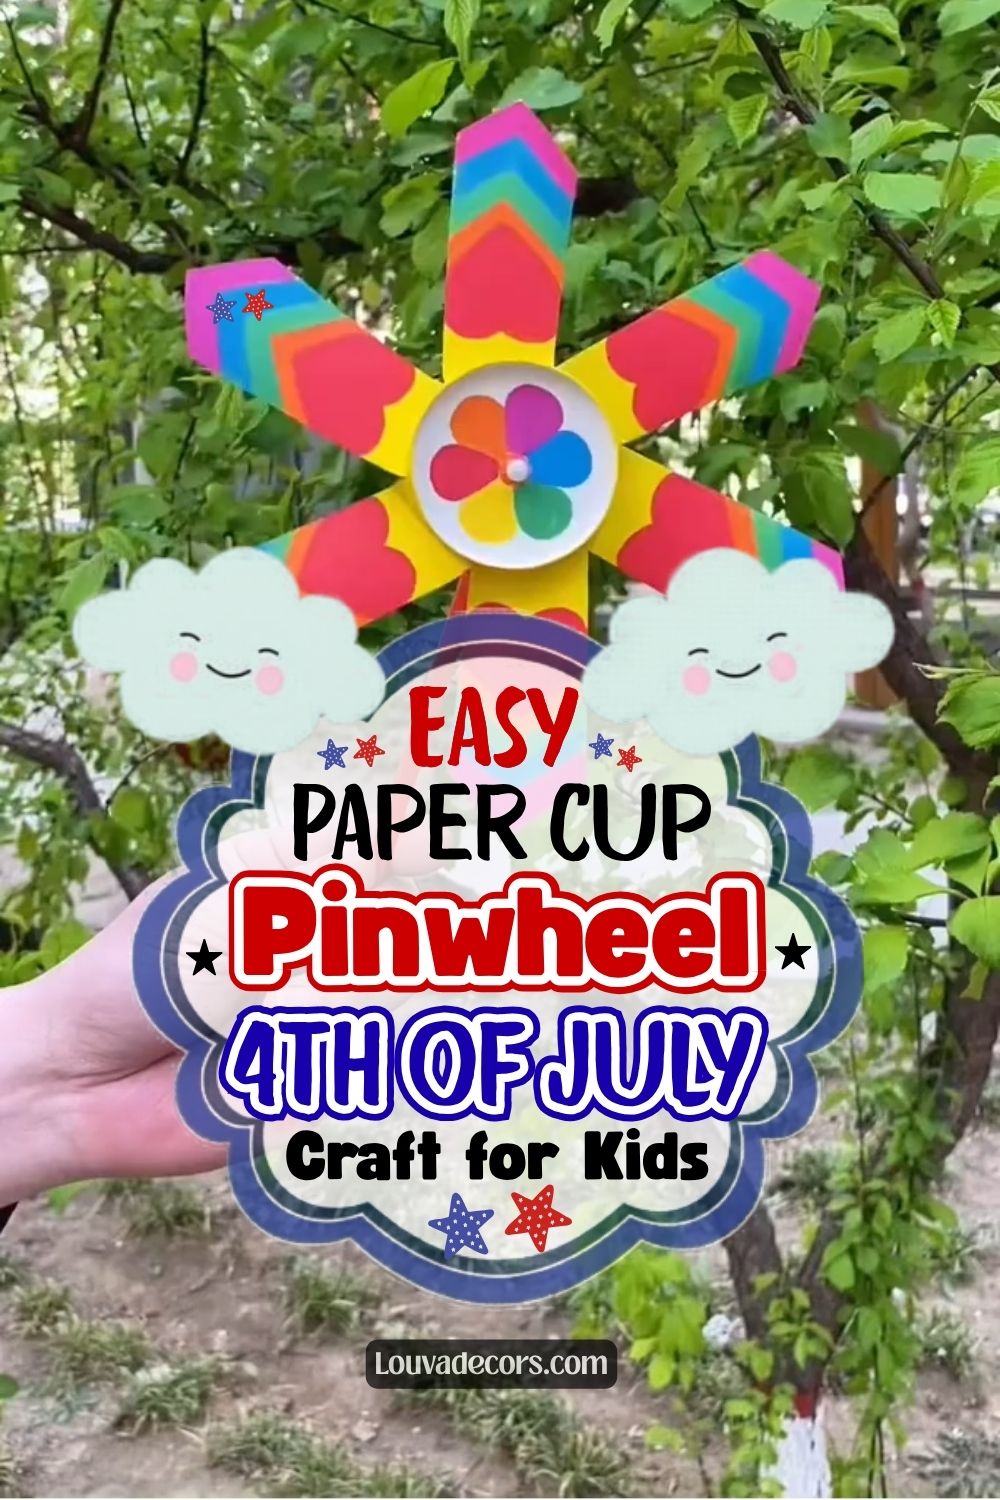
A single paper cup can turn into something kids will run around the yard waving for hours.This rainbow paper cup pinwheel craft for kids starts as a plain paper cup and ends as a spinning flower pinwheel with chevron stripes and tiny hearts on every petal. It is the kind of patriotic craft for kids that fits right into a 4th of July party table, a summer kids activity afternoon, or a quiet rainy-day project at the kitchen table. The bright colors and spinning motion make it a favorite handmade party for backyard celebrations.
You do not need any craft experience to make this one. There is no sewing, no hot glue gun, and no tricky folding, just a cup, a few snips of the scissors, and some color. Take your time with the cutting step, and it’s okay if your petals are not perfectly even; the spin still works beautifully.
This project uses one paper cup, a marker, a small round center piece, a cotton swab, and a bendy straw, and it comes together in well under thirty minutes. It is a sweet little addition to any home decor or DIY gift ideas collection for the holiday, especially for families looking for screen-free entertainment.
Why You Will Love This Project
This pinwheel looks like something from a craft store display, but it is made almost entirely from supplies already sitting in a kitchen drawer. It is wonderfully low-cost, beginner-friendly enough for young kids to help with most steps, and perfect for 4th of July party décor or favor tables. Once it is finished, it actually spins in the breeze, so it doubles as a toy long after the glue dries.
What You Will Need
- 1 Paper Cup (plain colored cup works best yellow shown in the video) [Budget alternative: any small paper cup from a multi-pack]
- Scissors [Budget alternative: kid-safe craft scissors]
- Marker(s) in rainbow colors [Budget alternative: a basic 8-pack washable marker set]
- Patterned paper or stickers in a chevron/heart rainbow design
- Small round flower-shaped center piece (button or pre-cut paper circle) [Budget alternative: a cut circle of cardstock decorated with dot stickers]
- 1 Cotton Swab (broken to length) [Budget alternative: a toothpick]
- 1 Bendy Straw (red shown in video) [Budget alternative: any reusable straw or wooden craft stick]
- Glue (for attaching paper pieces and the center button) [Budget alternative: a basic glue stick]
All materials can be found at your local craft store or ordered online.
Video Tutorial
Watch the full tutorial above before reading the written steps. The steps below match the video exactly.
Step-by-Step Instructions
Step 1: Poke a Hole in the Bottom of the Cup
Flip your paper cup upside down and poke a small hole in the center of the base. This hole is where the pivot will go later, so it needs to sit as close to the middle as possible. No rush here, a slightly off-center hole will still spin, just not as smoothly.
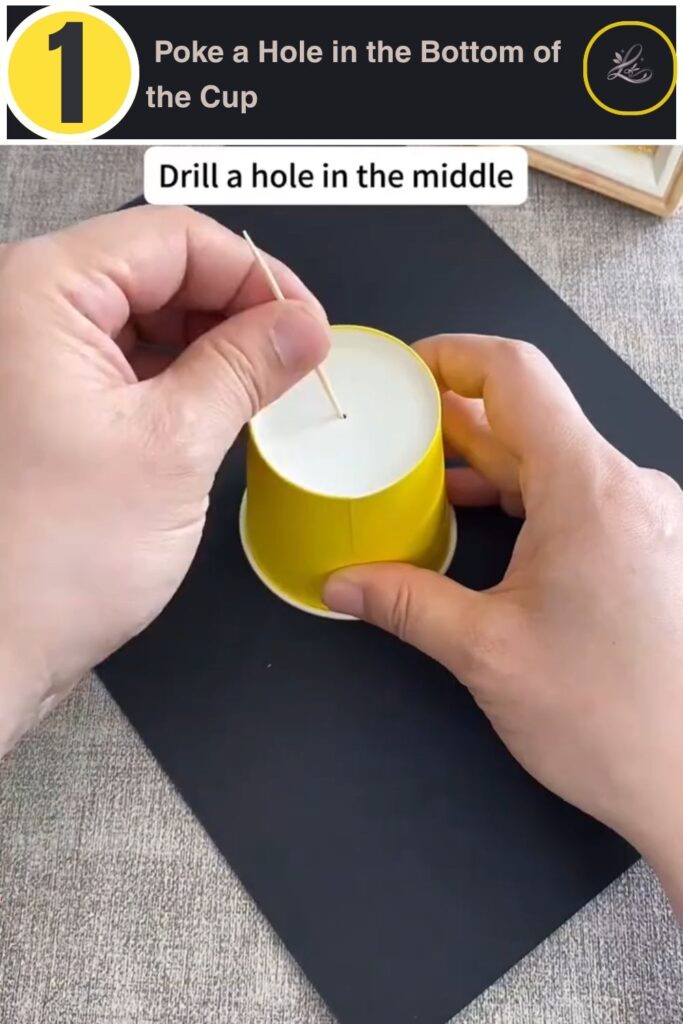
💡 Pro Tip: Use something with a rounded tip, like a pencil point or a capped pen, instead of anything sharp it makes a clean hole without tearing the cup.
Step 2: Mark and Divide the Cup Rim
Turn the cup right-side up and lightly mark six even sections around the open rim. These marks are your guide for cutting straight petal lines in the next step. Take your time spacing them out so the finished petals end up roughly the same size.
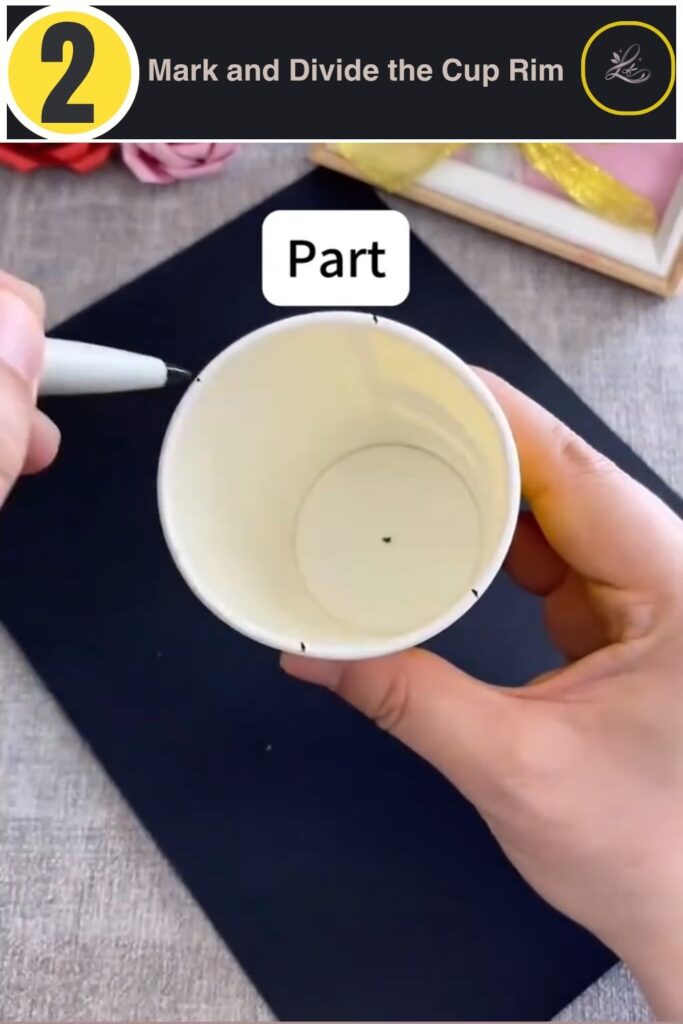
💡 Pro Tip: A light pencil mark is easier to erase or hide than a dark marker line, especially if your final petals will be covered in patterned paper anyway.
Step 3: Cut the Cup Into Petal Strips
Use your scissors to cut straight down each marked line, stopping just above the base of the cup. Cutting slowly keeps each strip even and prevents the cup from tearing past the base. If one strip comes out a little wonky, that is okay it will still fold into place.
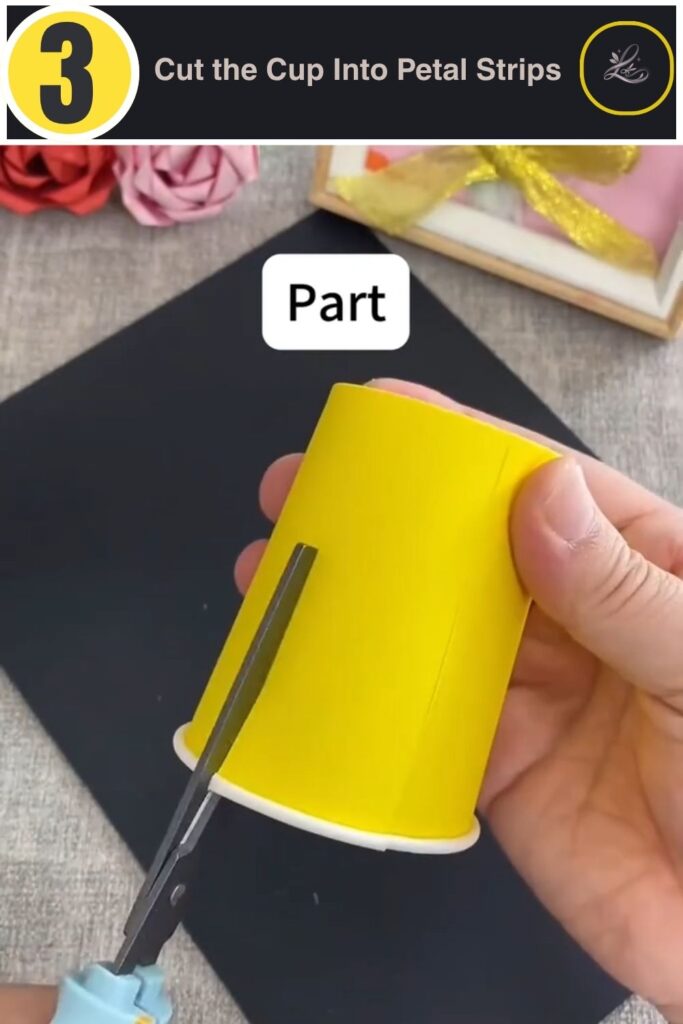
💡 Pro Tip: Stop cutting about a half inch above the base of the cup so all six strips stay attached to a solid center this is what keeps your pinwheel from falling apart.
Step 4: Fold the Strips Outward Into Petals
Gently fold each cut strip outward and slightly forward so the cup starts to flatten into a flower shape. Work your way around the cup one strip at a time rather than rushing through all six at once. Press each crease so the petal holds its position.
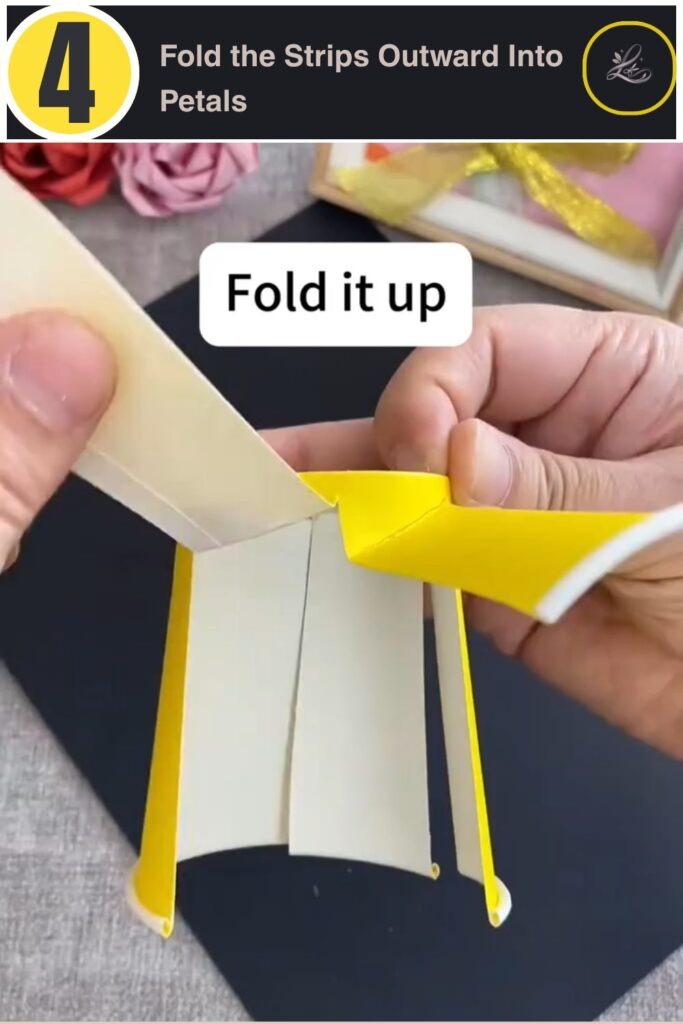
💡 Pro Tip: Fold against a flat surface, like a table edge, to get a sharper, more even crease on each petal.
Step 5: Decorate the Center Circle
Take your small center circle and draw or attach a simple flower pattern with rainbow dots or petals. This piece sits in the very middle of the pinwheel, so it is a fun spot for kids to add their own personal touch. Keep the design simple since this circle is fairly small.
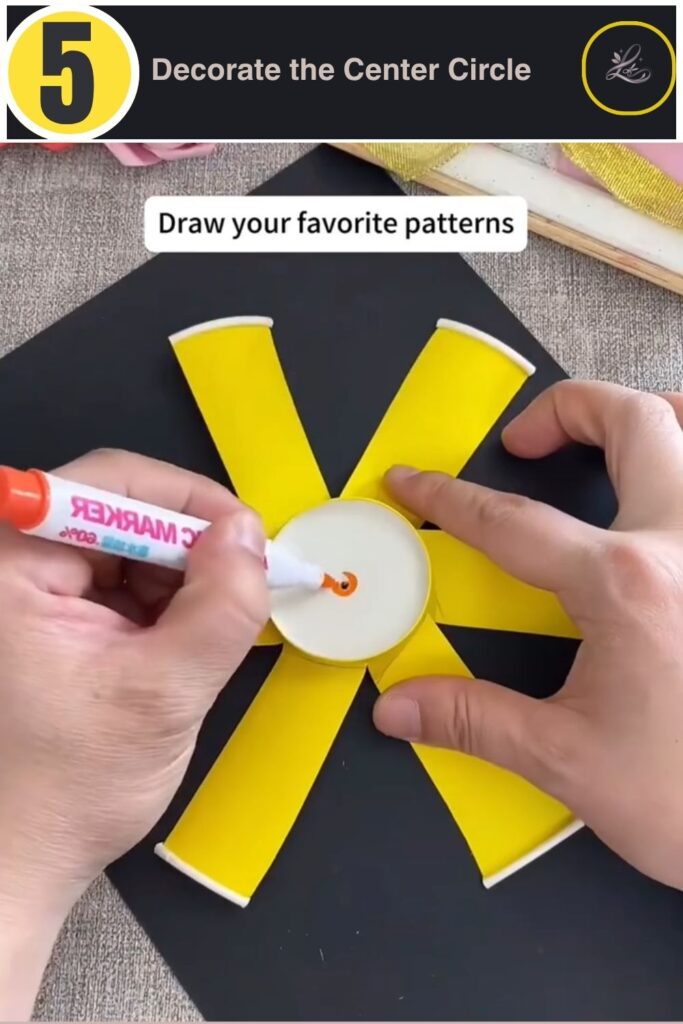
💡 Pro Tip: Let kids pick their own dot colors here since this circle is small, there is very little room for a mistake to show.
Step 6: Attach the Patterned Petal Covers
Cut six matching strips of rainbow chevron or heart patterned paper and glue one onto each folded petal. This is what gives the pinwheel its bold, finished look instead of plain yellow paper. Smooth each strip down firmly so it does not lift while spinning later.
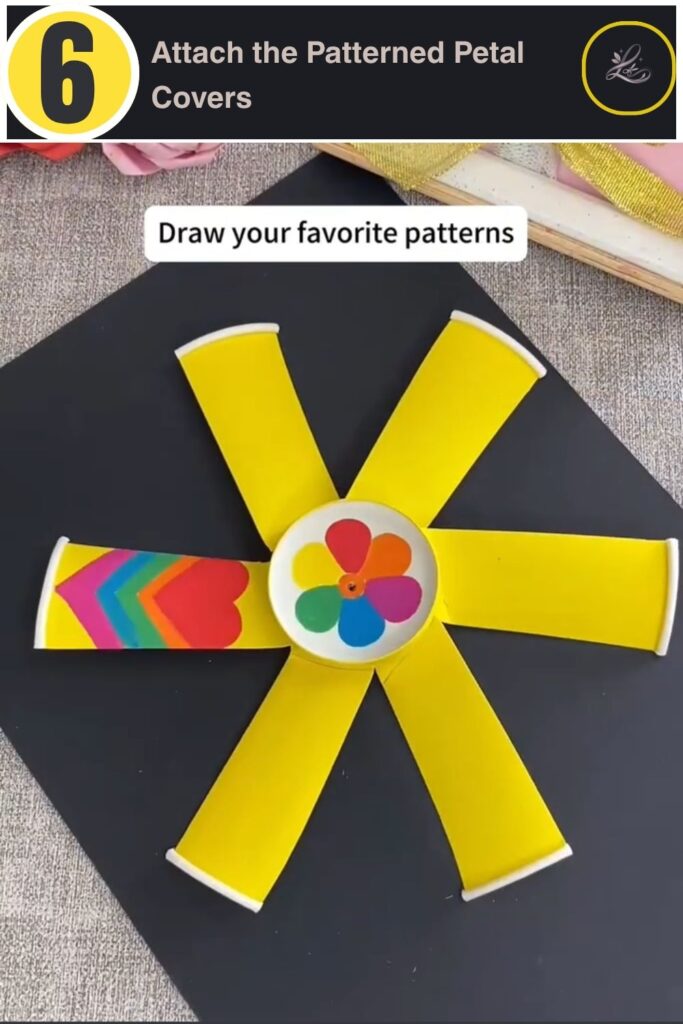
💡 Pro Tip: Glue the patterned strip on before fully shaping the petal tip, so the edges line up neatly with the yellow paper underneath.
Step 7: Attach the Center Piece and Insert the Pivot
Glue your decorated center circle into the middle of the flower, then break a cotton swab to a short length and push it through the center hole. The cotton swab becomes the pivot point that lets the whole flower spin freely. Press it through gently so it sits snug but still turns easily.
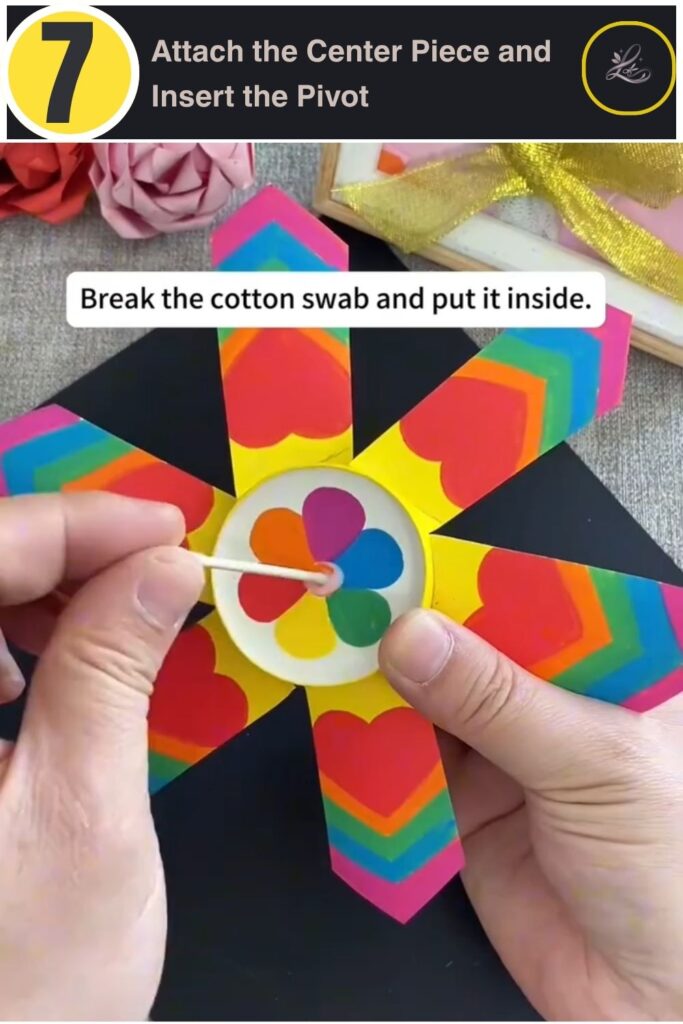
💡 Pro Tip: Add a small dab of glue where the cotton swab meets the center circle, but keep the back of the pivot free so the flower can still spin against the straw.
Step 8: Add the Straw Handle
Slide a bendy straw onto the back of the pivot to create the handle. This is the part kids will hold onto, so make sure it feels secure before letting go. Give the finished pinwheel a gentle blow or a wave through the air to watch it spin.
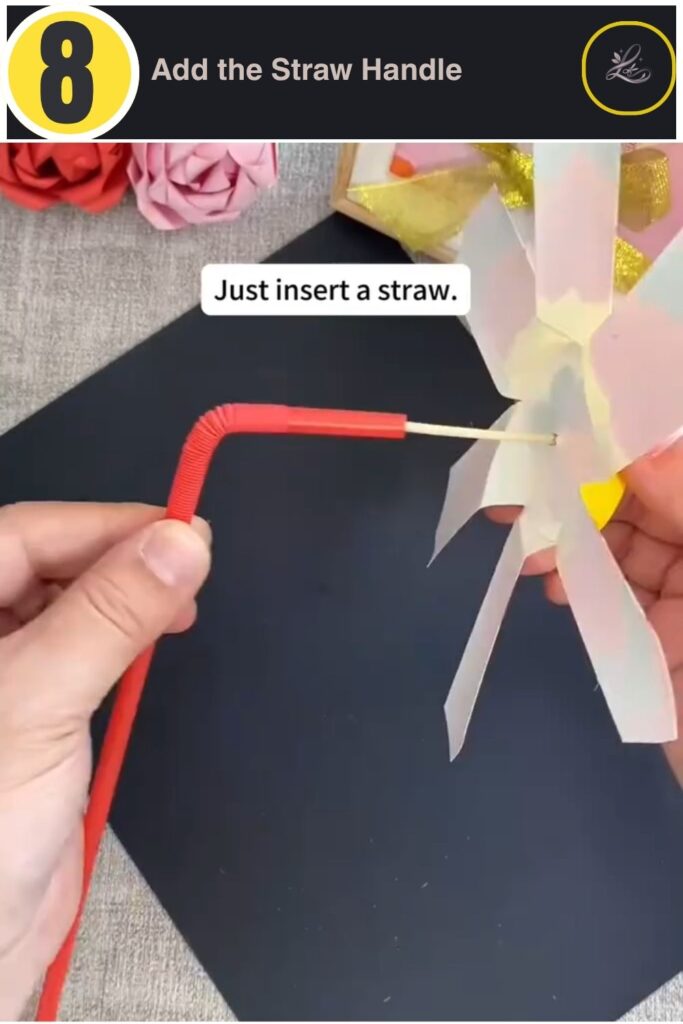
💡 Pro Tip: A bendy straw works especially well here because the bend gives small hands a comfortable angle to hold while running or waving the pinwheel outside.
Tips & Tricks
- If your petals do not spin smoothly at first, check that the cotton swab pivot is not glued too tightly against the back of the flower it needs room to turn.
- Work on a placemat or tray so loose paper trimmings and glue do not end up all over the table.
- If a petal tears while cutting, a small strip of tape on the back will hold it together without showing on the front.
- For younger children, an adult can handle the initial cutting step while the child focuses on decorating and assembling.
- Store finished pinwheels standing up in a cup or vase so the petals do not get bent before the party.
Ways to Use This Craft
This pinwheel fits beautifully into a 4th of July table setting, whether propped in a flower pot as a centerpiece or handed out as a party favor for kids to wave during a parade or backyard barbecue. It also works as a fun seasonal swap for spring garden parties or summer birthday themes, since the rainbow colors are not locked into any single holiday. For a thoughtful gift angle, make a small batch and tie them together with ribbon for a handmade party favor bundle.
Frequently Asked Questions
-
How long does this project take to complete?
Most families finish this paper cup pinwheel craft for kids in about twenty to thirty minutes, including decorating time. Younger kids may take a little longer on the cutting and gluing steps, and that is perfectly fine. Building in extra time for color choices makes the project more enjoyable.
-
Where can I buy the materials for this project?
Paper cups, markers, cotton swabs, and bendy straws are easy to find at any grocery store, dollar store, or craft store. Patterned paper or stickers in rainbow chevron designs are available at most craft stores or online in multi-packs, which is helpful if you plan to make several pinwheels at once.
-
How can I make a pinwheel without a paper cup?
A paper plate, a sturdy circle of cardstock, or even a clean yogurt cup lid can be cut into petal strips the same way a paper cup is in this tutorial. The key is starting with a shape that already curves slightly, since that curve becomes the base of the pinwheel. From there, the cutting, folding, and pivot steps stay exactly the same.
Closing
Look at that one ordinary paper cup just became a spinning rainbow pinwheel ready for a 4th of July celebration. Whether it ends up in a flower pot centerpiece or waving around the backyard in a kid’s hand, this little craft brings a lot of color for very little cost. Ready for your next project? Try Magical Spinning Paper Princess Lantern Beginner DIY next! Happy crafting! LOUVADECORES
Follow us on: Pinterest
