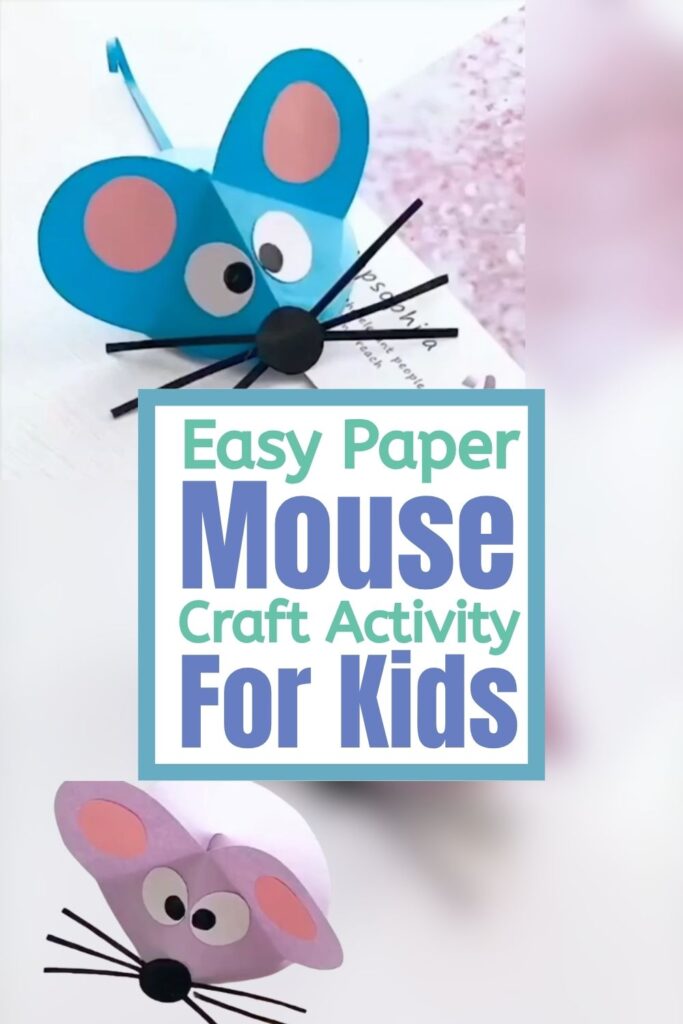

Imagine a colourful little companion sitting on your desk, made entirely out of paper. This adorable paper mouse craft brings a touch of whimsy to any room and adds a cheerful pop of color to your shelves. Working with construction paper allows you to experiment with bright palettes like the vivid purple and blue seen in the video. This weekend project makes an excellent kids activity or a mindful creative break for adults. You will end up with a charming handmade decoration that sparks joy every time you look at it.
You do not need any experience to create this project. We will walk through every fold and glue application together. Take your time, and remember that handmade items have unique character. It is okay if the ears are slightly asymmetrical or the whiskers point in different directions!
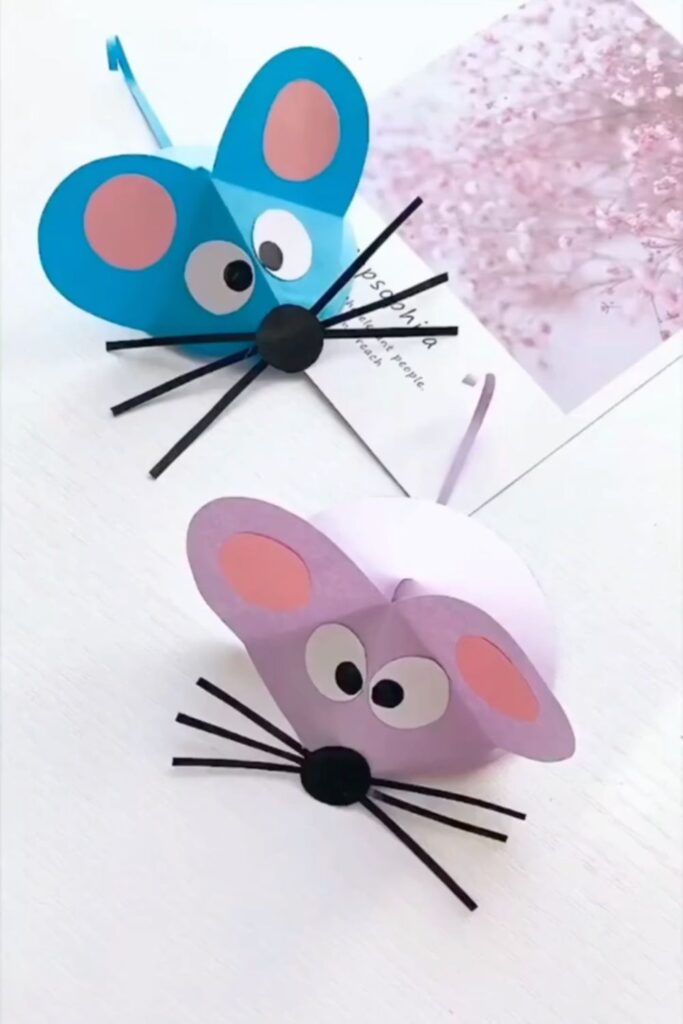
Gather your colorful paper, scissors, and a glue stick. We will finish this craft in under 15 minutes. This fits perfectly into your schedule whenever you crave a quick DIY home decor addition or a playful desk accessory.
WHY YOU WILL LOVE THIS PROJECT
This craft transforms basic household supplies into an engaging three-dimensional figure. It costs pennies to make, is entirely beginner-friendly, and delivers immediate visual impact. You will love how quickly the paper takes shape to form a recognizable, friendly character. It serves beautifully as a DIY gift idea for teachers, friends, or family members.
WHAT YOU WILL NEED
- 1 Large Paper Circle (Purple or Blue) [Any thick coloured paper or cardstock]
- 2 Small Pink Paper Circles [Cut from scrap paper]
- 2 Small White Circles and 2 Tiny Black Circles [For the eyes]
- 1 Medium Black Circle and 6 Thin Black Strips [For the nose and whiskers]
- 1 Long, Thin Paper Strip [For the tail]
- Craft Glue or Glue Stick [Double-sided tape works too]
All materials can be found at your local craft store or ordered online.
VIDEO TUTORIAL
Watch the full tutorial above before reading the written steps. The steps below match the video exactly.
STEP-BY-STEP INSTRUCTIONS
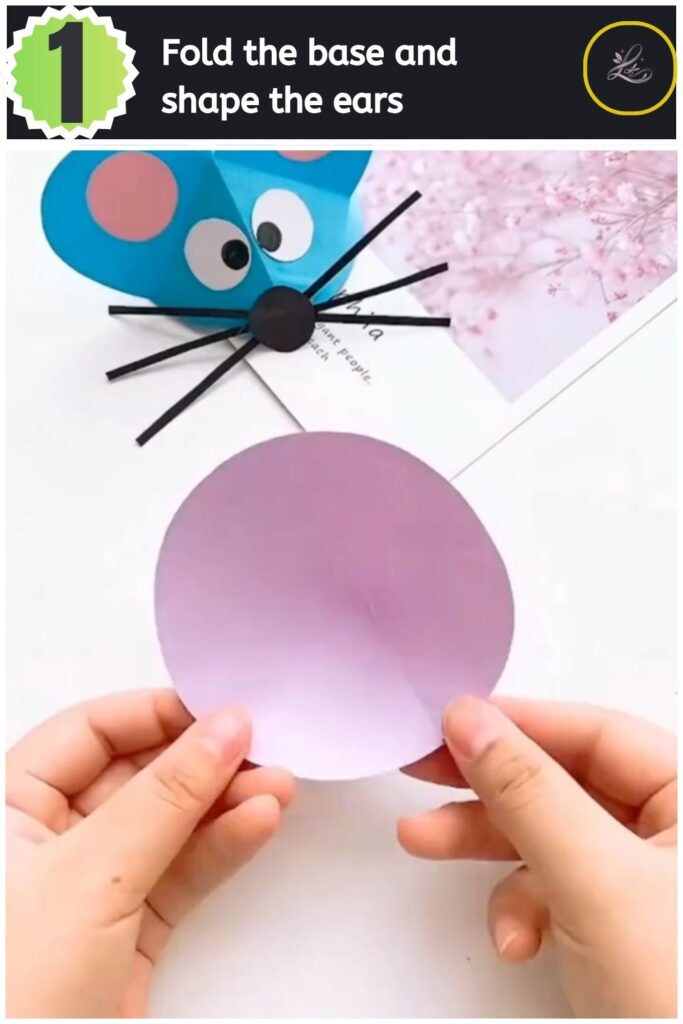
Step 1: Fold the base and shape the ears
Fold the large paper circle in half to create the curved body of the mouse. Crease the bottom edge firmly so the mouse can stand upright on the table. Fold back the top rounded corners slightly to form the protruding ear shapes.
Pro Tip: Run the edge of a ruler along the bottom fold to ensure your mouse stands perfectly flat.
Step 2: Attach the inner ears
Apply glue to the back of the small pink paper circles. Press one pink circle firmly onto the center of each folded ear flap. Hold the paper in place for a few seconds to ensure the glue bonds completely.
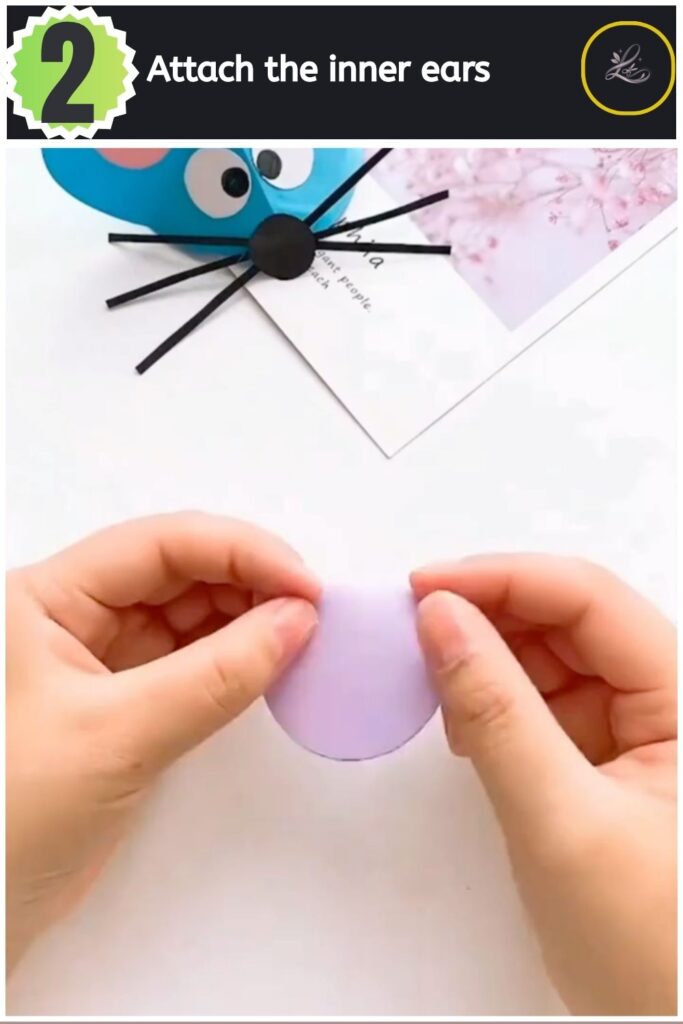
Pro Tip: Keep the glue concentrated in the center of the pink circles to prevent any seepage around the edges.
Step 3: Add the eyes
Assemble the eyes by gluing the tiny black circles onto the smaller white circles. Attach these completed eye pieces to the front of the mouse face, positioning them right beneath the ear flaps. Press down gently.
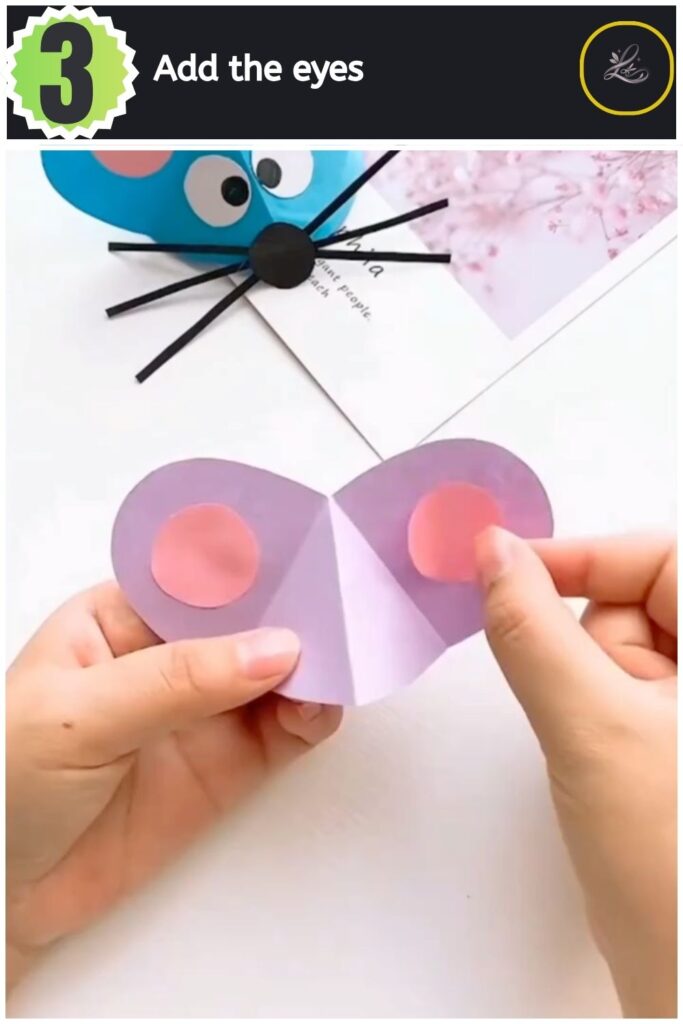
Pro Tip: Place the black pupils looking in slightly different directions to give your mouse a goofy, playful expression.
- Easy DIY 3D Origami Christmas Tree (Cute Folded Holiday Decor)
- Easy DIY Origami Cruise Ship (5-Minute Paper Boat Tutorial)
- Easy DIY 3D Paper Heart Hot Air Balloon (5-Minute Kids Craft & Gift Card)
- Easy DIY 3D Pop-Up Flower Card (Exploding Floral Bouquet Tutorial)
- Easy DIY Paper Sunflower Card (With Surprise Flip Message!)
Step 4: Attach the nose and whiskers
Glue the thin black paper strips to the back of the medium black circle to create the whiskers. Apply glue to the pointed tip of the mouse’s folded face. Press the completed nose and whisker assembly onto the tip.
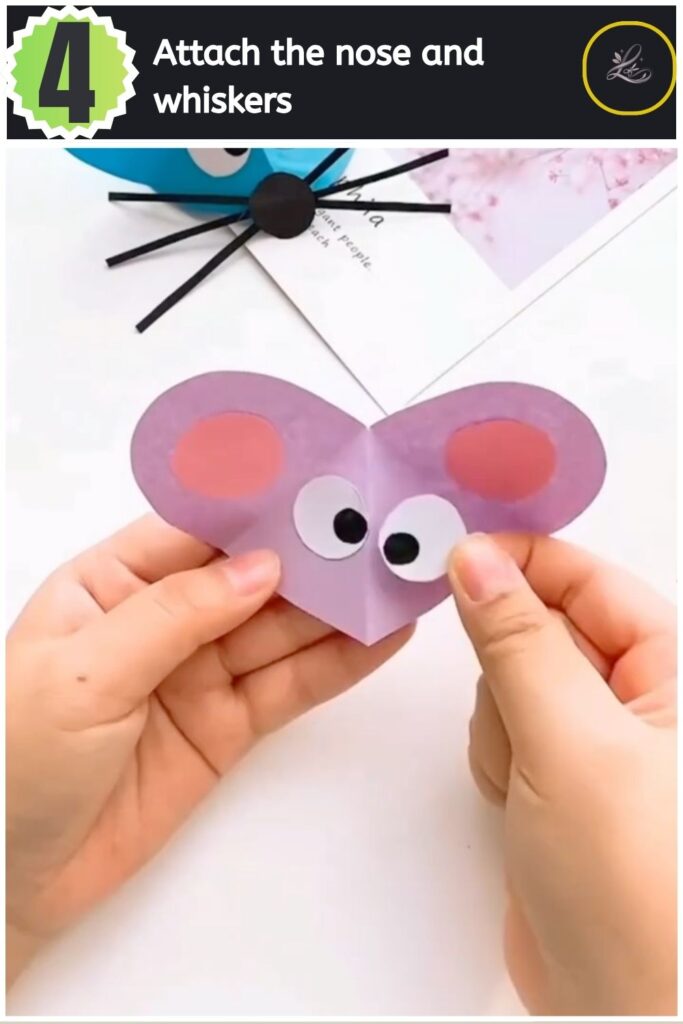
Pro Tip: Cut the whisker strips slightly thicker than you think you need; this helps them stand out prominently against the colorful paper.
Step 5: Attach the tail
Curl the long, thin paper strip slightly using your fingers or a pencil. Apply a drop of glue to one end of the strip. Press it onto the inside back edge of the mouse body so it trails playfully behind.
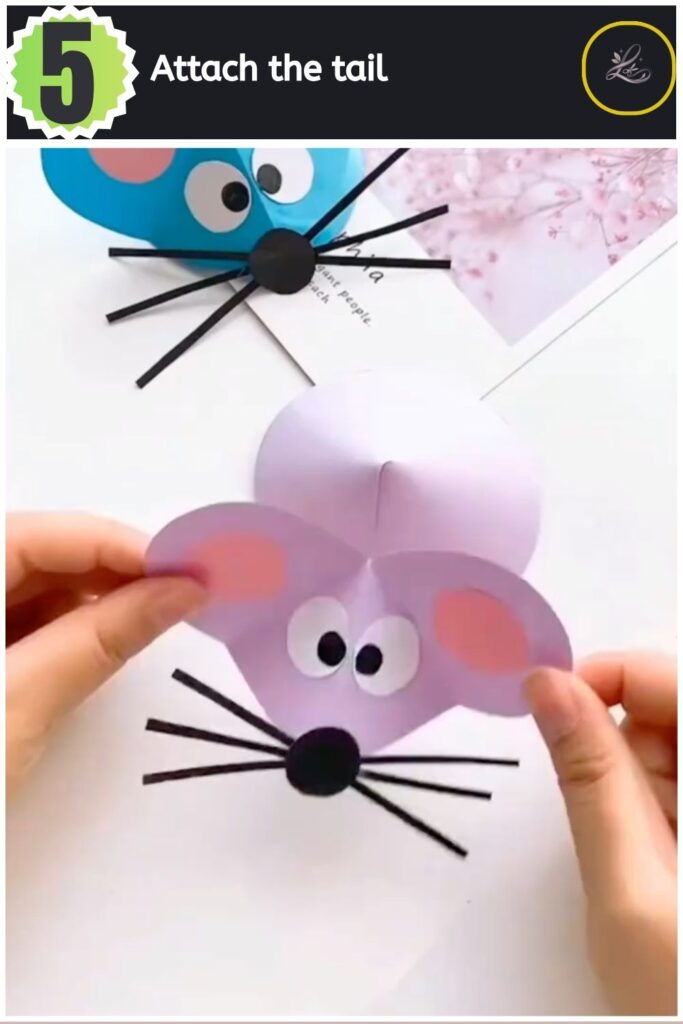
Pro Tip: Wrap the paper strip tightly around a pen for five seconds before gluing it to achieve a tight, bouncy curl.
TIPS & TRICKS
- If your paper mouse keeps falling over, open the bottom fold slightly wider to increase the surface area of the base.
- If you do not have colored paper, use plain white paper and paint it with watercolors before cutting out your shapes.
- If the glue makes the paper warp, switch to double-sided tape for a cleaner, dry finish.
- If cutting perfect circles proves difficult, trace a coin or a bottle cap for precise shapes.
WAYS TO USE THIS CRAFT
These little paper mice look wonderful clustered together on a bookshelf or windowsill as whimsical home decor. You can tuck them into gift bags or attach them to the top of wrapping paper for an unforgettable presentation. If you host a spring or garden-themed gathering, use them as creative name card holders by writing your guests’ names on the side of the mouse body.
FREQUENTLY ASKED QUESTIONS
-
How long does this project take to complete?
This paper mouse craft takes about 10 to 15 minutes from start to finish. Cutting out the shapes takes the most time. Assembly happens very quickly once your pieces are ready.
-
What is the best paper to use for folding crafts?
Medium-weight cardstock holds its shape best for this project. Regular construction paper works wonderfully as well and offers vibrant colors. Avoid very thin tissue paper, as it will not stand upright.
-
How can I make the paper craft more durable?
Apply a thin layer of clear craft sealer over the finished mouse to protect it from moisture. Store the mice out of direct sunlight to keep the paper colours from fading over time.
CLOSING
You have successfully completed a wonderful new project! Building skills with basic materials opens up endless creative possibilities for your home. Ready for your next project? Try Colourful Paper Strip Basket Craft for Kids next!
Happy crafting! LOUVADECORES
Follow us on: Pinterest