

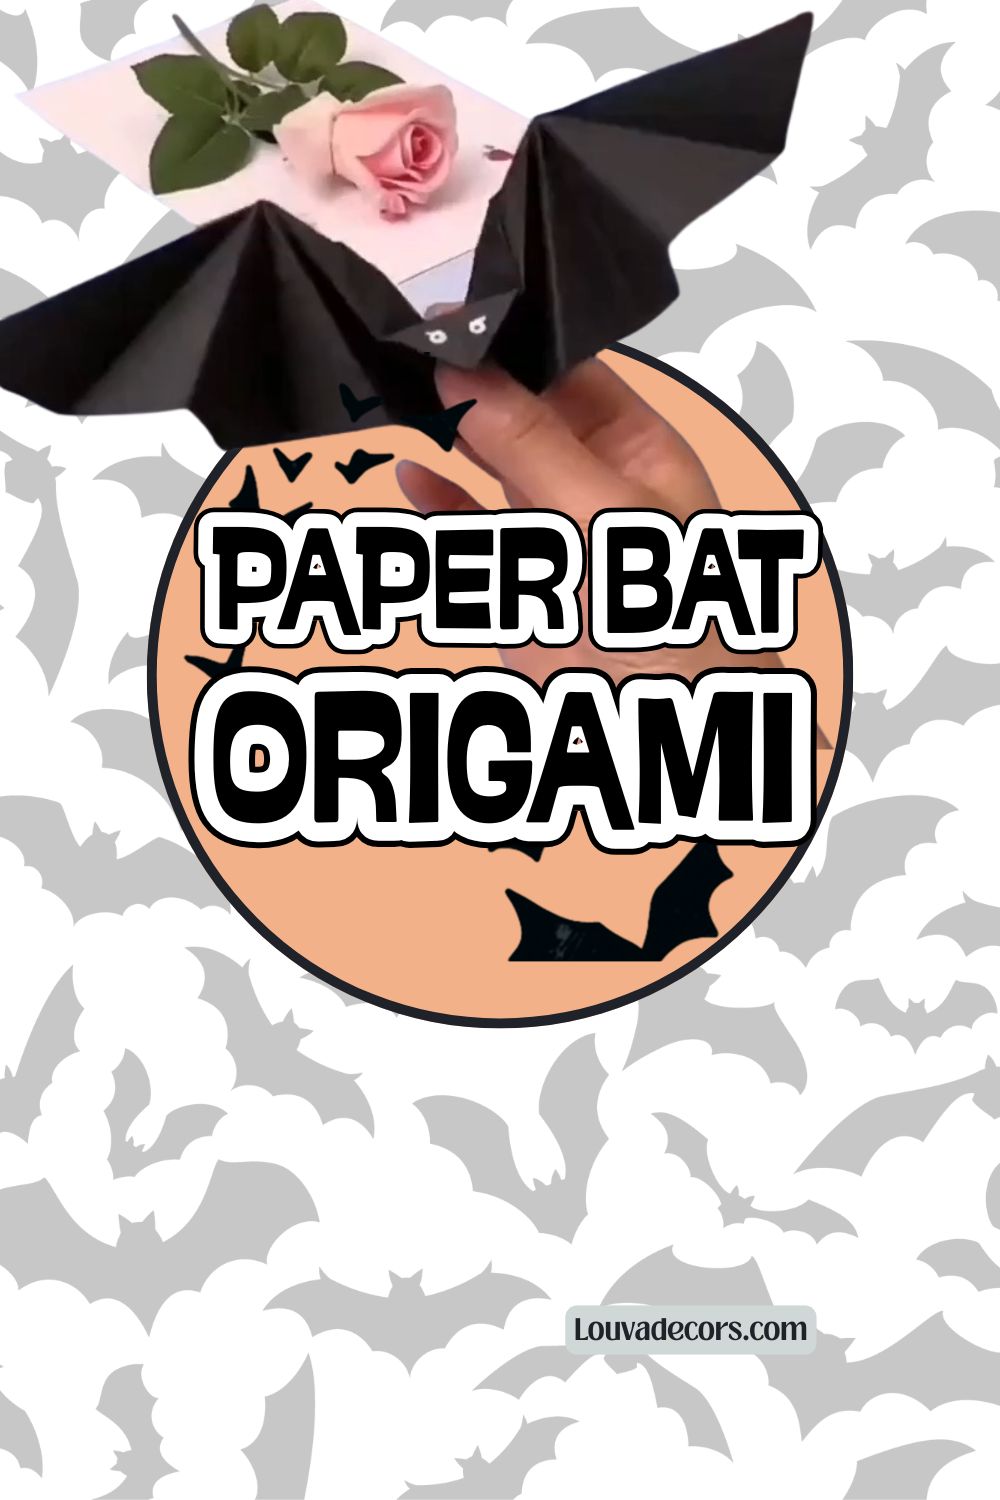
Get ready to add some interactive charm to your seasonal crafting with this simple origami bat craft for beginners. This project takes a traditional paper folding approach and adds a playful twist the finished bat actually flaps its wings when you gently hold the base! It serves as a fantastic DIY Halloween decoration or a captivating afternoon project that looks far more intricate than it actually is to construct.
You do not need any experience with complex paper folding to achieve great results here. Origami can sometimes look daunting with its sharp lines and hidden tucks, but this design relies on clear, repeating geometric shapes. Take your time with each crease, use your fingernail to flatten the edges firmly, and remember that any minor asymmetry just gives your little bat a bit of extra handmade personality.
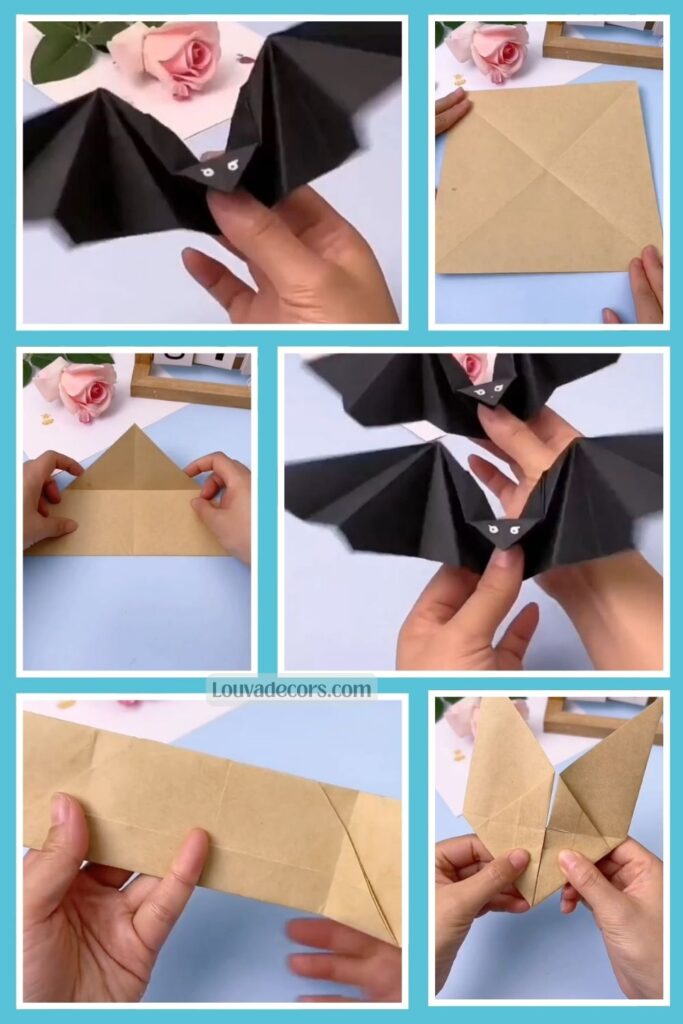
All you need is a single square piece of paper and a black marker to bring this little creature to life in under ten minutes. It is a wonderful option to include in your collection of quick kids crafts or spooky party favors. Let’s dive straight into the first fold and create something fun together!
WHY YOU WILL LOVE THIS PROJECT
This project stands out because it combines the elegance of traditional paper folding with an interactive, moving element that kids and adults love. It requires zero messy glue, scissors, or specialized tools, making setup and cleanup incredibly minimal. It is an exceptionally budget-friendly way to create custom festive accents or to keep young minds engaged with a screen-free, hand-eye coordination activity.
WHAT YOU WILL NEED
- Square Craft Paper 1 sheet (approx. $6 \times 6$ inches) [Any square page from an old magazine, newspaper, or brown wrapping paper]
- Black Fine-Tip Marker 1 count [A standard gel pen or dark colored crayon]
All materials can be found at your local craft store or ordered online.
VIDEO TUTORIAL
Watch the full tutorial above before reading the written steps. The steps below match the video exactly.
STEP-BY-STEP INSTRUCTIONS
Step 1: Make the Initial Diagonal Triangle Fold
Place your square paper flat and fold it diagonally in half from corner to corner to form a large triangle. Press firmly along the long folded edge to create a crisp, solid crease, then unfold the paper back to a flat square. This creates your primary central reference guide line for the upcoming steps.
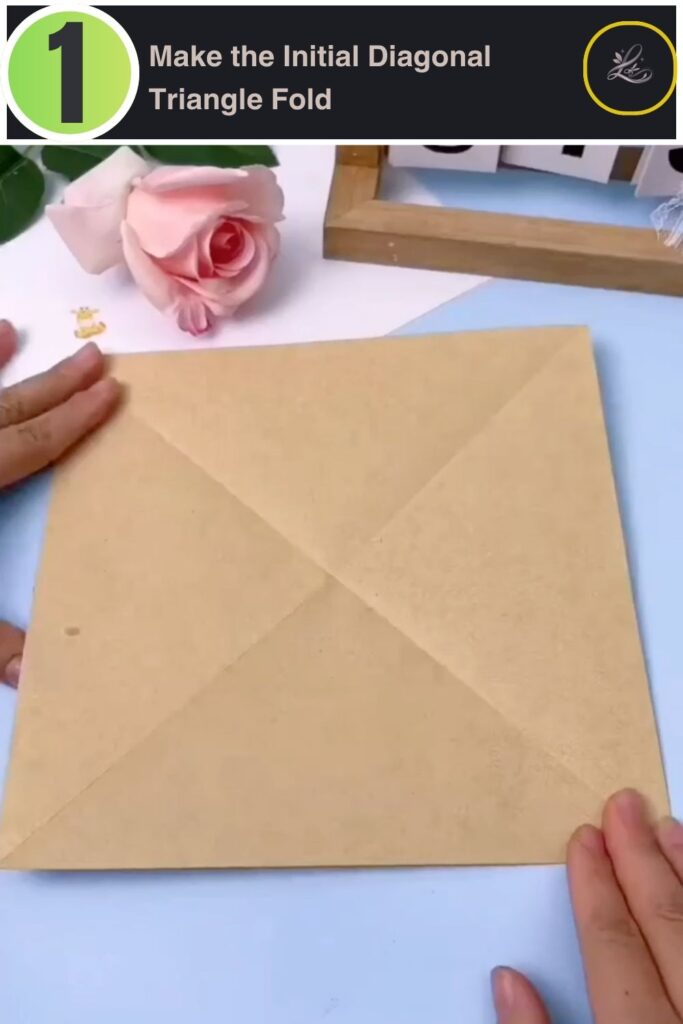
Pro Tip: Make sure the corners line up perfectly before pressing down on the center to keep your subsequent folds symmetrical.
Step 2: Fold the Bottom Edge Upwards
Take the long straight bottom edge of your triangle and fold a wide strip upwards toward the top point. This fold should take up roughly one-third of the total height of your triangle shape. Smooth your fingers across the entire width to lock the flat horizontal band securely in place.
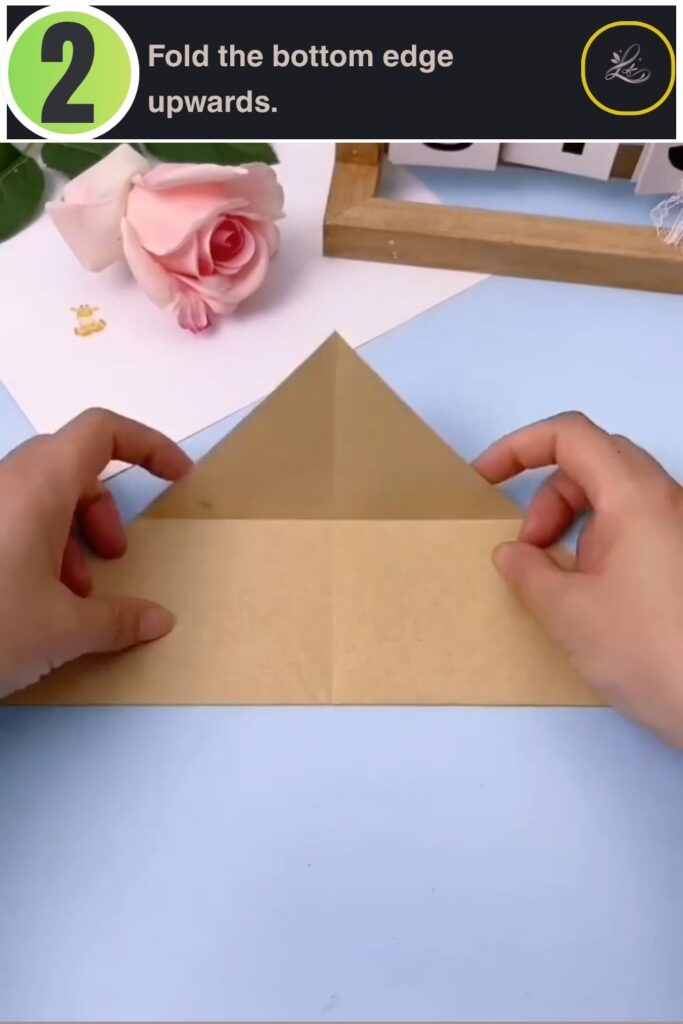
Pro Tip: Keep this horizontal fold completely parallel to the baseline to ensure the bat’s wings stand at equal heights.
Step 3: Bring the Top Peak Down
Fold the top single triangular peak straight down over the horizontal band you just created. The tip of the point should slightly overlap the lower edge of that horizontal strip. This action begins defining the central structural core that will eventually form the bat’s head and body.
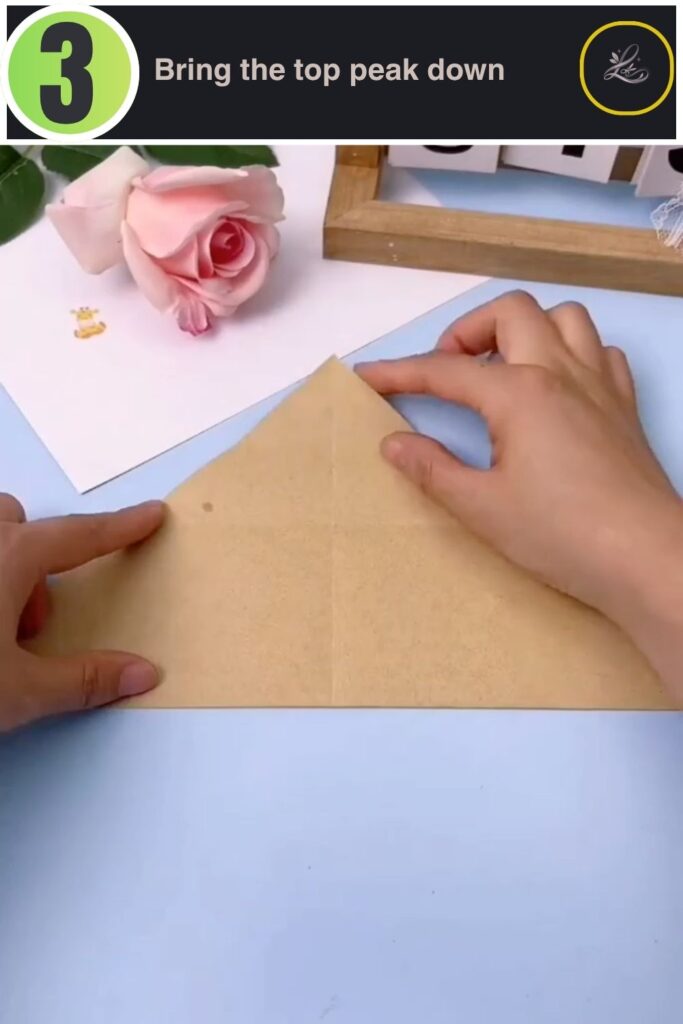
Pro Tip: Use the central vertical crease line from Step 1 to keep this downward point perfectly centered.
Step 4: Create the Vertical Center Crease
Fold the entire paper structure directly in half vertically, bringing the left side over to meet the right side. Press firmly along this central spine to set the main hinge point for the wing movement. Unfold the paper back out flat after setting this crease to prepare for shaping the wings.
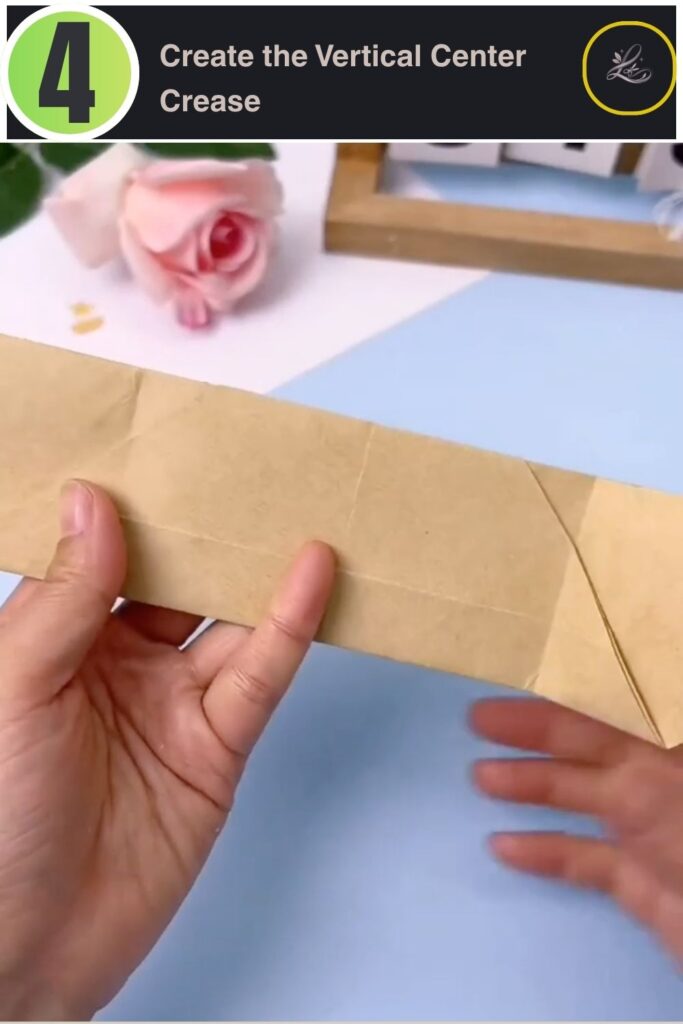
Pro Tip: Run the edge of a plastic ruler or your fingernail over this fold to ensure the paper hinges back and forth smoothly.
Step 5: Shape the Angled Accordion Wing Folds
Fold each side wing backward and forward in an alternating accordion pattern using the angled guide lines. Angle the folds slightly outward away from the center body to give the wings their sweeping, aerodynamic shape. Repeat the exact same fold spacing and angles on both the left and right sides to keep the project balanced.
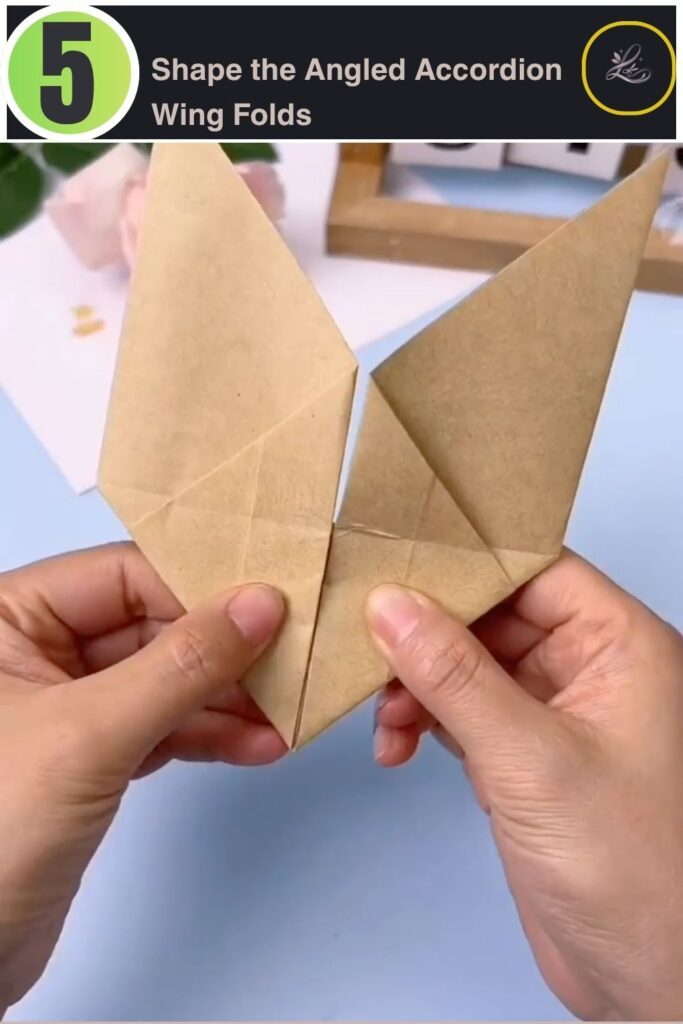
Pro Tip: Look closely at the existing creases to match up the alignment, which helps the wings catch the air evenly.
Step 6: Tuck the Nose and Draw the Eyes
Fold the tiny bottom center point upward to form a small triangular nose, then draw two expressive eyes. Use your fine-tip black marker to add dots or small circular details right above the nose fold. Gently hold the small tab beneath the head and pull the wing tips slightly outward to watch your new creation flap its wings!
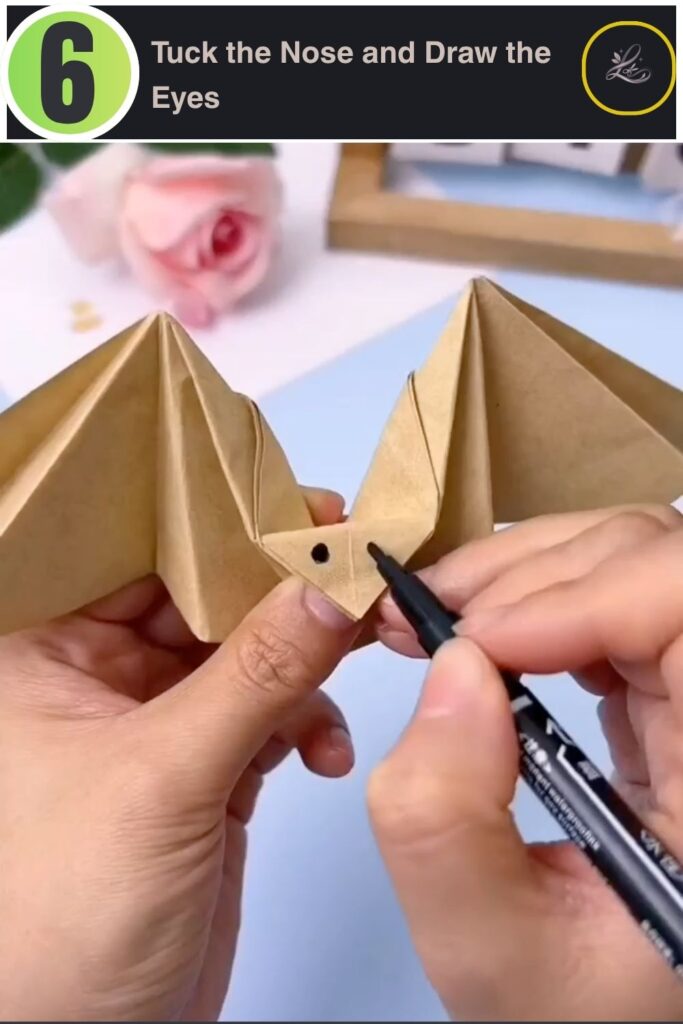
Pro Tip: Keep your marker dots slightly angled or add tiny white paper dots to give your bat a cute, animated expression.
TIPS & TRICKS
- Select the Best Paper Weight: Avoid heavy cardstock for this project, as lightweight origami paper or standard construction paper bends with much less resistance, allowing the wings to flap easily.
- Achieving Symmetric Movement: If one wing flaps more than the other, check your accordion folds from Step 5 to ensure the pleat depths and angles match perfectly on both sides.
- Sharpening the Creases: Use a bone folder, the edge of a plastic credit card, or a ruler to press every fold down, which gives the paper the structural springiness needed for movement.
- Preventing Paper Tearing: When pulling the tab to activate the wing movement, use a gentle pulling motion rather than a sudden yank to preserve the central paper hinge over time.
WAYS TO USE THIS CRAFT
This wonderful interactive paper bat makes an excellent addition to your seasonal home decor when suspended from the ceiling with a thin fishing line to create a floating colony effect. You can also use them as a fun, screen-free activity during a classroom party, letting kids customize their own characters with different colors and expressions. Try mounting a few finished pieces onto a dark background for a 3D shadowbox display, or check out our [INTERNAL LINK: Halloween Party Favor Round-up] and [INTERNAL LINK: Easy Kids Garland Tutorial] for more ways to integrate these fluttering creatures into your festive planning.
FREQUENTLY ASKED QUESTIONS
-
How long does this project take to complete?
This project takes about 5 to 7 minutes to fold from start to finish. Once you understand the basic sequence of the accordion folds, you can easily create a whole colony in under an hour.
-
Where can I buy the materials for this project?
You do not need any special supplies; any square piece of thin household paper and a standard marker work perfectly. Specialty origami paper can be found at local craft stores or online.
CLOSING
You have successfully completed your flapping paper bat! It is wonderful to see how simple geometric folds can turn a basic square sheet into a charming, interactive toy. Share your new creation with friends, or hang a few around the room to surprise your guests. Ready for your next project? Try our popular Make Cute Paper Bunny Rings for Beginners guide next to keep your crafting journey moving forward!
Happy crafting! LOUVADECORES
Follow us on: Pinterest
