

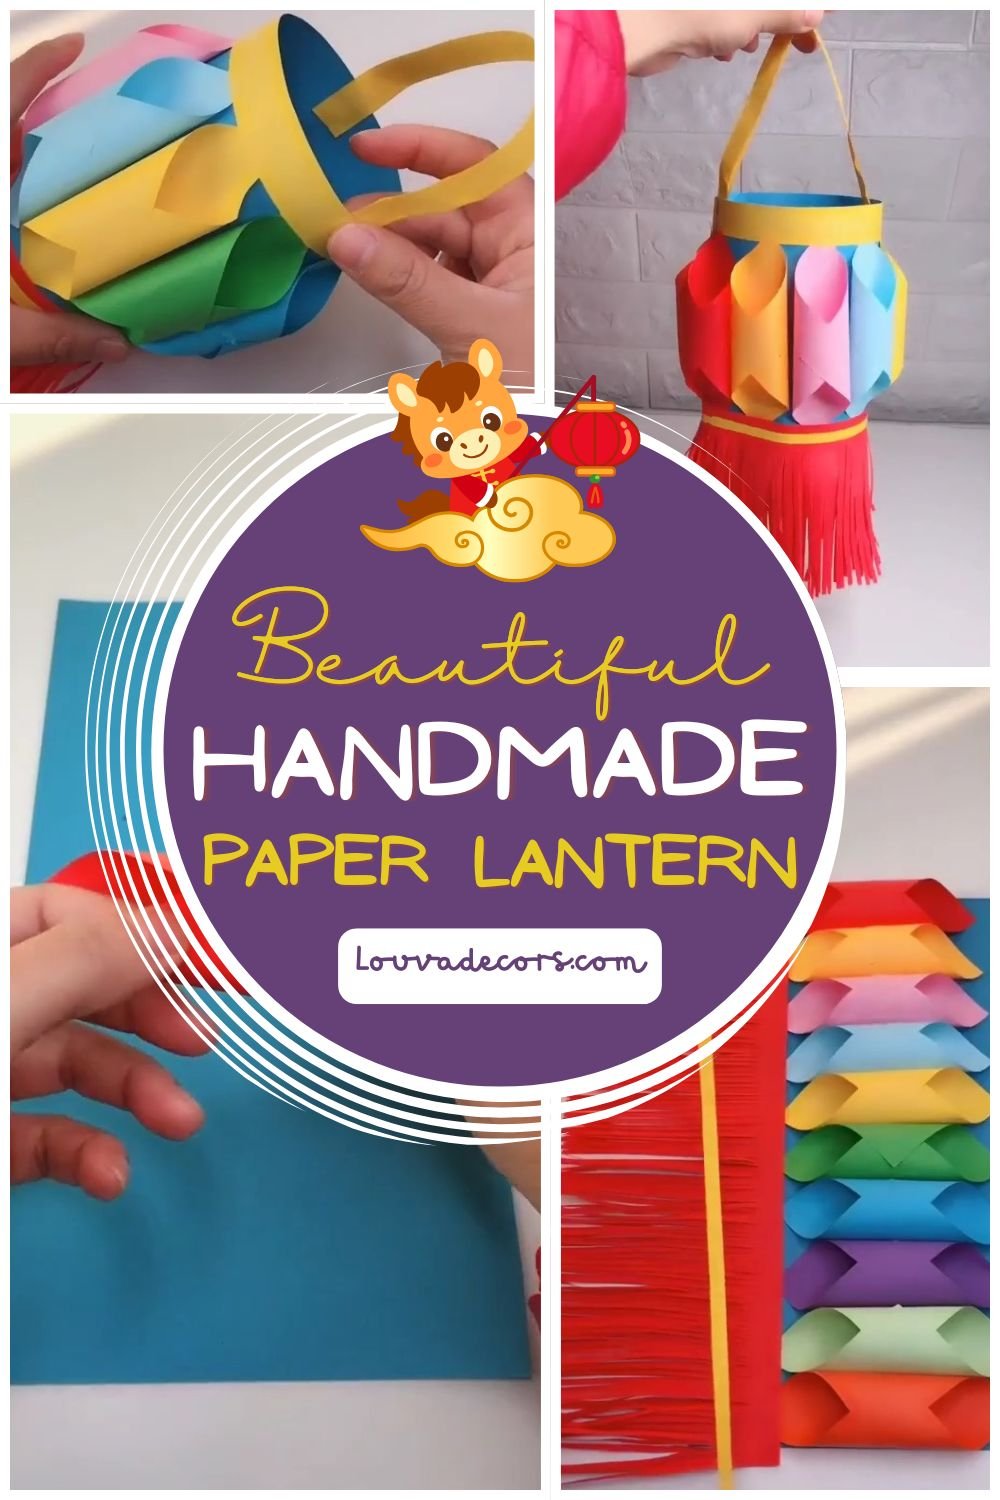
Brighten up your living space with a colourful DIY paper lantern that brings instant warmth and joy into any room. Crafting your own vibrant decorations lets you customize your home styling to match your unique personality perfectly. This specific project transforms basic crafting sheets into an eye-catching piece that looks like it came straight from a boutique store.
You do not need any experience to bring this beautiful creation to life. It can feel intimidating to try a new project, but we are going to walk through this together one motion at a time. Take your time, enjoy the process, and remember that it is okay if it is not completely perfect on your very first try.
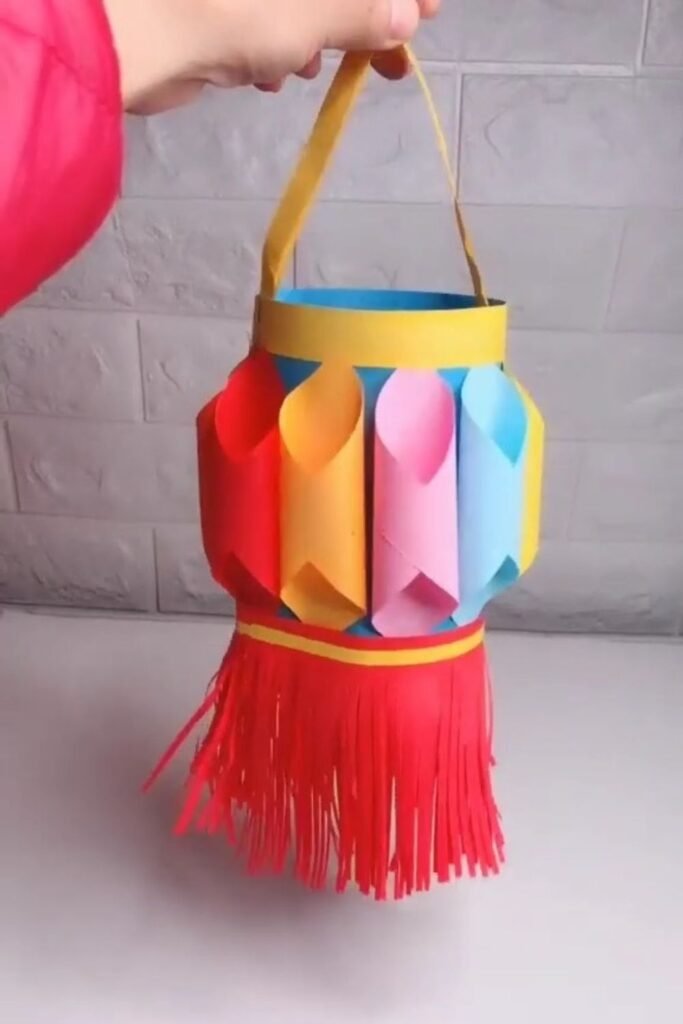
This project uses affordable crafting paper and takes under twenty minutes to complete from start to finish. It serves as a fantastic introduction to paper crafts before you move on to more complex items. Let us gather our materials and get ready to create something wonderful.
WHY YOU WILL LOVE THIS PROJECT
This vibrant hanging piece looks wonderfully intricate but relies entirely on basic cutting and folding methods. It is an incredibly low-cost project that maximizes visual impact without straining your budget. You will love how customizable this design is, making it the perfect choice for festive holiday celebrations, seasonal gatherings, or everyday bedroom styling.
WHAT YOU WILL NEED
- Multi-colored construction paper sheets (10 different colors) — [Budget alternative: Origami paper pack]
- 1 Large blue cardstock base sheet — [Budget alternative: Repurposed poster board]
- 1 Red paper sheet for the fringe tassel — [Budget alternative: Red tissue paper]
- 1 Yellow paper strip for the trim — [Budget alternative: Yellow Washi tape]
- Craft glue stick — [Budget alternative: Double-sided tape rolls]
- Scissors — [Budget alternative: Safety craft scissors]
All materials can be found at your local craft store or ordered online.
VIDEO TUTORIAL
Watch the full tutorial above before reading the written steps. The steps below match the video exactly.
STEP-BY-STEP INSTRUCTIONS
Step 1: Prep the Lantern Tubes
Select a square sheet of colourful paper to form your first decorative outer tube. Hold two opposite corners of the square paper firmly between your fingers. Bring the two corners inward together to form a rolled, open cylinder shape. Secure the overlapping paper corners cleanly with your craft glue stick.
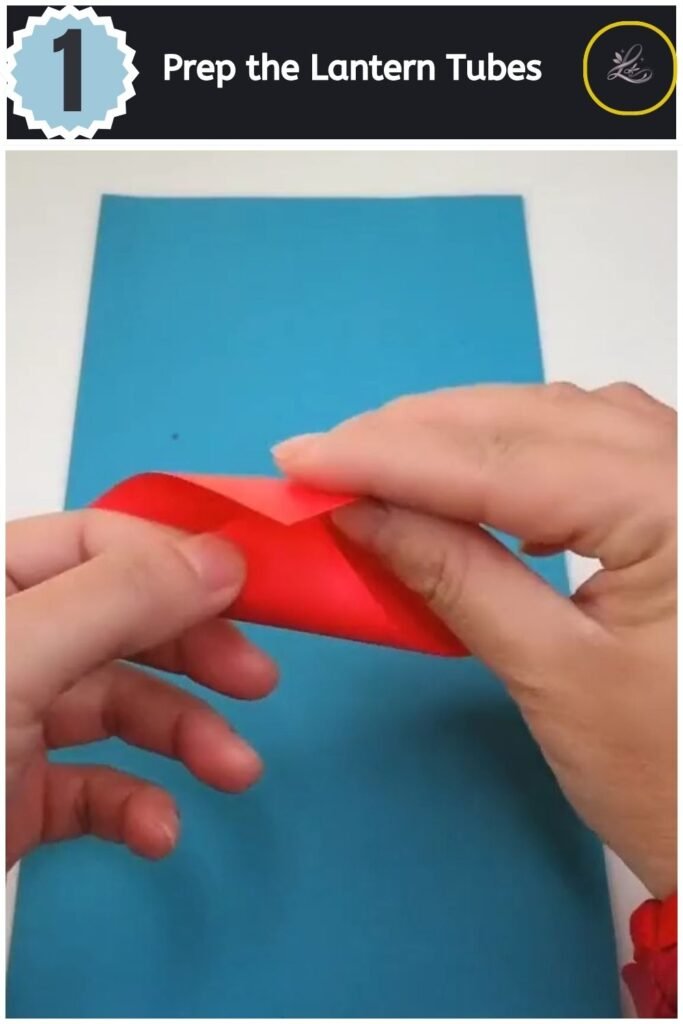
Pro Tip: Apply a generous amount of glue right up to the very tip of the paper corner to keep the cylinder from popping open later.
Step 2: Form the Base Grid
Lay out your large blue base sheet flat on your work surface. Draw two parallel vertical lines down the middle of the sheet with your glue stick to guide your placements. Grab your first completed paper tube and press it firmly onto the top edge of the glue lines. Keep adding your colorful tubes downward in a neat row until you reach the bottom of the sheet.
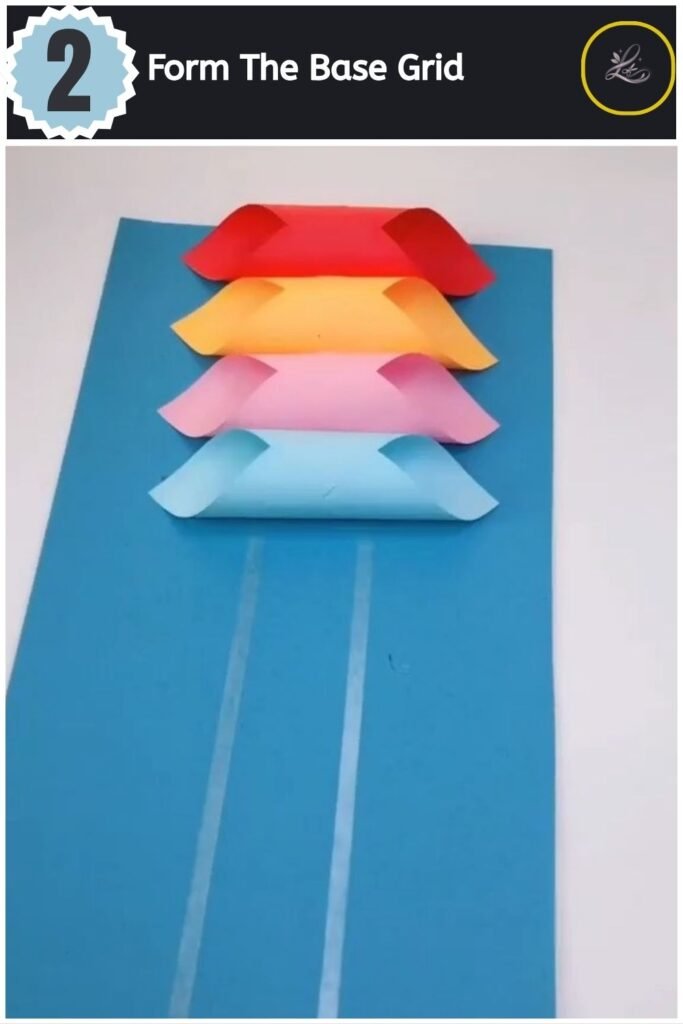
Pro Tip: Space your tubes evenly by matching the top edge of each new tube directly against the bottom edge of the previous one.
Step 3: Create the Bottom Fringe Tassel
Take your rectangular piece of red construction paper to create the bottom fringe decoration. Use your scissors to slice thin vertical cuts along the entire length of the red sheet. Leave a solid, uncut boundary line at the very top edge of the paper to hold your fringe strands together. Work steadily across the page to keep the hanging fringe pieces uniform in width.
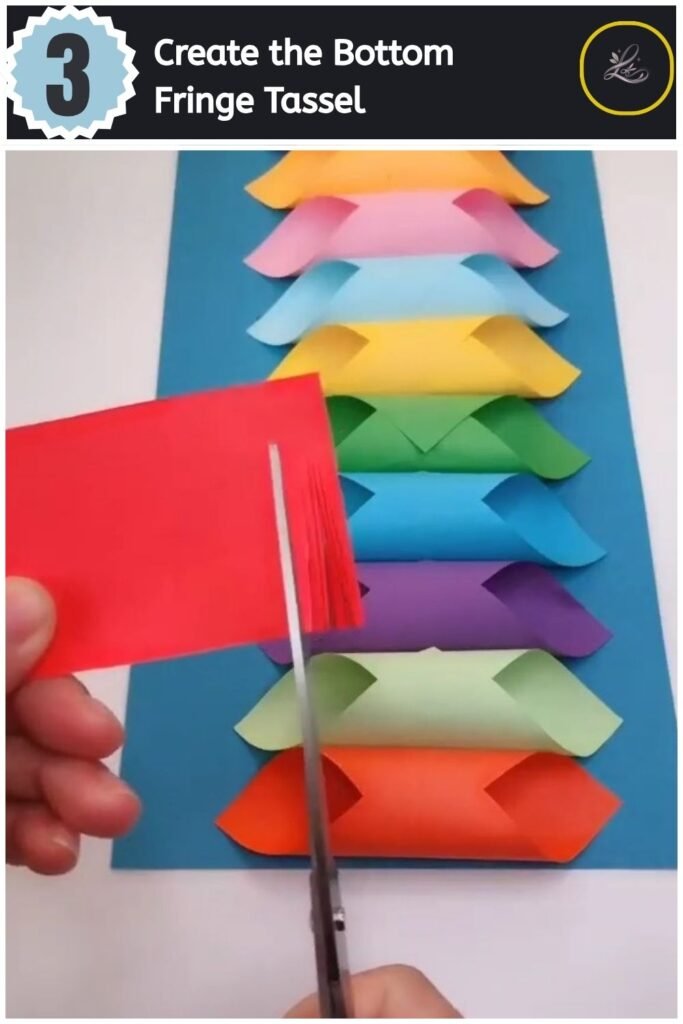
Pro Tip: Snip slowly and stop your blade exactly half an inch from the top edge to prevent cutting right through the paper.
- 20 Easy DIY Santa Crafts to Make This Christmas (Cheap & Adorable)

- Beautiful Air Dry Clay Flower Wall Decor for Beginners

- Beautiful Handmade Paper Lantern Craft

- Colorful Paper Cup Mini Basket Step by Step

- Cute DIY Inspirational Wall Hanging Anyone Can Make

Step 4: Attach the Fringe and Trim
Glue your freshly cut red tassel piece along the left outer border of your main blue base sheet. Place a thin yellow decorative strip of paper right over the uncut top edge of the red fringe to act as a neat border. Repeat this process on the right outer border by gluing a solid yellow strip of paper down that edge to keep the layout symmetrical.
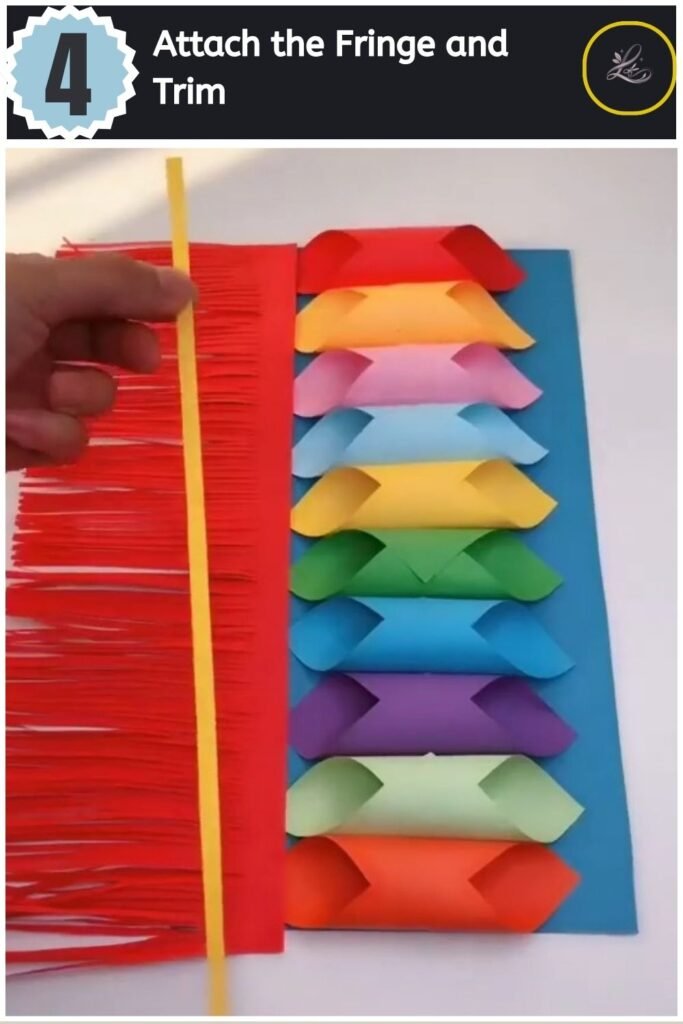
Pro Tip: Smooth the paper strips down firmly with the side of your thumb to ensure a completely flat, secure hold.
Step 5: Roll the Main Lantern Body
Flip your entire assembled project piece over so the colourful tubes face away from you. Gently curl the left and right edges of the blue base sheet inward toward each other to form a large cylinder. Apply glue along the edge to seal the ends together, making sure the red fringe hangs freely out from the bottom opening.
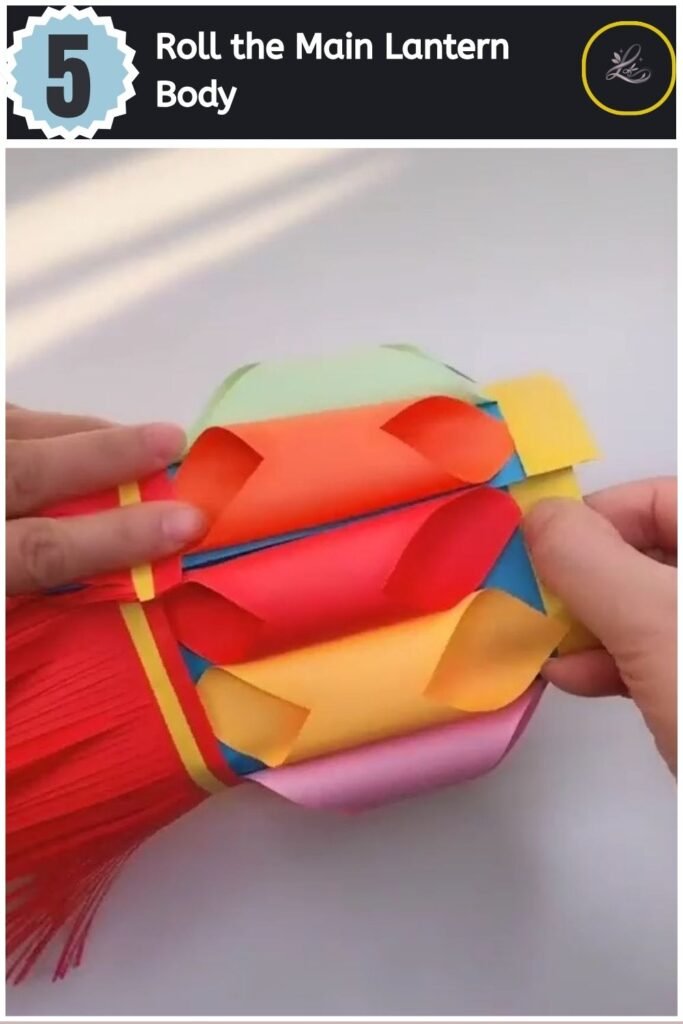
Pro Tip: Hold the glued seam firmly with both hands for thirty seconds to allow the adhesive to bond completely before letting go.
Step 6: Secure the Hanging Handle
Attach a thin yellow paper strip across the top inside rim of your new lantern to serve as your handle. Apply glue to both ends of the strip and press them securely against the inner walls of the upper opening. Hang your gorgeous finished creation up on a wall hook or ceiling wire to display your handiwork proudly.
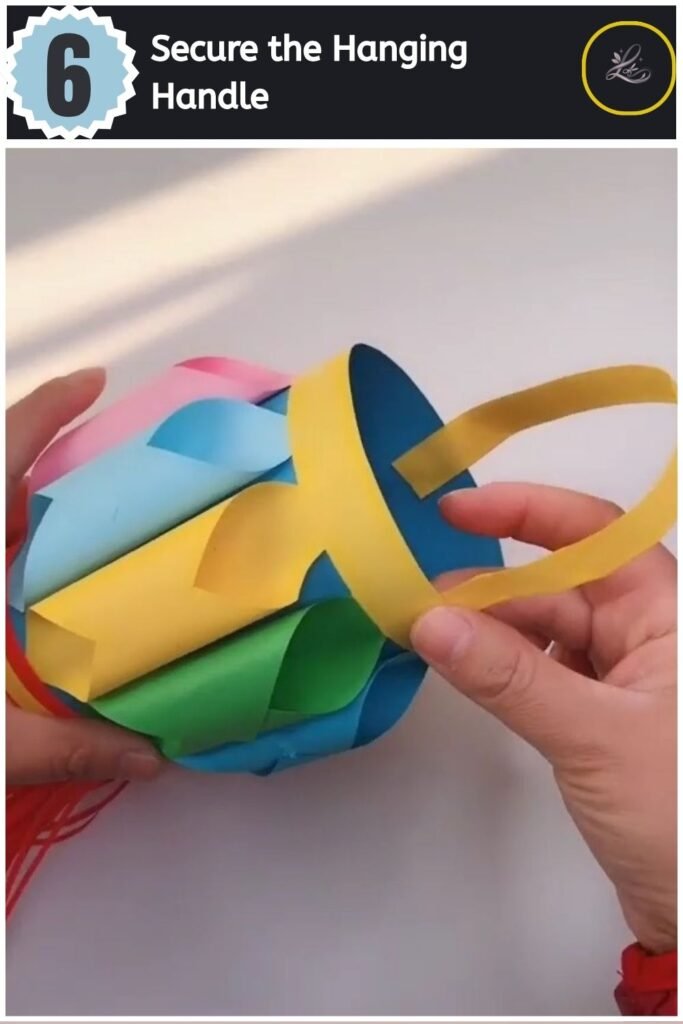
Pro Tip: Make sure the handle glue is completely dry before lifting the lantern by the loop to avoid any accidental slips.
TIPS & TRICKS
- Fixing a Collapsed Tube: If one of your colourful outer tubes gets squished during the assembly phase, gently slide the round handle of a wooden spoon inside the tube to pop it back out into shape.
- Preventing Glue Messes: Use a silicone crafting mat beneath your workspace so that excess glue stick residue wipes away cleanly without tearing your project papers.
- Creating Straight Fringe Lines: Lightly sketch your stopping point line on the back of the red paper with a pencil before cutting your fringe to keep your scissor cuts perfectly uniform.
- Boosting Lantern Structure: If your construction paper feels a bit too floppy, substitute standard paper with a lightweight cardstock for the blue base sheet to give the frame extra durability.
WAYS TO USE THIS CRAFT
This beautiful decoration serves as an excellent piece of celebratory home decor for dynamic festival themes. You can easily make a dozen of these pieces to create a stunning, bright backdrop for a photo booth or a cozy reading corner. They also work brilliantly as interactive seasonal craft projects for classrooms or as handmade holiday gifts to share a bit of festive cheer with family and neighbours.
FREQUENTLY ASKED QUESTIONS
-
How long does this project take to complete?
This project takes roughly fifteen to twenty minutes from start to finish. It is a quick and satisfying activity that provides immediate, colorful results for crafters of all ages.
-
Can I put a real candle inside this paper lantern?
No, you should never place an open flame inside a paper project because it creates a severe fire hazard. If you want your piece to illuminate, drop a small battery-operated LED tea light safely inside the base instead.
-
What is the best paper for making paper lanterns?
Standard construction paper or lightweight cardstock works best because it holds its structural shape beautifully while remaining pliable enough to roll into curves. Avoid using heavy cardboard or flimsy tissue paper for the primary body.
CLOSING
You have created a marvelous, bright piece of art out of basic craft sheets! Taking the time to try out new creative activities is a wonderful way to unwind and express your personal style. Be sure to display your creation somewhere prominent where it can bring a smile to your face every single day.
Ready for your next project? Try DIY Birthday Paper Gift Bag You Can Make in 20 Minutes (No Experience Needed!) next!
Happy crafting! — LOUVADECORES
Follow us on: Pinterest
