

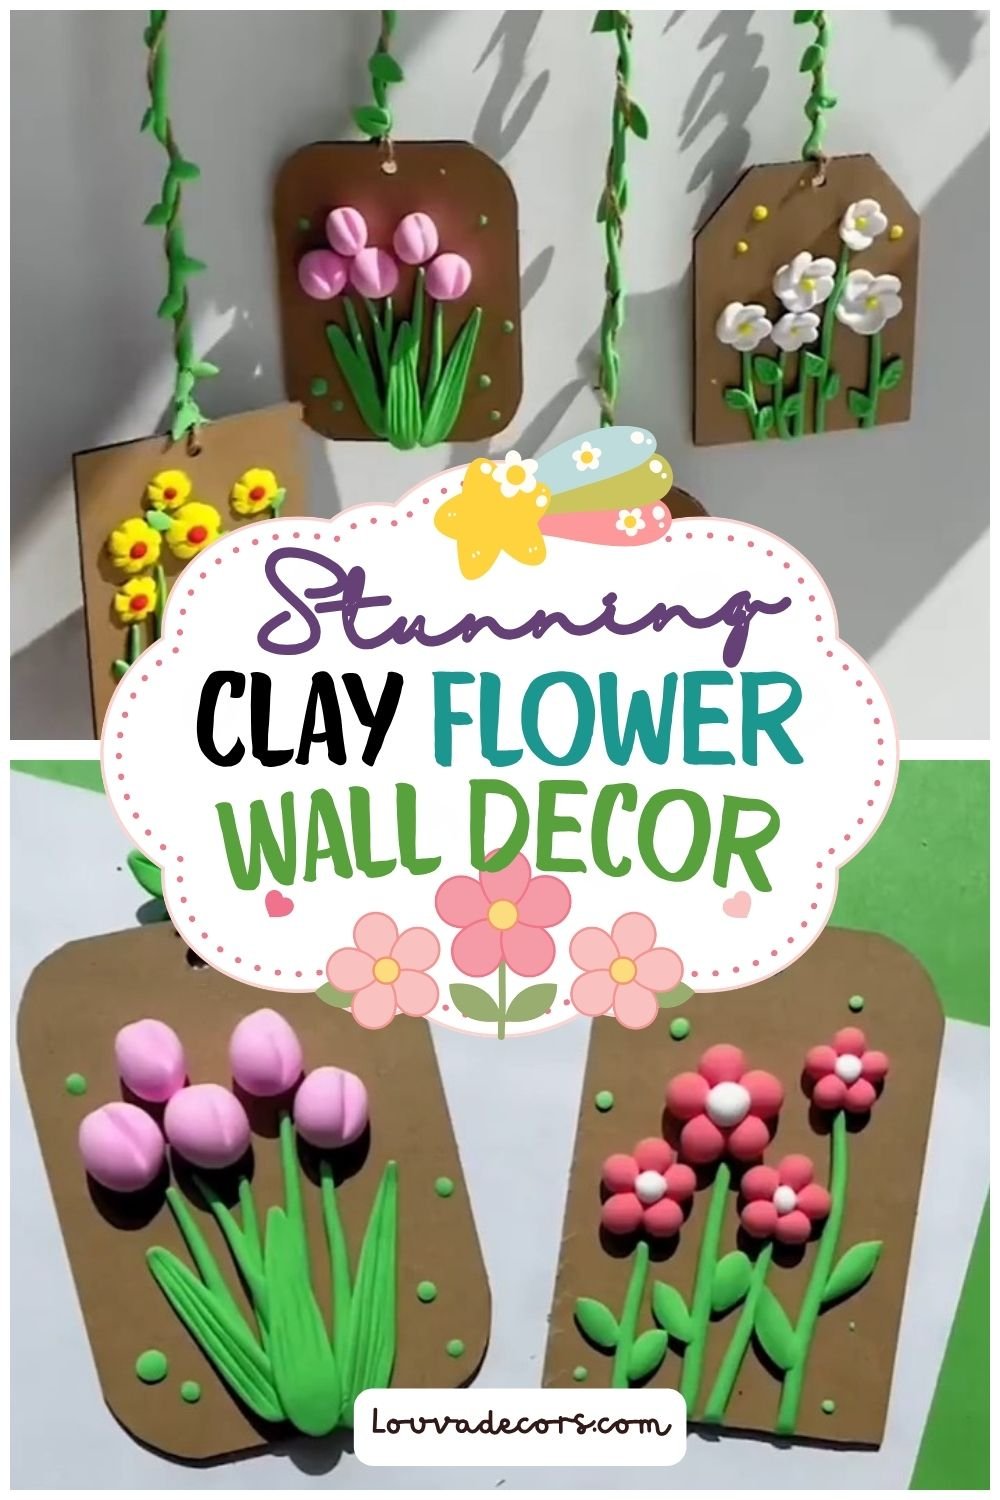
Picture a small branch resting on a plain wall, with four soft kraft tags hanging from it on twine wrapped in tiny green vines, each tag holding its own little garden of clay flowers. That is exactly what you will build in this air dry clay crafts project, and it is easier to recreate than it looks in photos. This kind of handmade wall art has become a favorite in boho wall hanging decor because it brings warmth and texture into a space without a big price tag. If you have been drawn to spring home decor lately, or you keep saving clay flower tutorial videos for later, this is the one to finally try.
You do not need any experience to make this piece, and you do not need to have worked with clay before. Every flower in this project is built from small rolled and pinched shapes, so if you can roll a ball of dough between your palms, you already have the skill you need. Take your time with each tag. It is okay if your first flower does not look exactly like the one in the video, because that little bit of imperfection is part of what makes handmade home decor feel personal.
For this project you will need a few colors of air dry clay, some kraft cardboard for the tag bases, and a couple of basic tools you likely already own. From start to finish, the hands on part of this tutorial takes about 45 to 60 minutes, with extra time needed for the clay to dry fully. It is a lovely weekend project if you have been wanting to add a bit more handmade character to your home decor.
Why You Will Love This Project
This wall hanging has the look of a boutique home decor find, but it costs only a few dollars to make once you have your clay and tools. Every flower is beginner friendly, since the whole design is built from rolled, pinched, and textured clay shapes rather than any carving or sculpting skill. It is a wonderful project for anyone who wants to add a bit of spring and everyday home decor charm to a wall, a shelf, or even a gift for a friend who loves handmade pieces.
What You Will Need
- Air dry clay, pink — [Budget alternative: white clay tinted with a small amount of acrylic paint]
- Air dry clay, coral or pink-red — [Budget alternative: mix pink and a touch of red/orange clay]
- Air dry clay, yellow — [Budget alternative: white clay tinted with yellow acrylic paint]
- Air dry clay, white — [Budget alternative: any light neutral clay you already have]
- Air dry clay, green — [Budget alternative: white clay tinted with green acrylic paint]
- Kraft cardboard or chipboard, 4 small tag shapes — [Budget alternative: cut shapes from a cereal box or shipping box]
- Small scissors — [Budget alternative: craft knife with a cutting mat]
- Clay shaping tool or dotting tool — [Budget alternative: a toothpick or the tip of a butter knife]
- Small jump rings, 4 — [Budget alternative: bent paperclip loops]
- Small pliers — [Budget alternative: tweezers, though pliers make this step much simpler]
- Jute twine, about 3 feet total — [Budget alternative: cotton string]
- Thin floral wire, about 2 feet, for the vine wrap — [Budget alternative: skip the vine wrap and use plain twine]
- Small branch or twig — [Budget alternative: a wooden dowel or chopstick]
All materials can be found at your local craft store or ordered online.
Video Tutorial
Watch the full tutorial above before reading the written steps. The steps below match the video exactly.
Step-by-Step Instructions
Step 1: Cut Your Cardboard Tag Bases
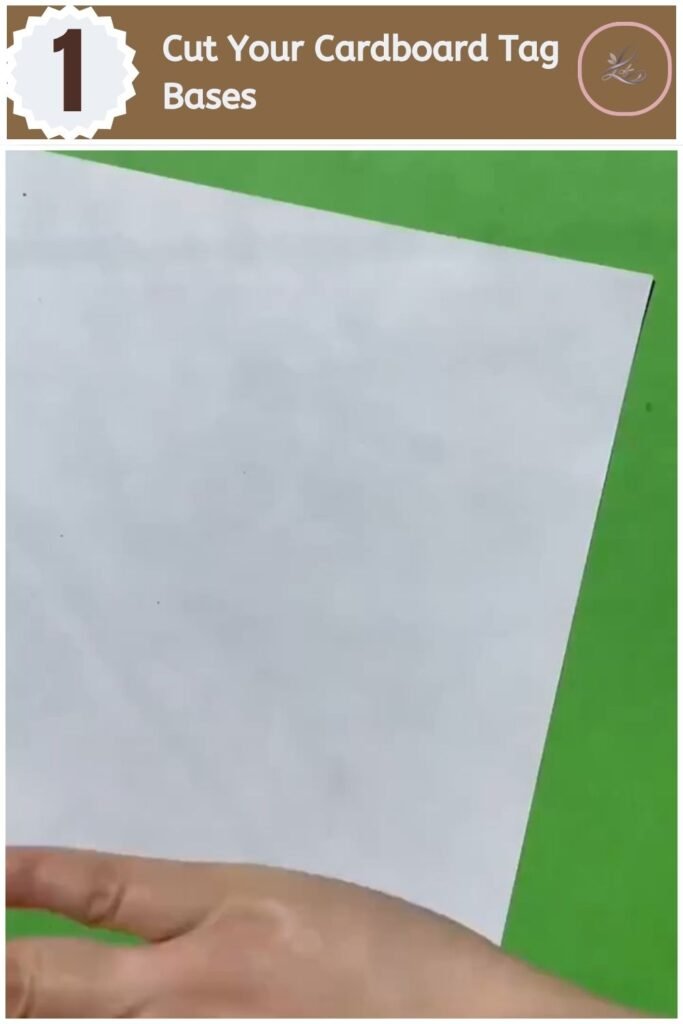
Start by cutting four small tag shapes from your kraft cardboard. These will act as the base for each cluster of clay flowers. Round the top corners of each tag slightly, since a soft edge looks more finished once the flowers are added. Keep your tags similar in size so the finished wall hanging looks balanced when it comes together.
Pro Tip: Cut all four tags before you start on the clay, since once your hands are covered in clay it is much harder to handle scissors cleanly.
Step 2: Shape the Pink Tulip Petals
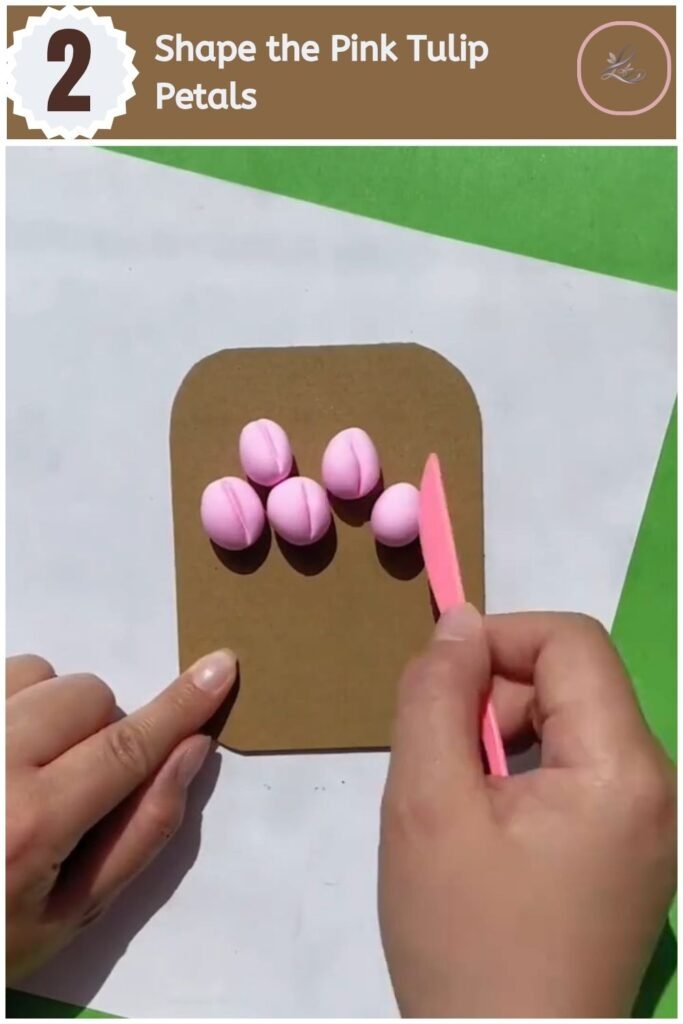
Roll five small balls of pink air dry clay between your palms, each about the size of a small pea. Pinch each ball gently at the top so it forms a rounded oval shape, similar to a tulip bud. Press each tulip shape onto your first cardboard tag in a small cluster near the top, leaving room below for stems.
Pro Tip: Keep your palms slightly damp while rolling the clay, since dry hands can cause the surface of the clay to crack as you shape it.
Step 3: Add Stems and Leaves to the Tulip Tag
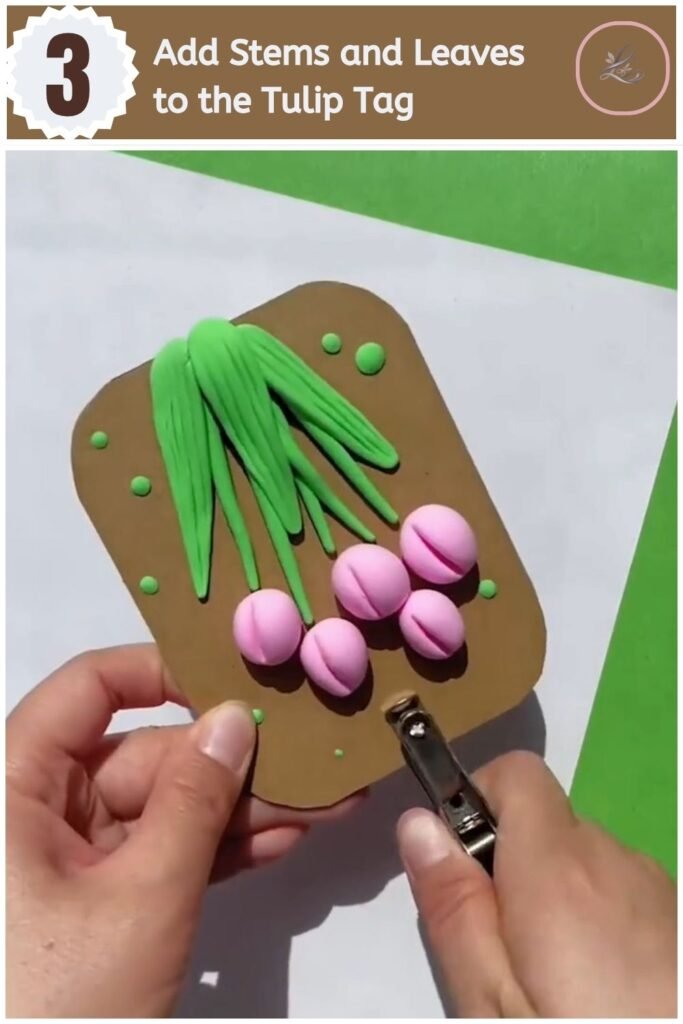
Roll five thin ropes of green clay to use as stems beneath your tulip cluster. Press the top of each stem gently against the base of a tulip so it holds in place, then flatten a few extra pieces of green clay into long leaf shapes tucked around the stems. Use your clay tool to press light vein lines into each leaf for texture.
Pro Tip: Vary the length of your stems slightly rather than making them all identical, since uneven stems mimic the way real tulips grow and look more natural.
Step 4: Attach the Hanging Loop
Press a small jump ring into the top edge of your tag while the cardboard and clay are still workable. Use your pliers to open the jump ring slightly, slide it through a small hole at the top of the tag, then close it securely. Tie a piece of jute twine wrapped in your green floral wire vine through the loop so the tag is ready to hang.
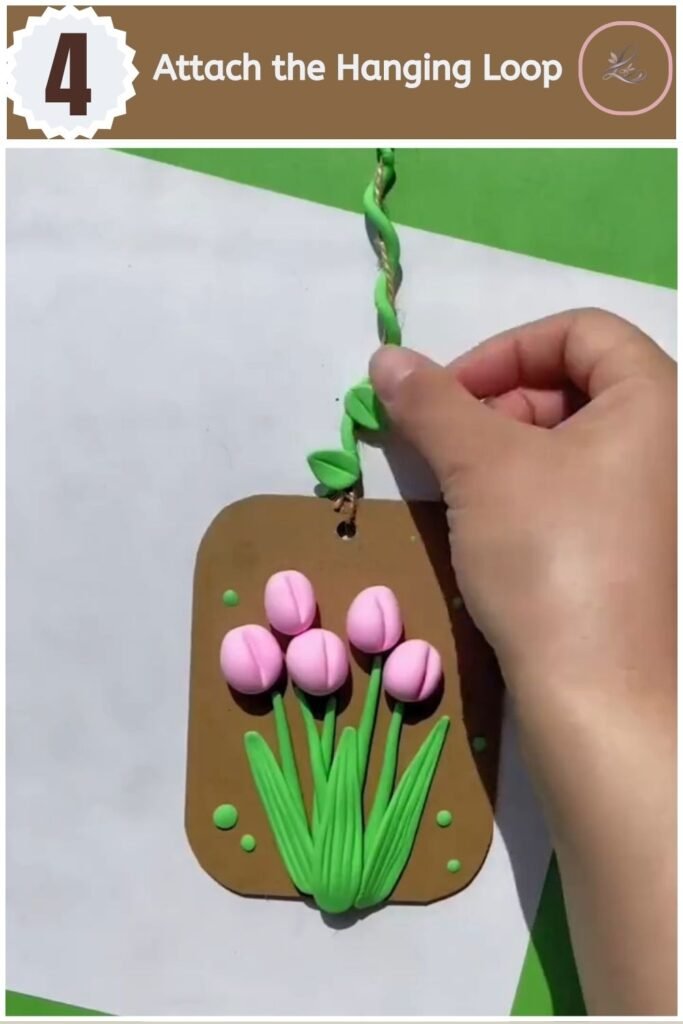
Pro Tip: If your cardboard is thick, poke the hole through with the tip of your scissors before trying to push the jump ring through, so you do not bend the tag out of shape.
- 20 Easy DIY Santa Crafts to Make This Christmas (Cheap & Adorable)

- Lovely Paper Pop Up Tulip Card Anyone Can Make

- Cute Paper Chinese New Year Garland Anyone Can Make

- Adorable Halloween Paper Hat Craft for Beginners

- Make Sweet DIY Flower Greeting Card for Loved Ones
Step 5: Shape the Coral Daisy Flowers
Roll six tiny balls of coral or pink-red clay and arrange them in a circle to form a single daisy shape, then flatten each ball slightly with your fingertip. Add a small white ball in the center of each flower to finish the daisy look. Repeat this process to create two or three coral daisies on your second cardboard tag.
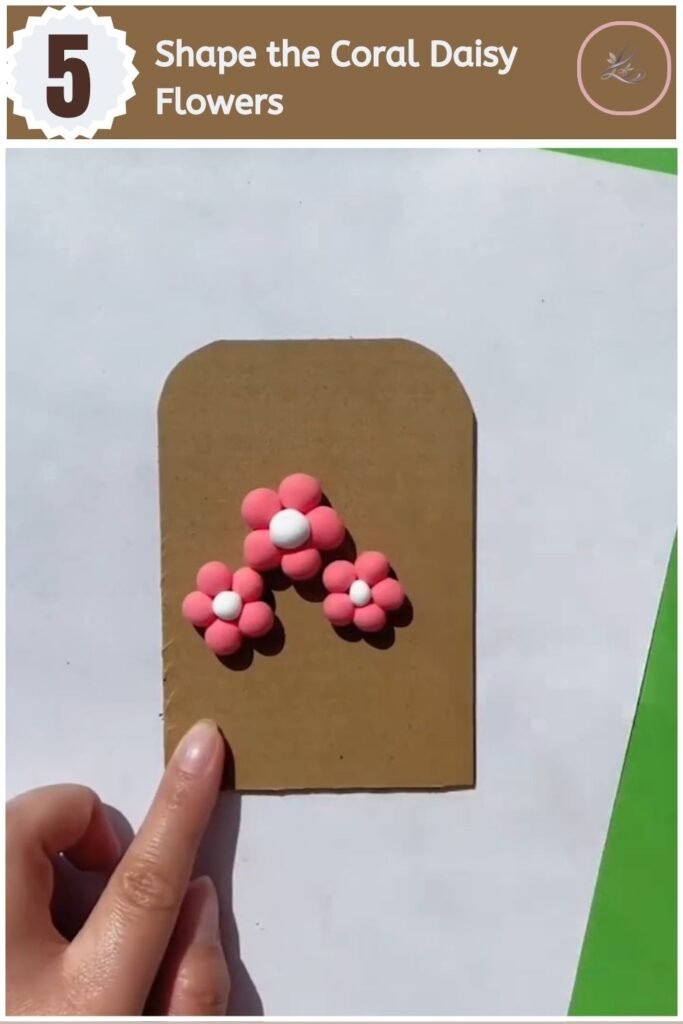
Pro Tip: Press the petals toward the center just slightly as you flatten them, since this small overlap keeps the flower from looking too flat and stiff.
Step 6: Add Stems to the Coral Flower Tag
Roll thin green stems and press them beneath each coral daisy, just as you did for the tulip tag. Add a few small dot shapes of green clay scattered around the flowers to suggest leaves and buds. Let the stems curve very slightly rather than sitting perfectly straight, so the arrangement feels a little more relaxed.
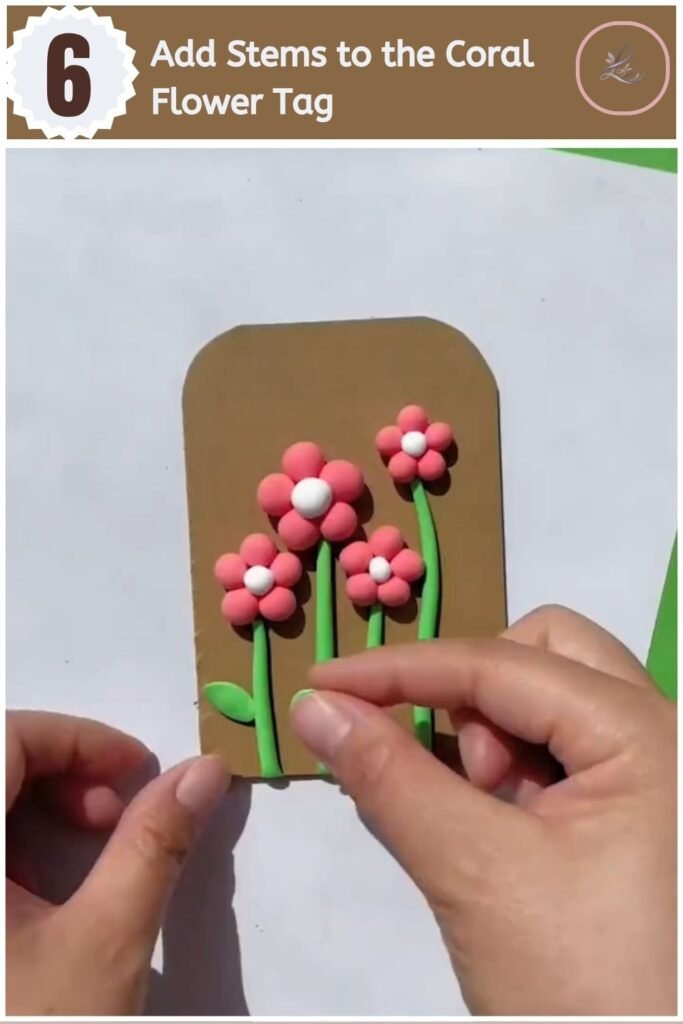
Pro Tip: Add the stems while the daisies are still soft, since pressing into dry or firm clay can crack the flower shapes you just made.
Step 7: Shape the Yellow Sunflower-Style Blooms
Roll a small ball of yellow clay and flatten it, then use your clay tool to press petal shapes evenly around the edge. Add a tiny red or brown ball in the center of the flower to finish the sunflower look. Press this flower onto your third tag, then repeat with a second smaller yellow flower beside it.
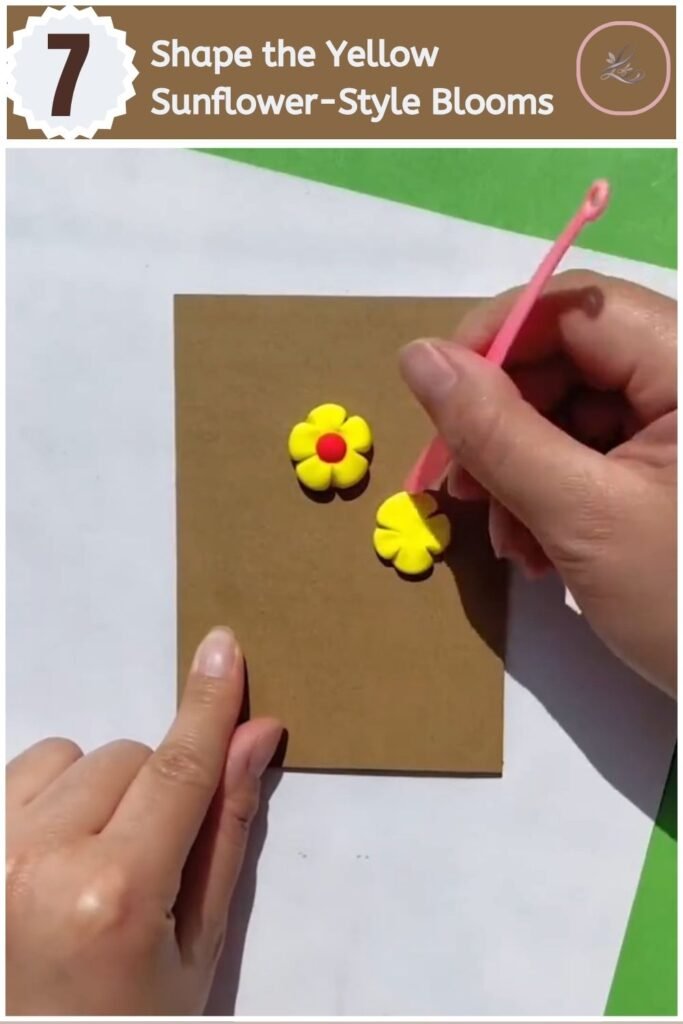
Pro Tip: Press each petal outward from the center in the same direction, since this keeps the petals looking even instead of pointing in random directions.
Step 8: Sculpt the Layered White Rose Flowers
Roll a small ball of white clay, then flatten and pinch several thin petal shapes around your fingertip to build up layers. Continue adding petals in a spiral pattern until you have a soft rosette shape, then press a tiny yellow dot into the center. This layered technique takes a bit more patience than the other flowers, so no rush if it takes a few tries to get the spiral looking right.
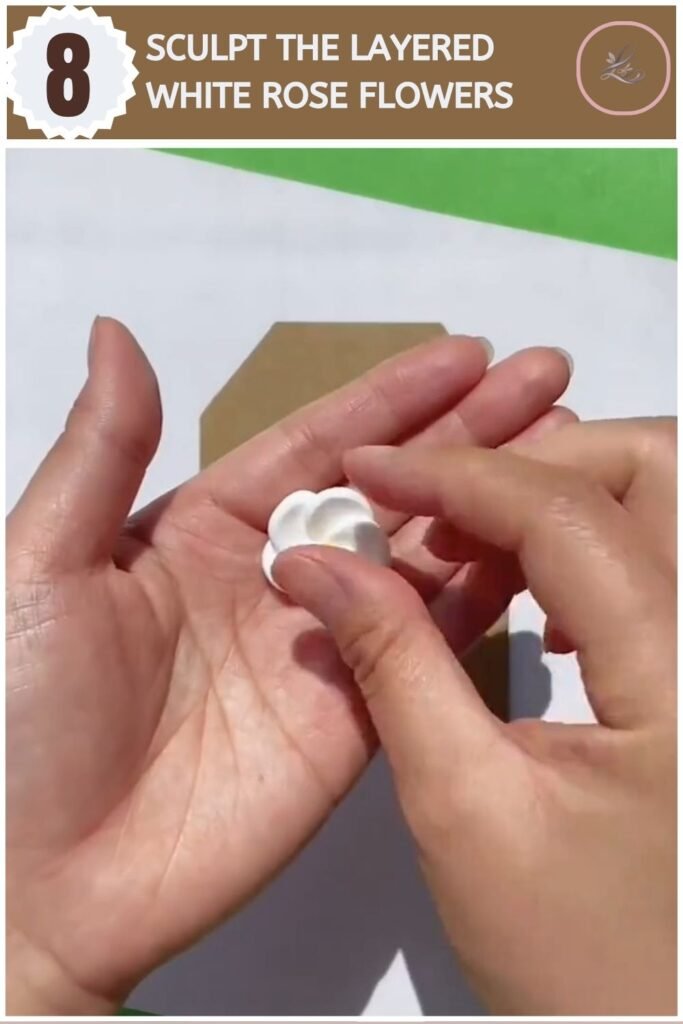
Pro Tip: Work over your open palm rather than on the table for this step, since the warmth and slight cushion of your hand makes it easier to curl each petal without tearing it.
Step 9: Arrange the White Flowers on the Final Tag
Press three or four finished white rose flowers onto your fourth cardboard tag in a small cluster. Add thin green stems beneath the flowers and a few small yellow dot accents scattered around the tag for extra detail. Let this tag sit for a few minutes so the flowers settle into place before you move it.
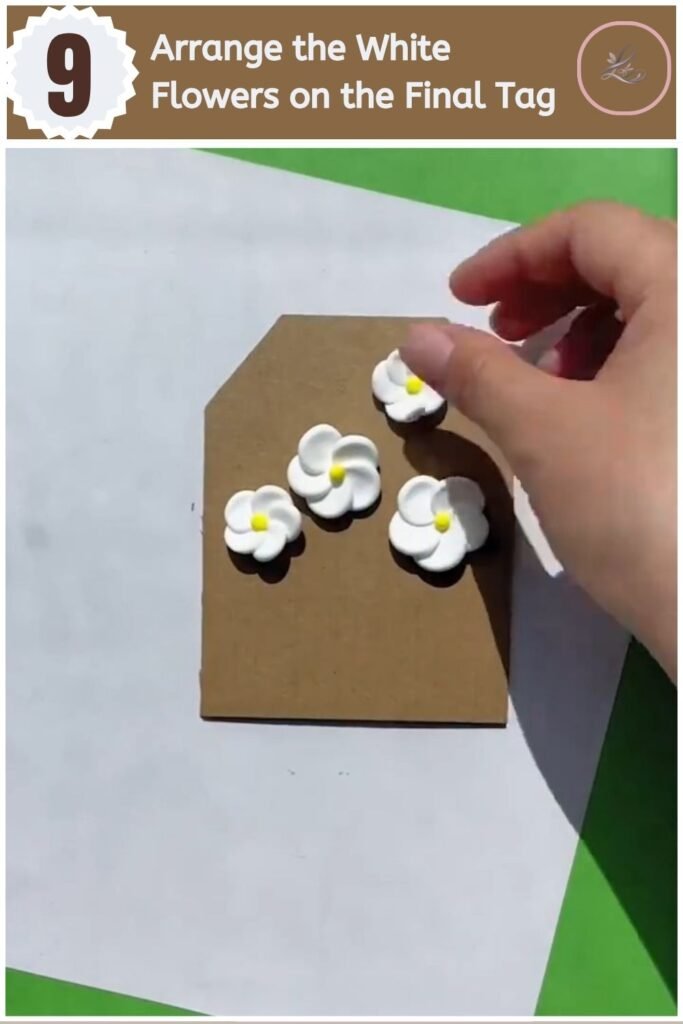
Pro Tip: Press each flower down gently from the center rather than the edges, so you do not flatten the delicate petal layers you just built.
Step 10: Assemble the Hanging Display
Wrap your floral wire vine around a length of jute twine, then tie each of your four finished tags to the twine at slightly different heights. Drape the twine over a small branch so the tags hang naturally at staggered lengths. Adjust the spacing between tags until the finished wall hanging feels balanced.
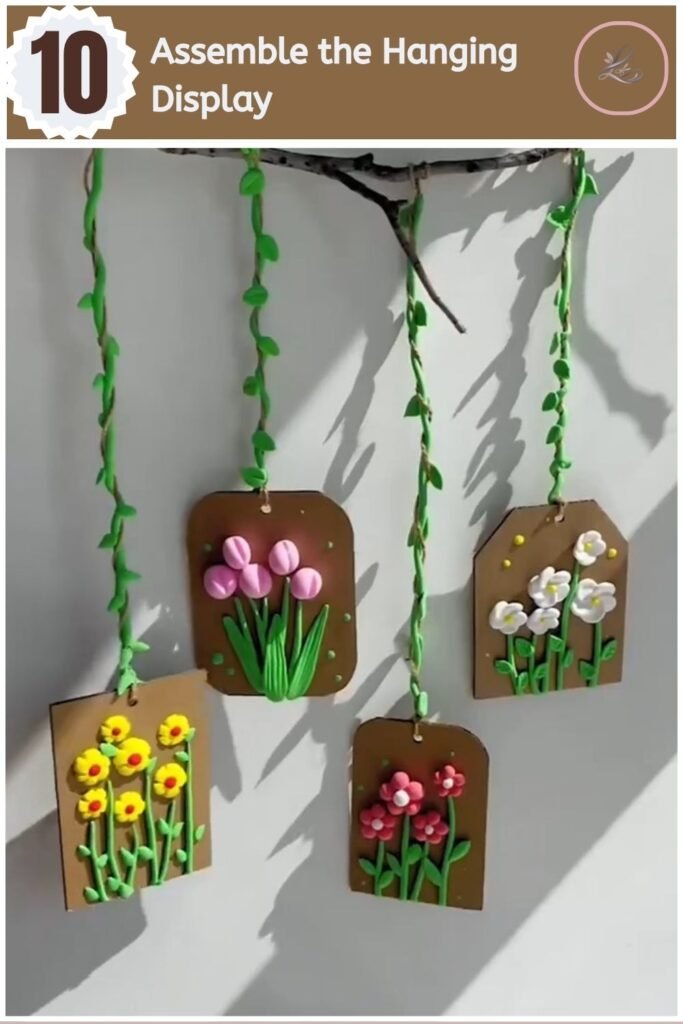
Pro Tip: Let all four tags dry completely for 24 to 48 hours, or according to your clay package instructions, before hanging the finished piece, so the flowers keep their shape.
Tips & Tricks
- If your clay starts to feel dry or crumbly while you work, rub a small drop of water between your palms before continuing, rather than adding water directly to the clay ball.
- Keep any unused clay wrapped tightly in plastic wrap between colors, since air dry clay begins to firm up the moment it is exposed to air.
- If a petal or stem cracks slightly once dry, a small dab of white craft glue can fill the crack, then you can touch up the color with acrylic paint once it dries.
- Work on one tag at a time from start to finish, since trying to keep four sets of flowers workable at once can lead to some drying out before you attach them.
- If you want extra durability, a light coat of clear sealant once everything is fully dry will help protect the piece from humidity and give it a soft sheen.
Ways to Use This Craft
This clay flower technique works well beyond a single wall hanging, and once you get comfortable rolling and shaping the petals, a whole world of home decor pillar projects opens up. A single flower tag on its own makes a sweet gift topper or a handmade card embellishment for someone who loves gifting pillar keepsakes. You could also make a smaller two flower version as a seasonal or garden pillar piece to swap out with the changing months, using warmer colours for fall or icy blues and whites for winter.
Frequently Asked Questions
-
How long does this project take to complete?
The hands on shaping and assembling takes about 45 to 60 minutes once you have your materials ready. On top of that, plan for 24 to 48 hours of drying time before the piece is fully hardened and ready to hang, depending on the clay brand you use.
-
What if I make a mistake, can I fix it?
Air dry clay stays workable for a while before it firms up, so you can reshape a petal or stem as long as it is still soft. If a piece has already dried and you notice a crack, a small dab of glue and a touch of paint will blend it back in without much trouble.
-
Does air dry clay flower wall decor crack over time?
This is a common concern for beginners, since cracking is one of the most searched issues with air dry clay projects. Thin pieces like petals and stems are more prone to hairline cracks as they dry, so keeping your shapes slightly thicker and drying the piece slowly away from direct heat helps prevent this.
-
How do I keep the clay flowers from fading in sunlight?
Air dry clay colours, especially brighter ones, can fade slightly with long term sun exposure. Hanging your finished piece away from a window that gets direct afternoon sun, or sealing it with a UV protective clear coat, helps the colours stay vibrant longer.
Closing
You just built a wall hanging that looks like it came from a boutique home decor shop, using nothing more than clay, cardboard, and a little patience. Every flower on this piece came from your own hands, and that handmade detail is what makes a home feel like yours. Whenever you are ready to try another project, take a look at DIY Paper Star Christmas Ornament (Kids Craft Ideas) for more beginner friendly clay ideas. Happy crafting! – LOUVADECORES
