

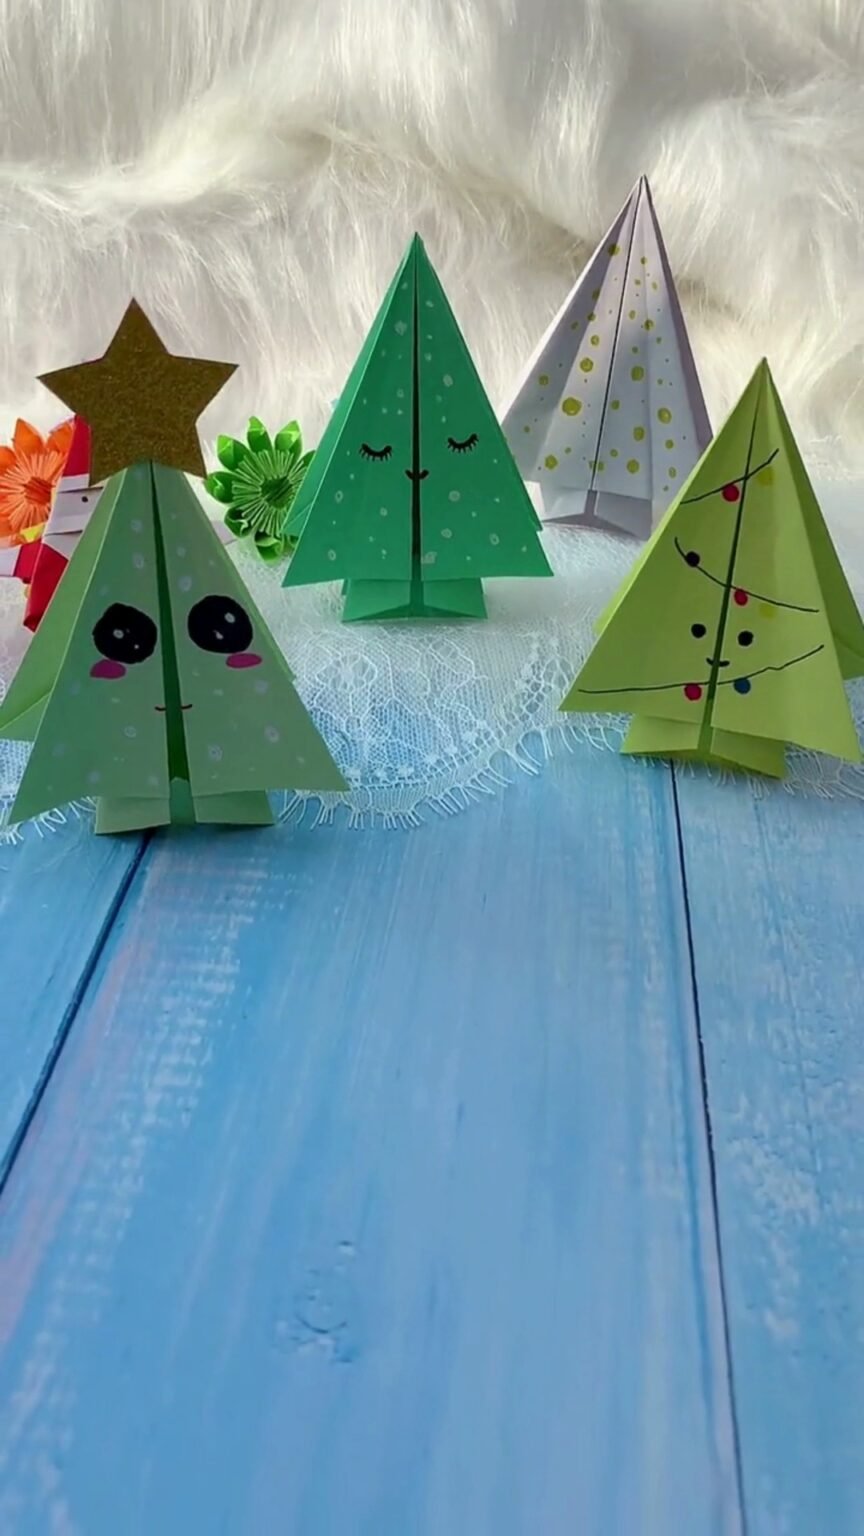
Looking for a magical, low-cost holiday craft to brighten your mantel, dinner table, or holiday gift packages? This 3D origami Christmas tree is an enchanting paper craft that folds out into a freestanding, multi-dimensional evergreen pine tree in just ten minutes.
Using a simple sequence of accordion squash folds and branch notches, a basic green square of paper turns into a miniature winter wonderland forest. Whether you crown yours with a sparkling gold star, decorate it with colorful fairy lights, or draw sweet kawaii faces, these folded pine trees are irresistible holiday fun for crafters of all ages!
⏱ Craft Time: 10 Minutes •
💰 Budget: Under $1 •
🎯 Skill Level: Beginner / Kid-Friendly
Supplies You Will Need
Simple materials you can grab right now with zero craft store trip:
- Green Origami Paper or Colored Craft Paper (standard 6×6 or 8×8 inch square)
- Gold Glitter Paper Scrap — for the sparkling star tree topper
- White Gel Pen or Acrylic Paint Marker — for falling snow dots
- Colored Markers (black, red, blue, yellow) — for festive string lights & faces
- Glue Stick
Tools:
- Craft Scissors
- Ruler (optional)
Step-by-Step Instructions
Step 1: Establish the Fundamental Crease Pattern
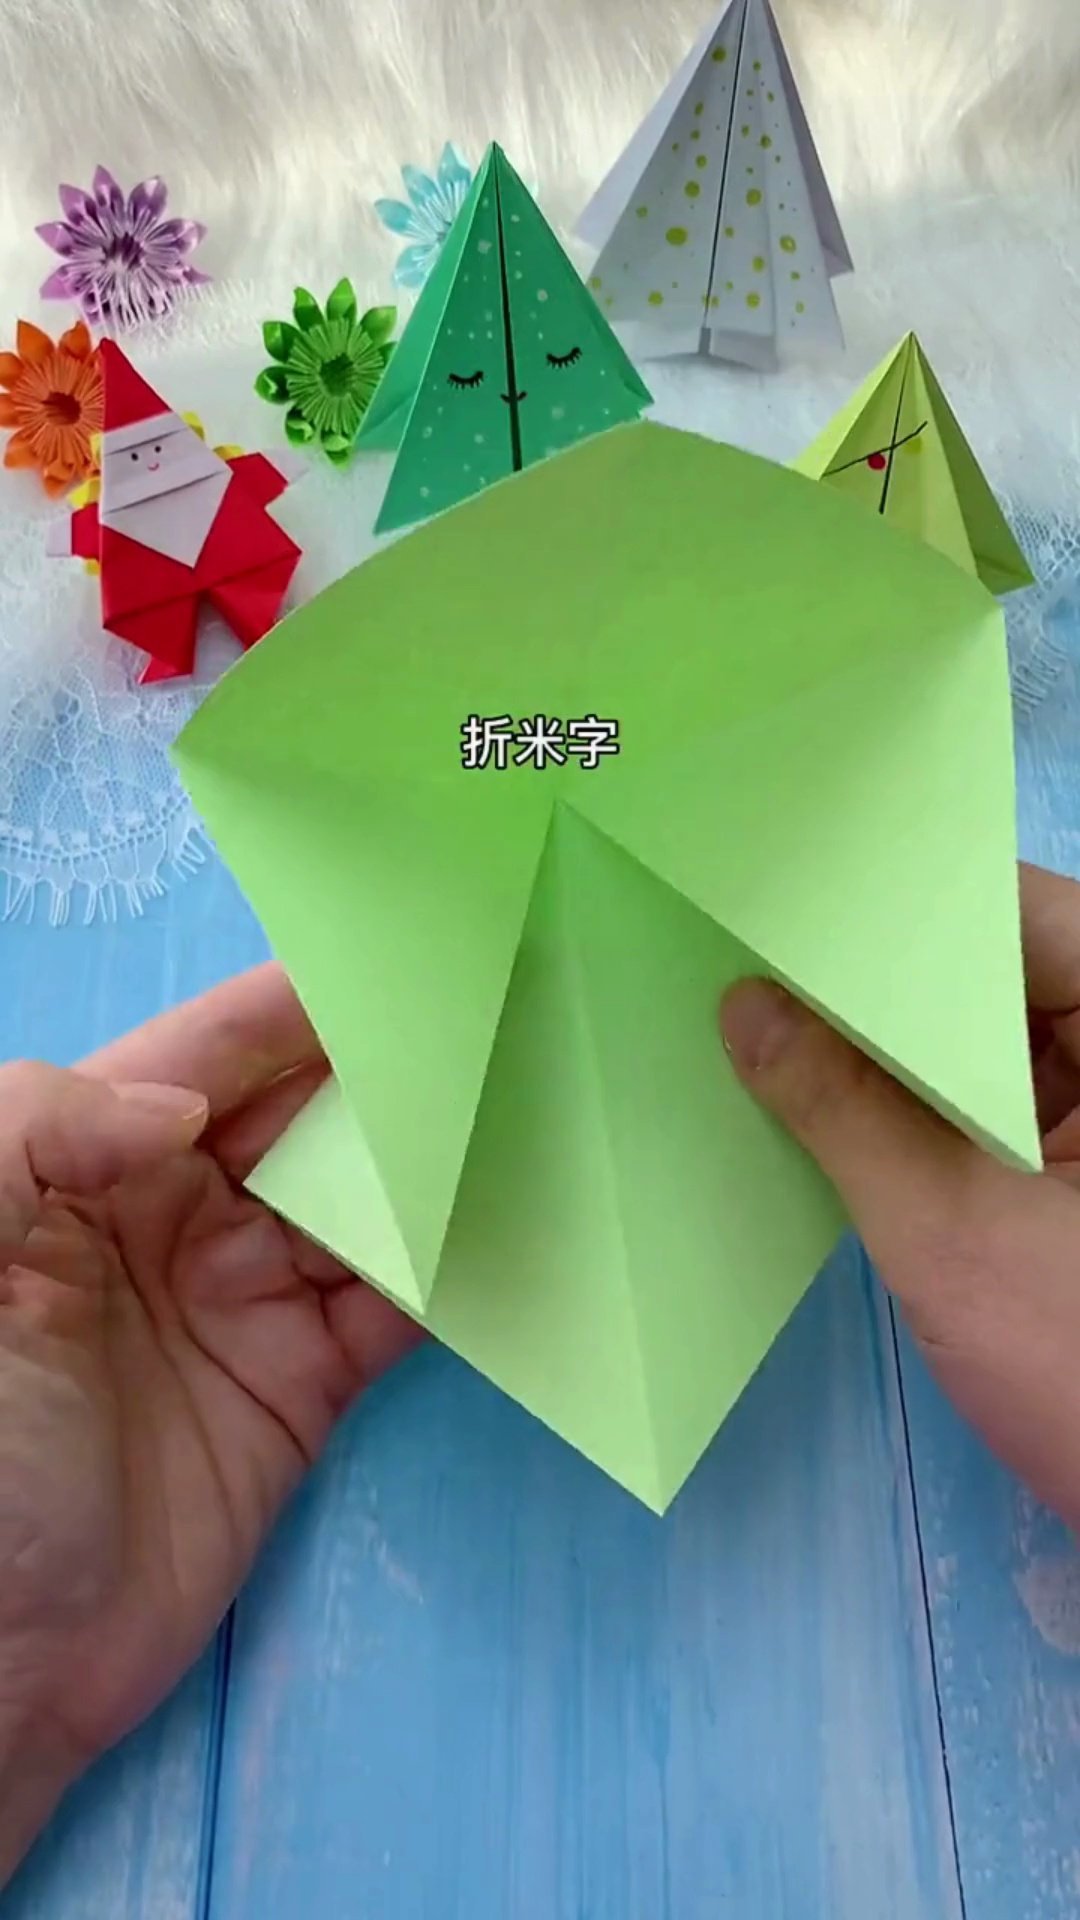
Fold a square sheet of green origami paper in half along both diagonals, then flip over and fold in half horizontally and vertically. Having both mountain and valley folds across all four axes creates the kinetic tension needed to collapse the paper into a compact origami base effortlessly.
Step 2: Collapse Into a Preliminary Square Base
Hold opposite corners and gently push the side creases inward to collapse into a flat, 4-cornered diamond base. Smooth down all edges so you have two symmetrical flaps pointing to the left and two pointing to the right.
Step 3: Squash Fold Each Flap to Create an 8-Sided Pine Cone
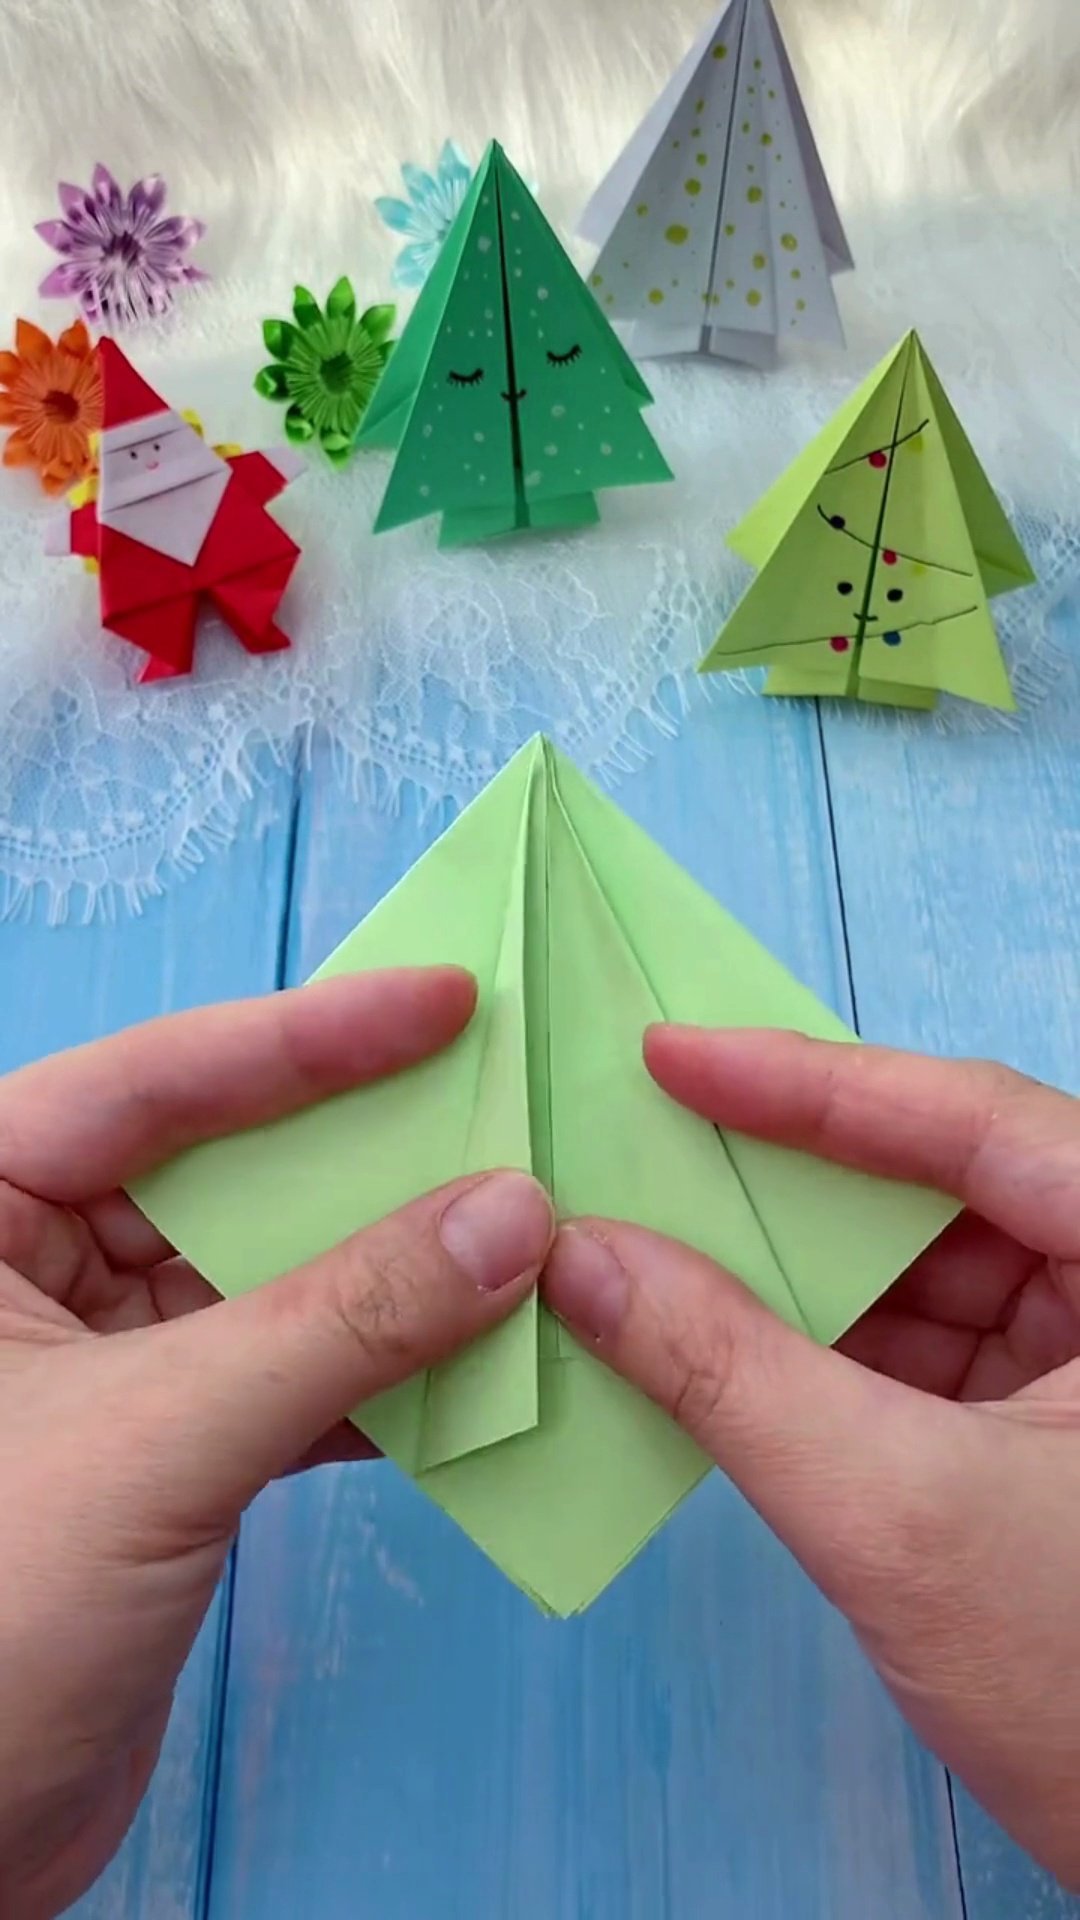
Lift each of the four outer flaps and squash-fold them open along the center crease line. Repeat on all four sections, front and back. When smoothed flat, your paper now has 8 distinct triangular facets, mimicking the dense, symmetrical branches of a real evergreen fir tree.
Step 4: Trim and Level the Bottom Trunk
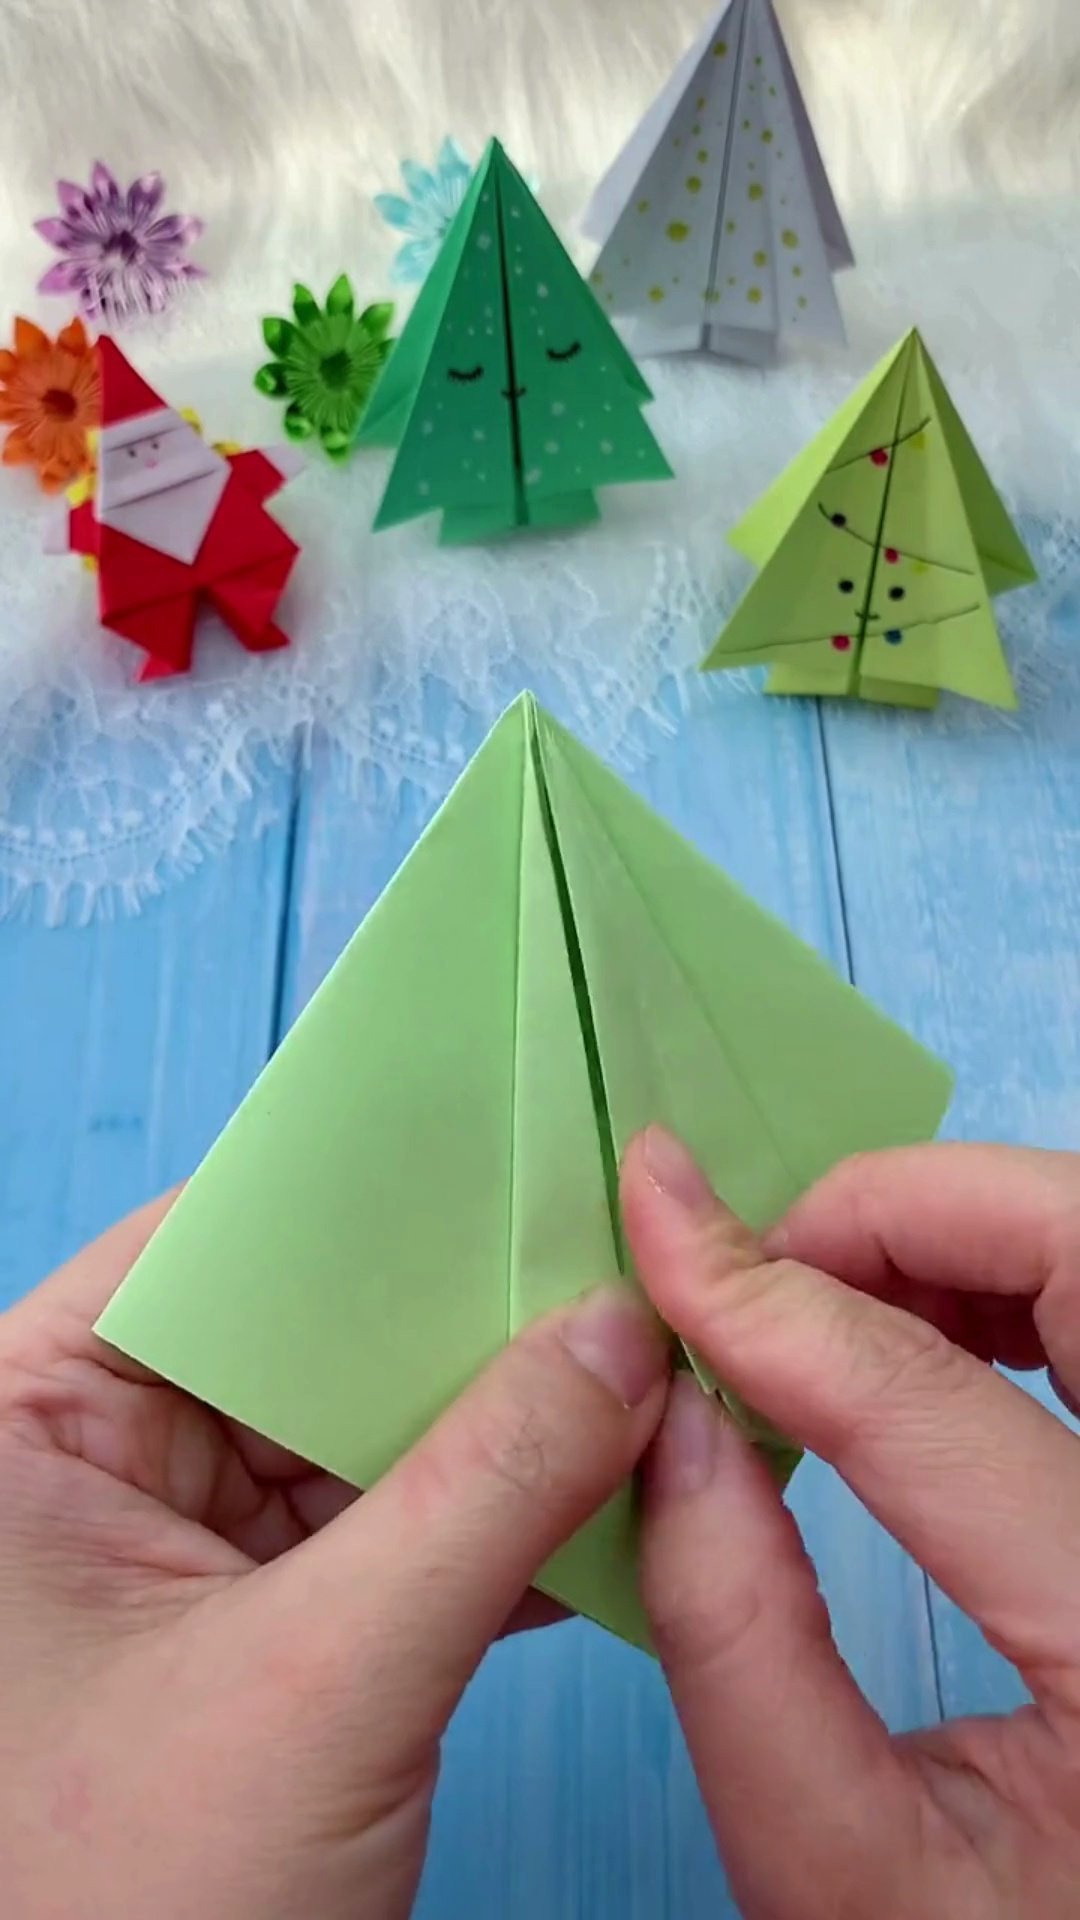
Snip straight across the lower pointed overhang or fold the triangular bottom tabs upward inside each layer. This step turns the pointed cone into a level, flat circular base, allowing your finished Christmas tree to balance and stand upright on any flat tabletop without wobbling.
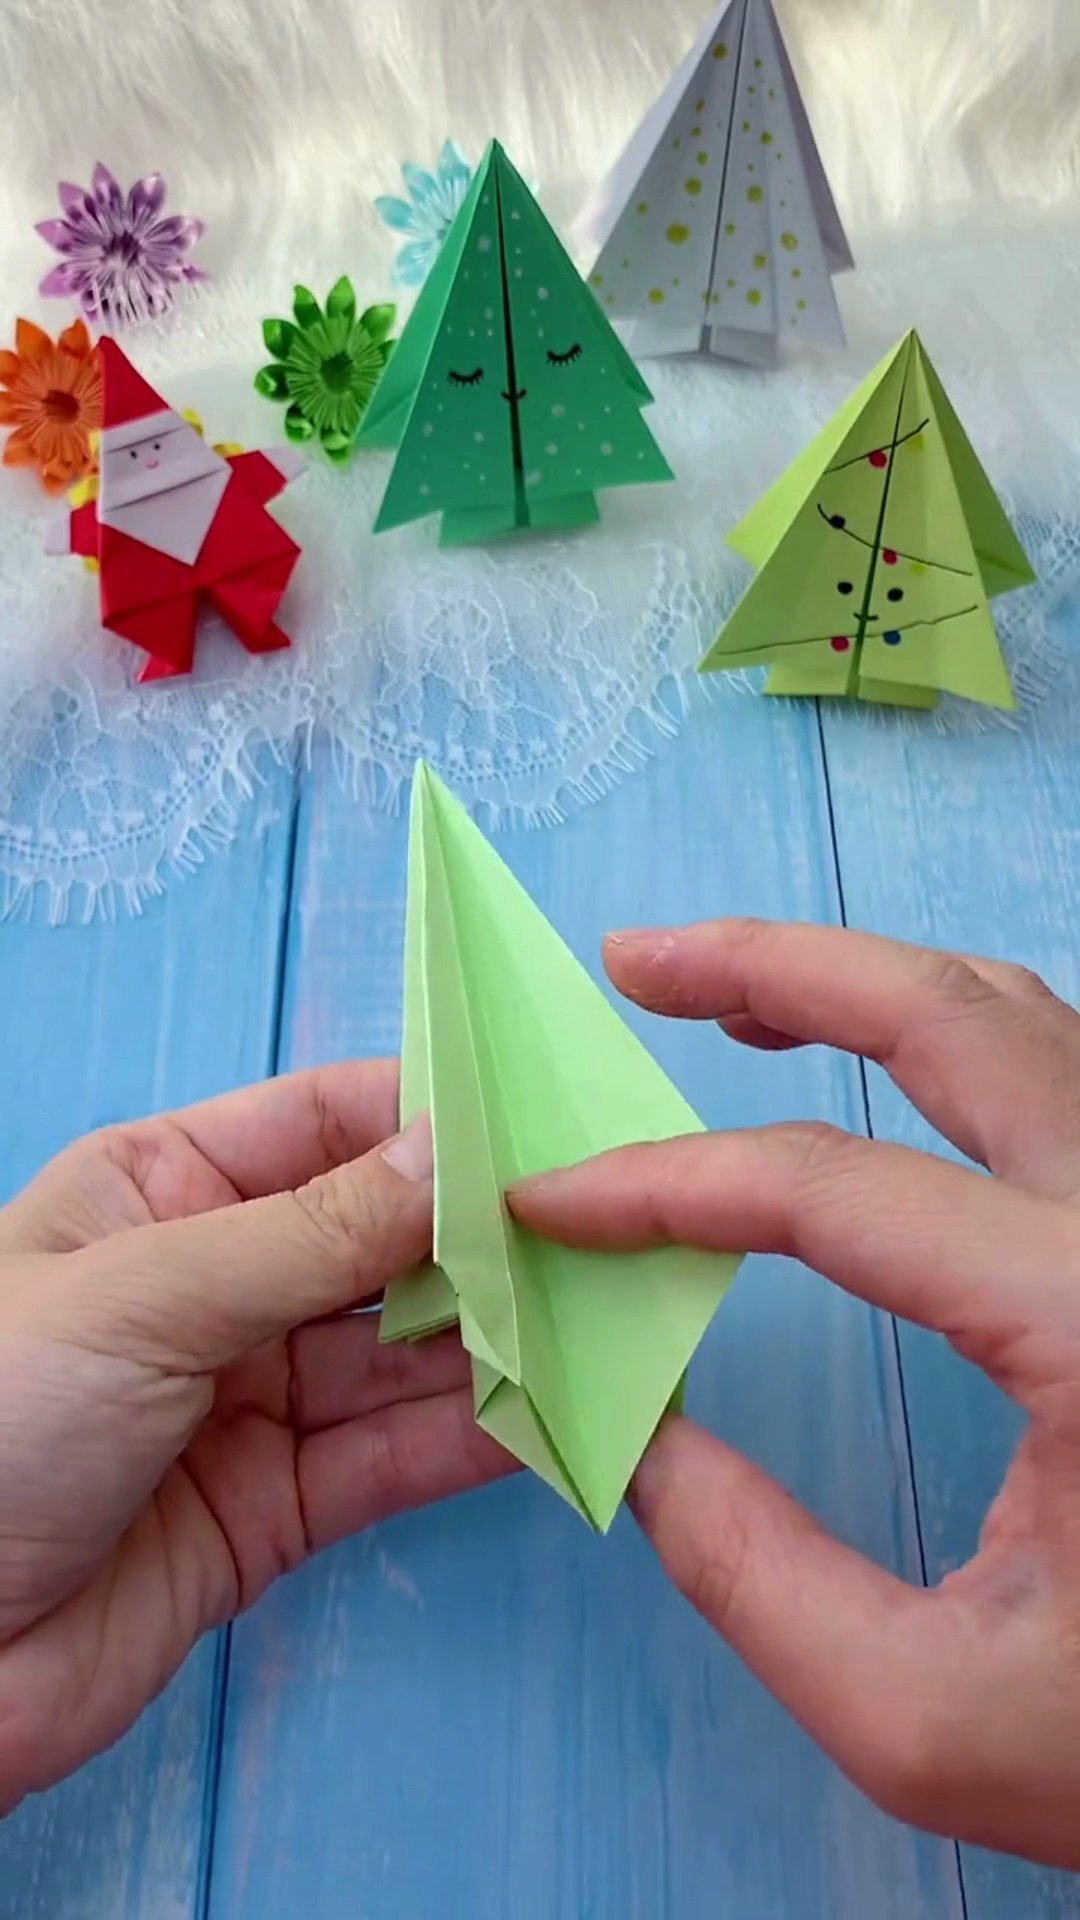
Step 5: Snip and Fold Down the Layered Pine Branches
Make 2 to 3 small horizontal cuts through the outer edges of all 8 flaps, then fold each notched corner downward. These downward triangular folds give the tree its classic stepped boughs, catching shadows and creating incredible organic dimension.
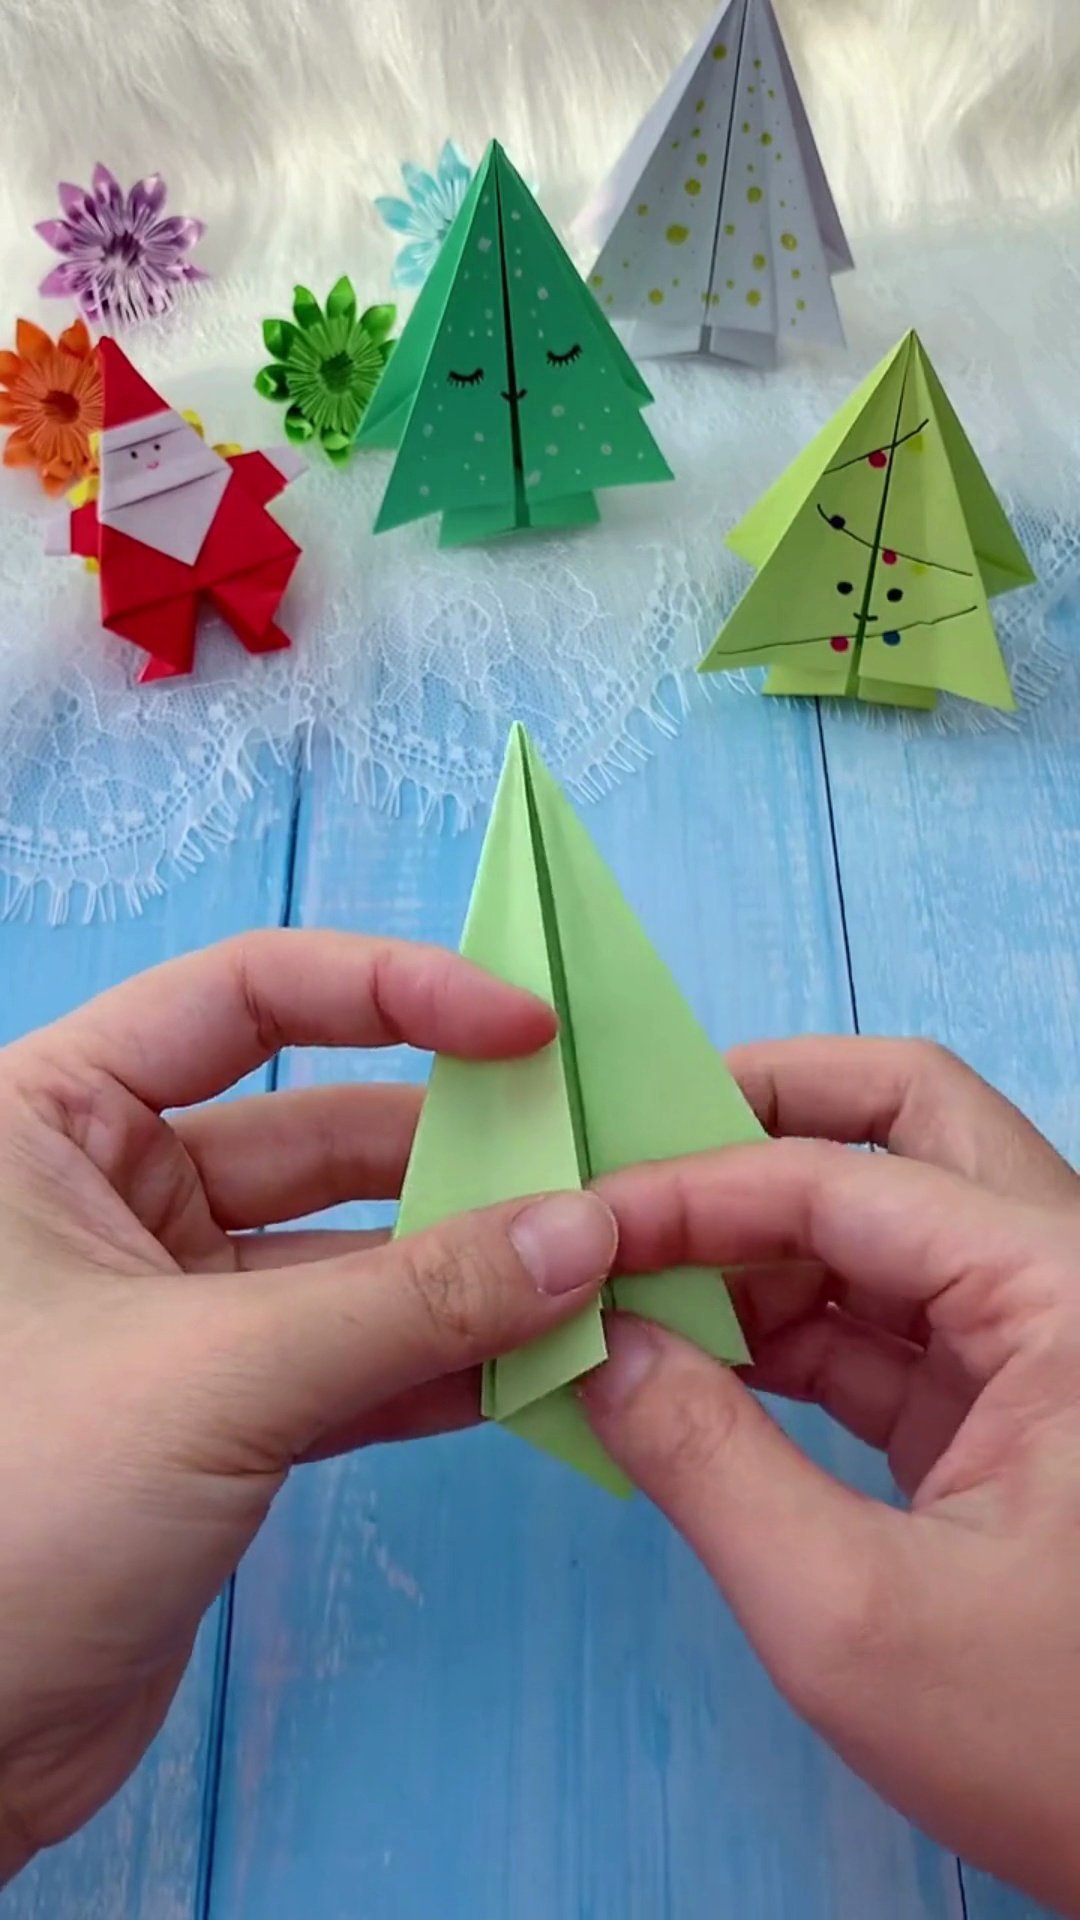
Step 6: Decorate with Snow, Fairy Lights & a Glitter Star!
Use a white gel pen to dot fluffy snow across the branches, sketch colorful string lights, and crown the peak with a gold glitter star. Gently fan out all 8 branches evenly in a circle and place your miniature Christmas tree on your mantel, shelf, or dining table!
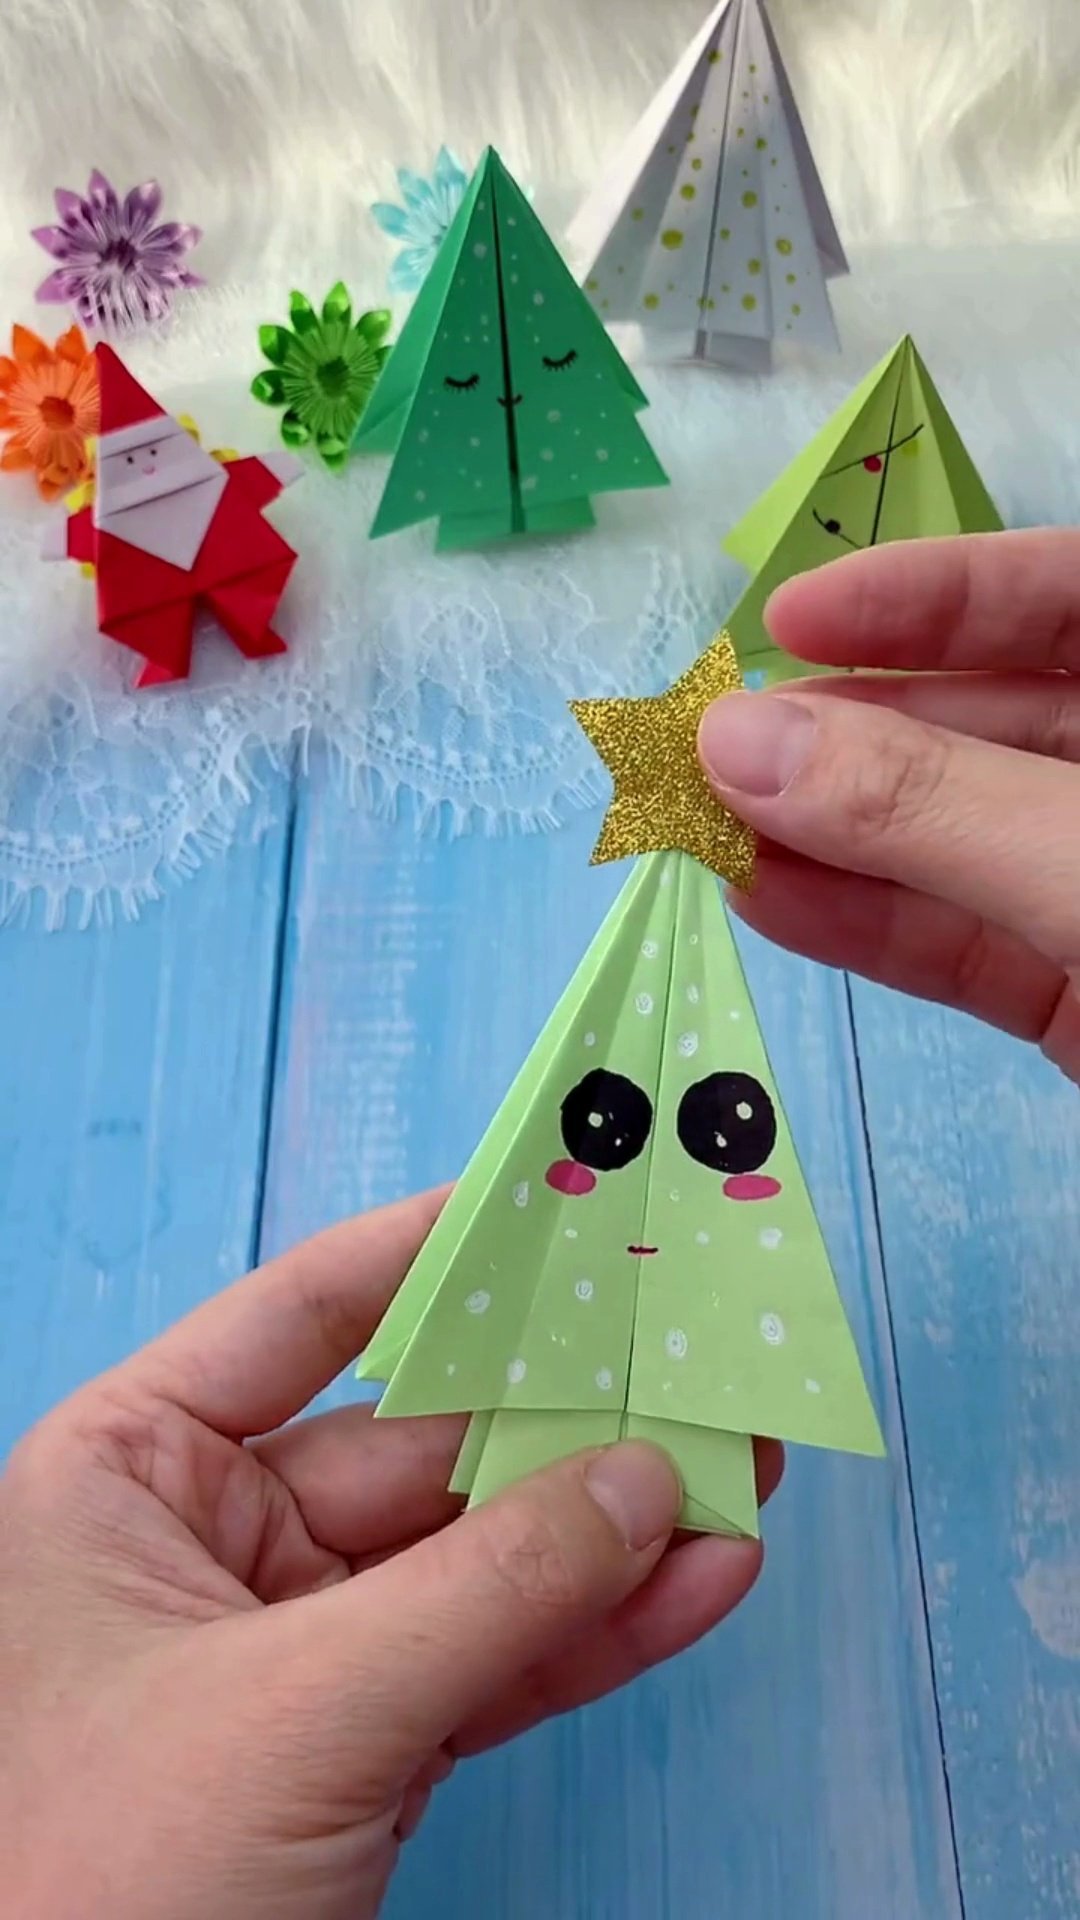
Ways to Style & Use
- Whimsical Winter Forest Centerpiece: Make 5 to 7 trees in varying sizes and green hues (emerald, mint, olive, and frosty white) and arrange them on faux snow or cotton fluff.
- Holiday Place Card Holders: Slip guests’ name cards between the branches for an unforgettable Christmas dinner table setting.
- Festive Gift Tag Topper: Tie a single 3D origami tree onto wrapped brown kraft paper gift boxes with rustic baker’s twine for stunning handmade packaging.
Explore More Paper Crafts
Keep the creativity flowing with our other easy DIY guides:
- 20 Easy DIY Santa Crafts to Make This Christmas — Adorable, cheap holiday crafts to make your home festive.
- Easy DIY 3D Paper Heart Hot Air Balloon — 10-minute colorful 3D craft with wooden tethers.
Frequently Asked Questions
What type of paper holds the 3D tree shape best?
Standard 70-80 GSM origami paper or colored copy paper is best. It is thin enough to handle 8 layers of folds without cracking, yet stiff enough to stand tall.
Can I make different sizes?
Yes! Use 8×8 inch paper for large centerpiece trees, 6×6 inch for standard decor, and 3×3 inch paper for miniature fairy-garden trees!
How do I make the branches stay fanned out?
After completing the folds, place your fingers inside the center cavity from the bottom and gently flare out the 8 panels like an umbrella.
Final Thoughts
Few crafts capture the joyful magic of the holidays quite like this 3D origami Christmas tree. In just a few minutes of mindful folding, a humble piece of paper transforms into a festive keepsake that brings holiday cheer to any room.
Gather your paper, turn on your favorite Christmas carols, and fold a whole winter wonderland fleet this season. Happy holiday crafting!
