

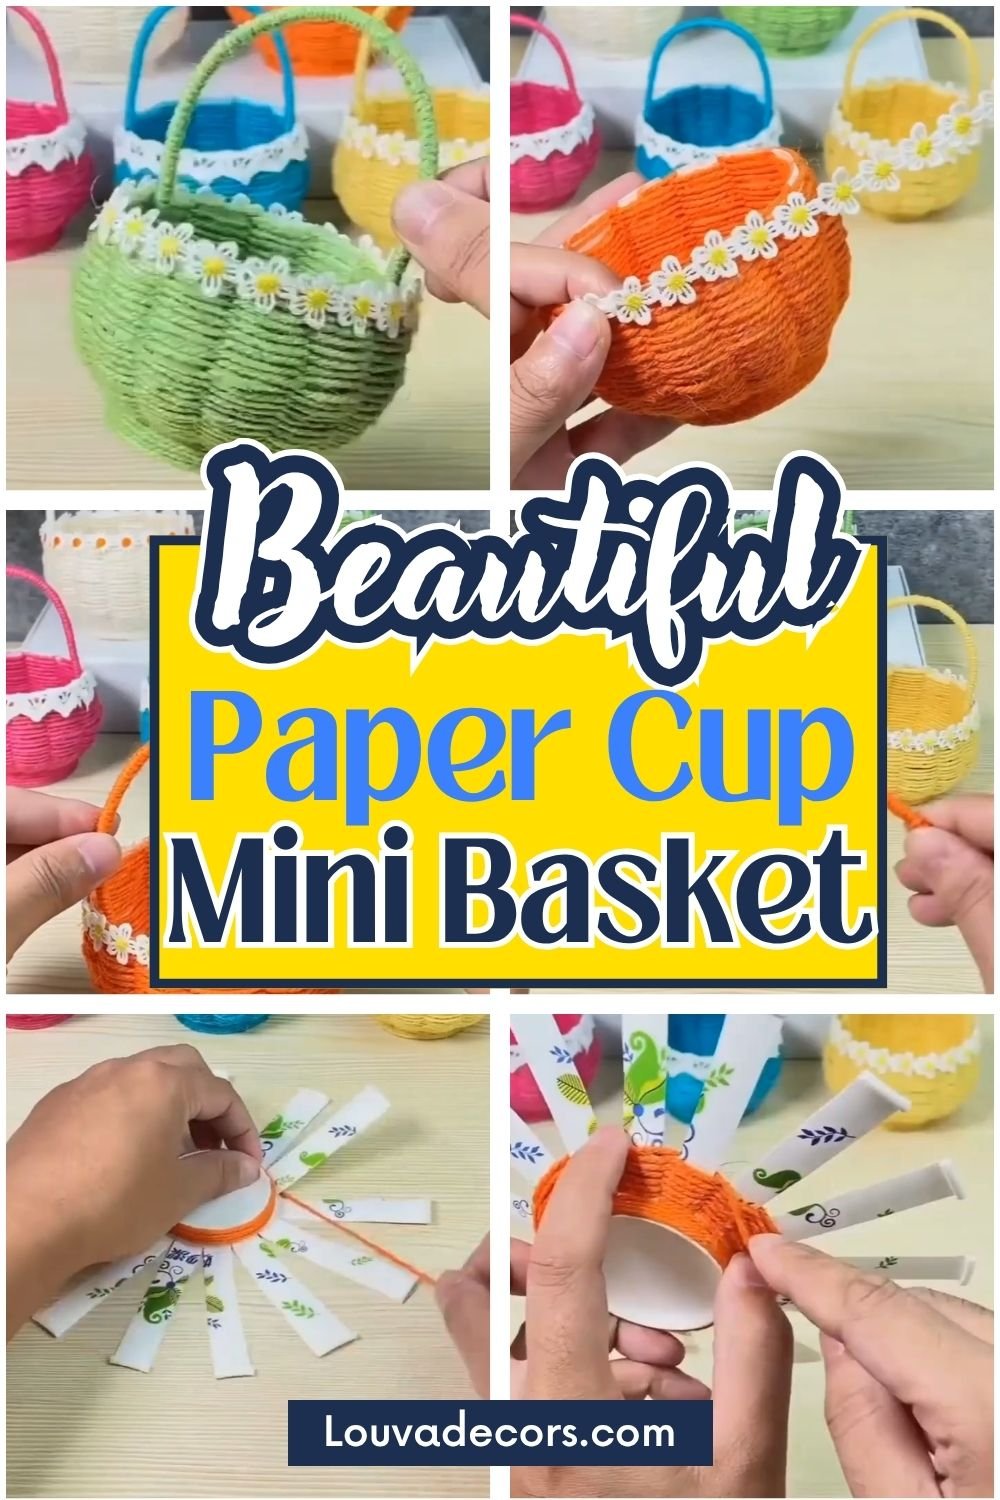
Imagine transforming a basic household item into a vibrant, woven treasure that brightens up any shelf or tabletop. These miniature woven baskets feature a sturdy base wrapped in rich, textured yarn and finished with a delicate touch of floral trim. They look like boutique finds, but you can create them right at your kitchen table using everyday crafting supplies.
You do not need any experience to succeed with this project. We will guide you through each part of the process, ensuring you feel confident from the very first stitch. Take your time, enjoy the rhythmic movement of the yarn, and remember that it is okay if your first few rows look a little loose.
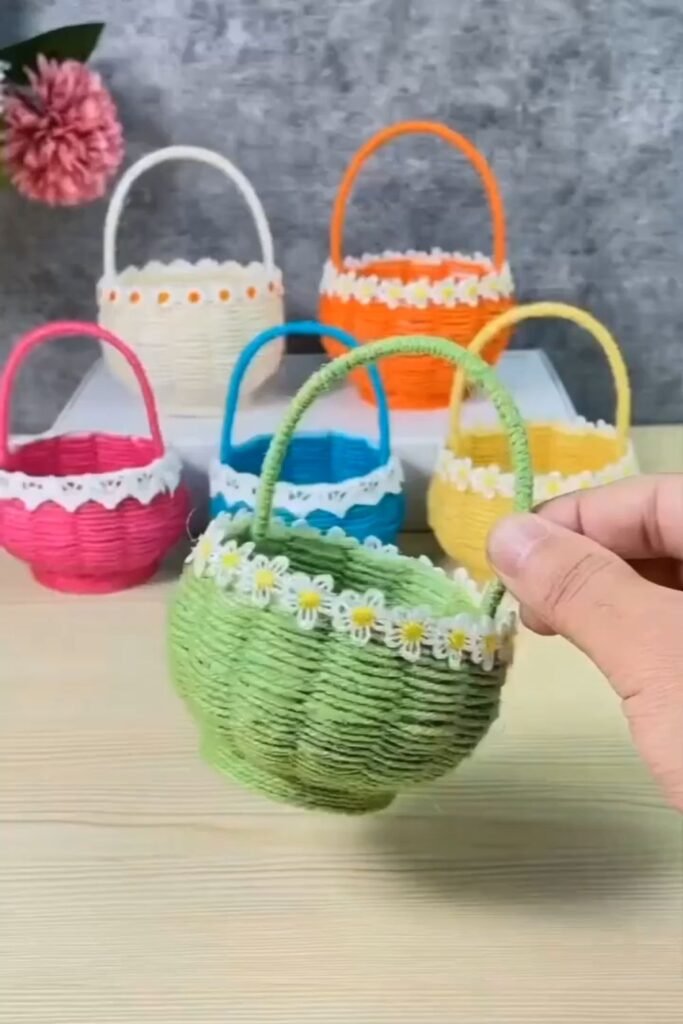
This beautiful craft requires only a single paper cup, a ball of your favorite yarn, and about 15 minutes of your time. It is an excellent introduction to creative home decor projects that keep your hands busy without stressful complications. Let’s gather our supplies and get ready to create something wonderful together.
WHY YOU WILL LOVE THIS PROJECT
This project turns affordable everyday items into a gorgeous decorative piece that looks expensive. The weaving process feels deeply relaxing, making it an excellent way to unwind after a busy day. Because it is completely customisable, you can match any colour scheme in your house or create personalized party favours for friends.
WHAT YOU WILL NEED
- 1 Paper Cup — [Standard disposable cup]
- Yarn (Orange, or your choice of color) — [Any scrap yarn or embroidery floss]
- Double-Sided Tape — [Clear school tape]
- Hot Glue Gun & Glue Sticks — [Craft glue or tacky glue]
- Scissors — [Household shears]
- Decorative Floral Lace Ribbon — [Washi tape or fabric scraps]
- Wooden Dowel or Skewer — [Sturdy rolled paper tube]
All materials can be found at your local craft store or ordered online.
VIDEO TUTORIAL
Watch the full tutorial above before reading the written steps. The steps below match the video exactly.
STEP-BY-STEP INSTRUCTIONS
Step 1: Cut the Paper Cup Slats
Cut vertical strips down the sides of your paper cup to create the weaving frame. Space your cuts evenly around the perimeter, stopping about 1 inch from the absolute bottom of the cup. This creates the vertical spokes that will hold your yarn securely as you build the basket walls.
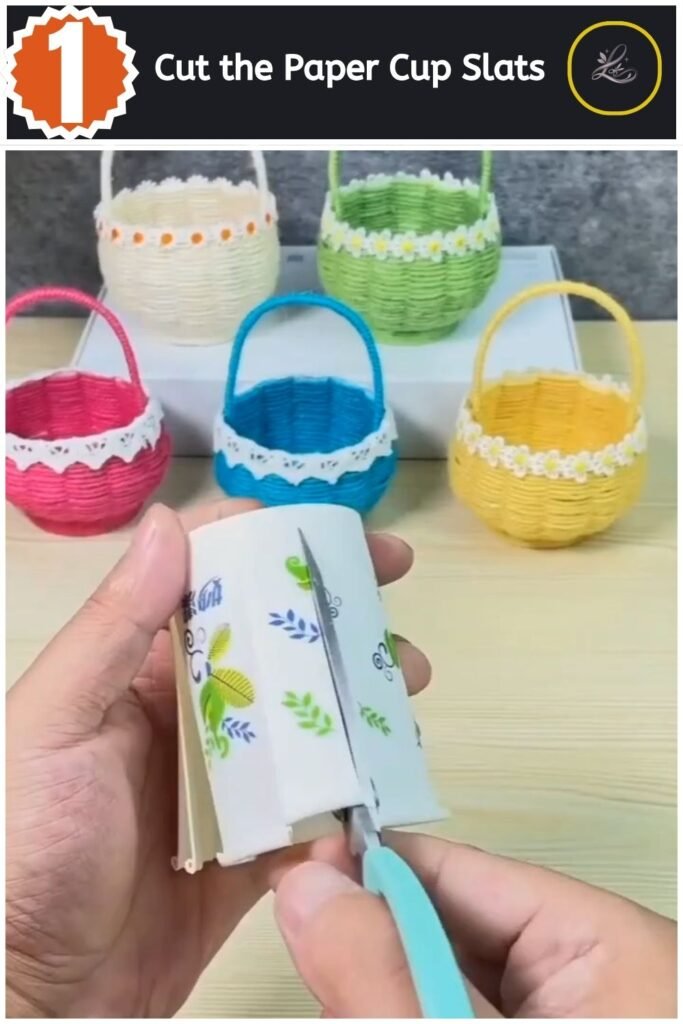
Pro Tip: Count your strips when you finish cutting to ensure you have an odd number, which is necessary for a continuous over-under weaving pattern.
Step 2: Apply the Base Anchor Tape
Wrap a strip of double-sided tape entirely around the lower base of your cup. Place this tape right where your vertical cuts end to keep the bottom structure solid and secure. Press down firmly to make sure the tape adheres cleanly to every single paper slat.
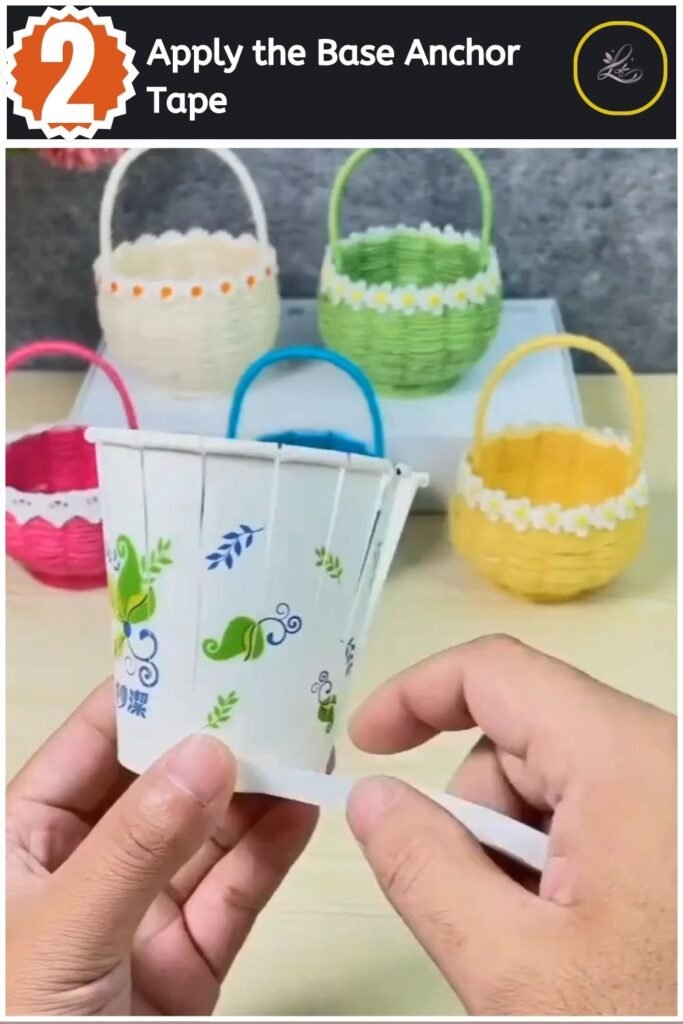
Pro Tip: If your paper cup has a glossy or waxy coating, rub the tape down with the back of your fingernail to prevent it from sliding.
Step 3: Secure the Yarn and Flatten the Frame
Anchor the end of your yarn with hot glue at the base, then push the paper slats outward like a blooming flower. Pressing the slats flat against your work surface gives you full, clear access to the bottom of the structure. This makes starting your first few rows of weaving much more comfortable.
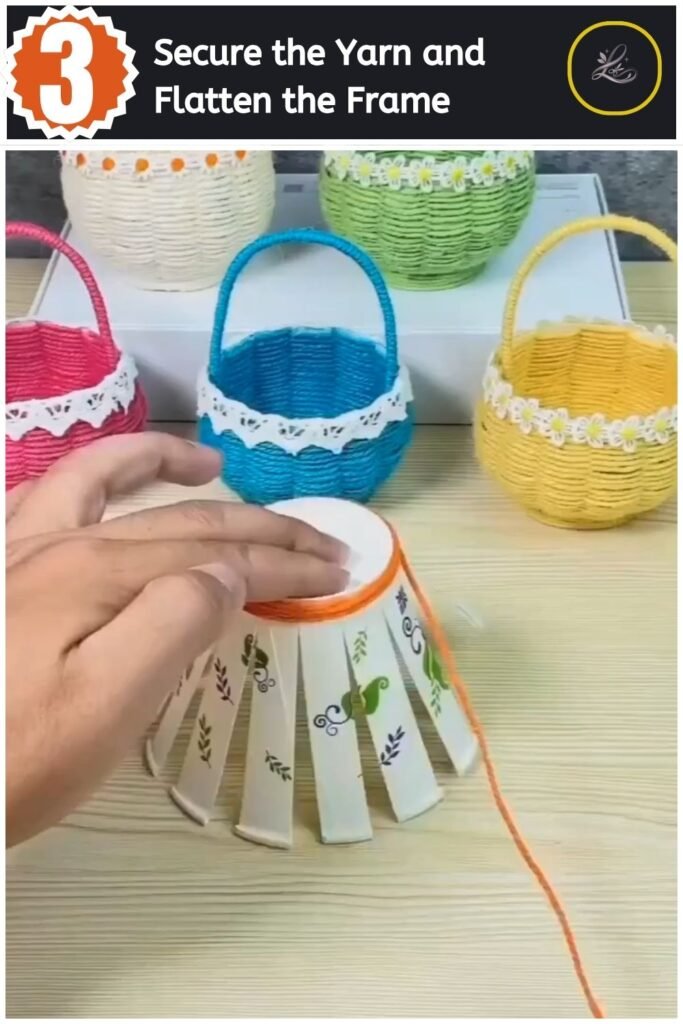
Pro Tip: Hold the yarn end in the hot glue for a full 5 seconds with a toothpick to avoid burning your fingers.
Step 4: Weave the Bottom Base
Guide your yarn in a steady over-and-under pattern around the base of the flattened paper spokes. Pull the yarn firmly but gently so it rests snugly against the center core without bending the paper out of shape. Keep going until the flat bottom section feels solid and well-covered.
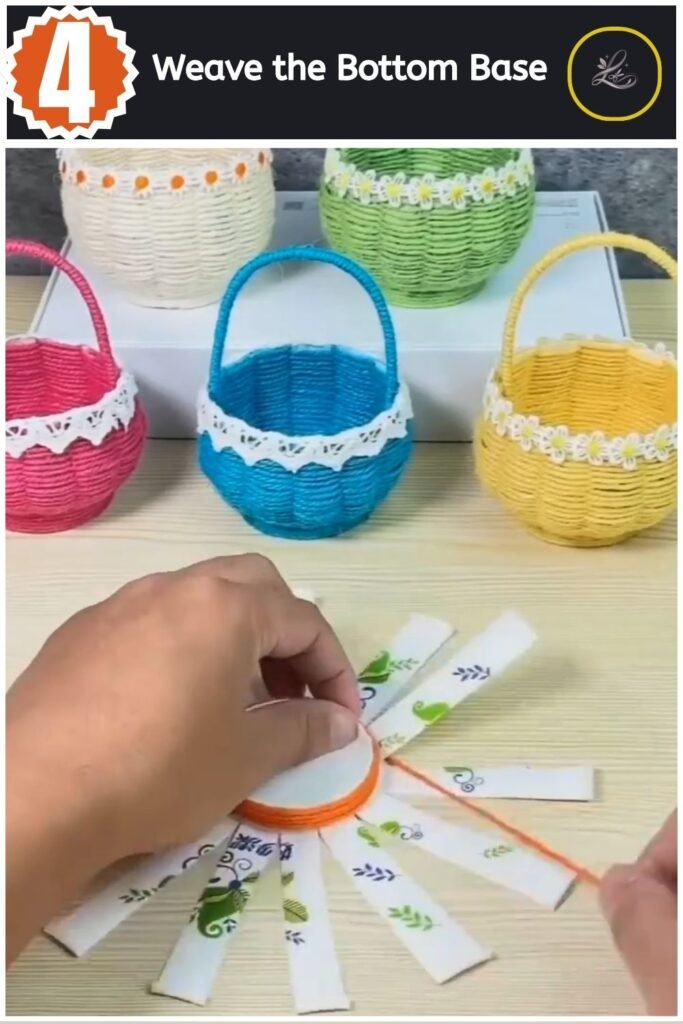
Pro Tip: Keep your yarn tension uniform; pulling too hard can distort the circular shape of your basket base.
- 20 Easy DIY Santa Crafts to Make This Christmas (Cheap & Adorable)

- Lovely Paper Pop Up Tulip Card Anyone Can Make

- Cute Paper Chinese New Year Garland Anyone Can Make

- Adorable Halloween Paper Hat Craft for Beginners

- Make Sweet DIY Flower Greeting Card for Loved Ones

Step 5: Pull Up the Walls and Continue Weaving
Pull the paper slats back upward into a bowl shape as you weave to build the basket walls. As you transition from the flat base to the sides, guide the yarn over and under each upright slat. Watch the beautiful woven texture grow taller with every round you complete.
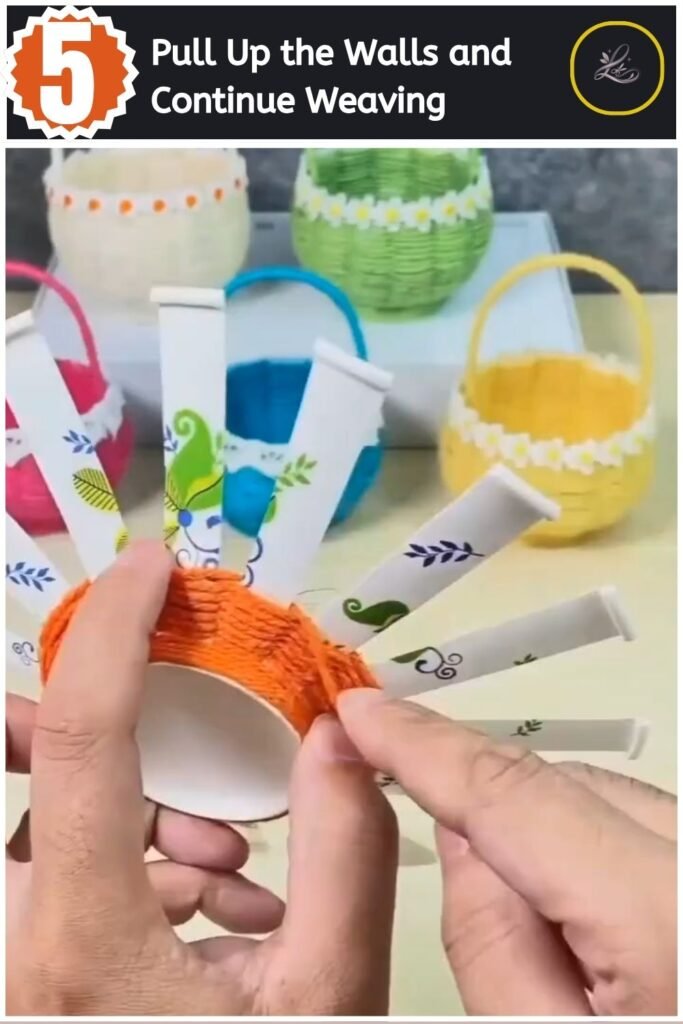
Pro Tip: Push the woven yarn layers down toward the base occasionally with your fingers to eliminate any gaps.
Step 6: Trim and Fold the Paper Edges
Cut away any excess paper from the top of the slats and fold the remaining tabs inward. Use your scissors to trim the tops evenly so they sit just above your final row of woven yarn. Folding these remaining little tabs into the interior of the basket creates a clean, smooth upper rim.
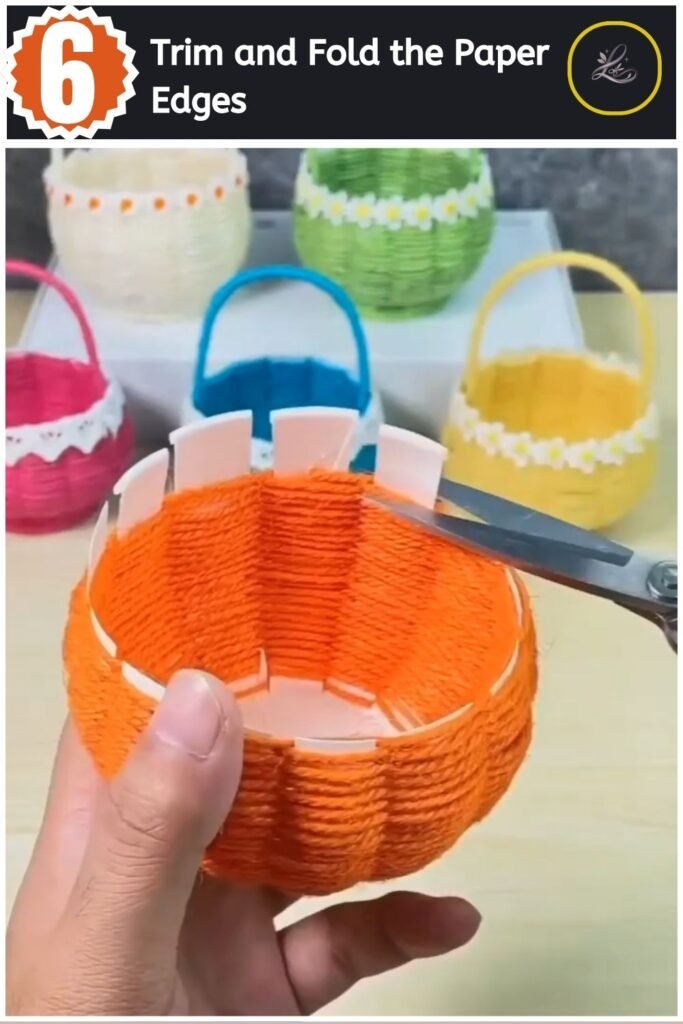
Pro Tip: Secure each folded tab with a small dot of hot glue inside the basket to lock everything permanently in place.
Step 7: Attach Decorative Lace Trim
Glue a strip of decorative daisy lace ribbon around the entire upper rim of your mini basket. This adds an elegant touch while perfectly concealing the folded paper edges underneath. Wrap it completely around and trim the ends so they meet smoothly at the back.
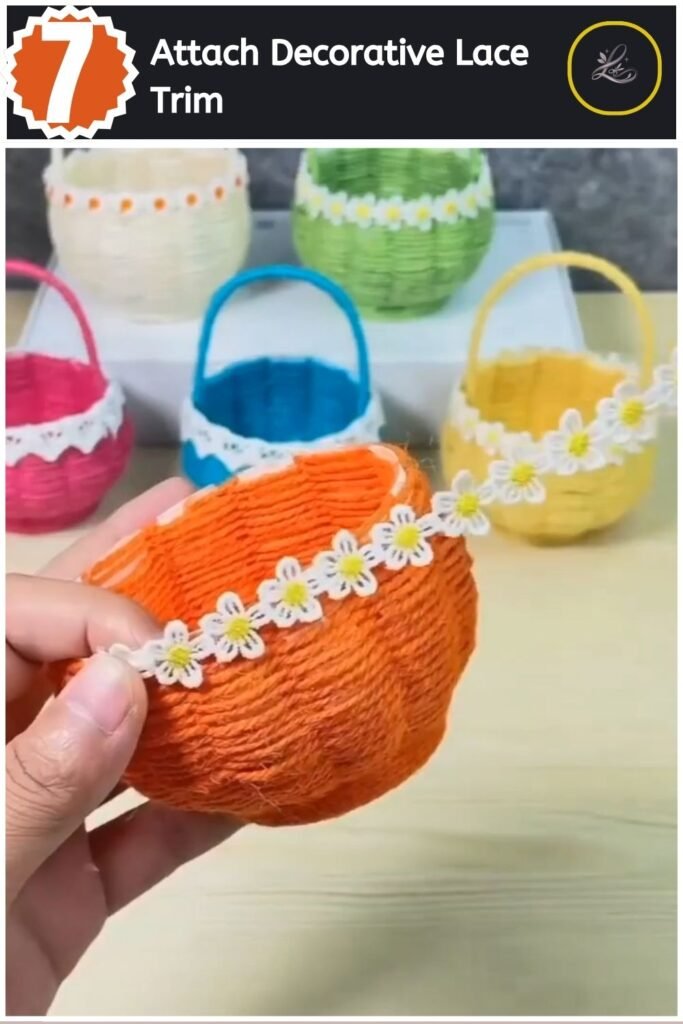
Pro Tip: Apply the hot glue in a very thin line directly on the rim to prevent any glue from squeezing out through the lace holes.
Step 8: Wrap the Basket Handle
Wrap a thin wooden stick completely with matching yarn to create your sturdy handle. Secure the yarn at one end with a tiny drop of glue, spin the stick to wrap the yarn tightly along its length, and finish with another glue dot at the opposite end. Bend it gently into a smooth arch.
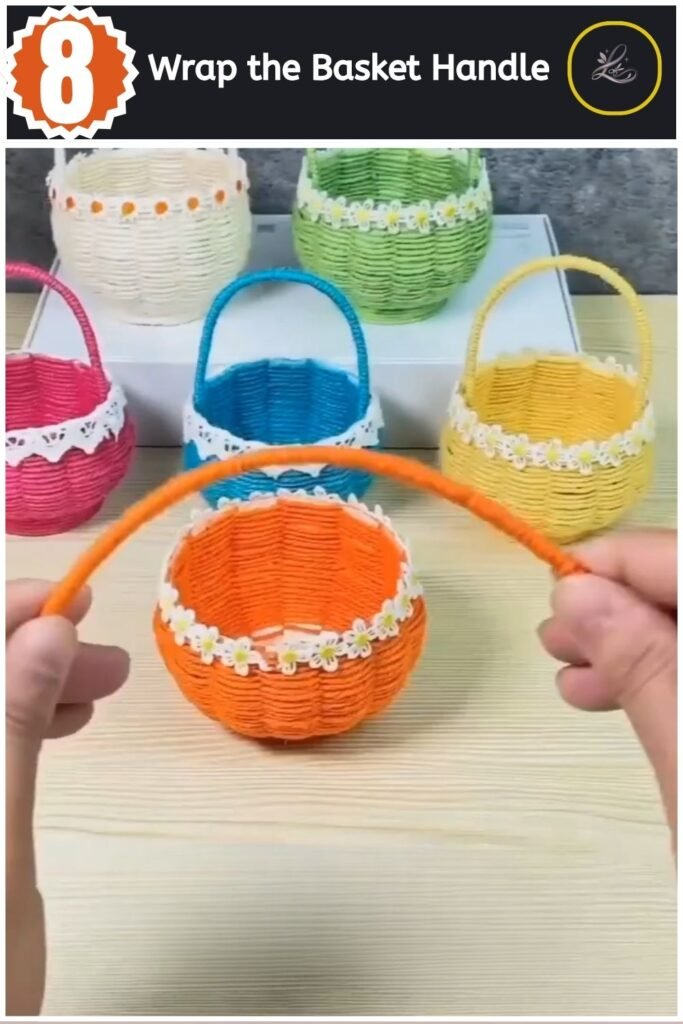
Pro Tip: If your wooden stick feels too stiff to bend, roll it gently back and forth against the edge of a table to loosen the wood fibers.
Step 9: Attach the Finished Handle
Apply hot glue to both ends of your wrapped handle and press them into opposite sides of the basket interior. Hold the ends firmly in place for several seconds to let the glue cool and bond securely. Once dry, your delightful miniature basket is fully ready to display!
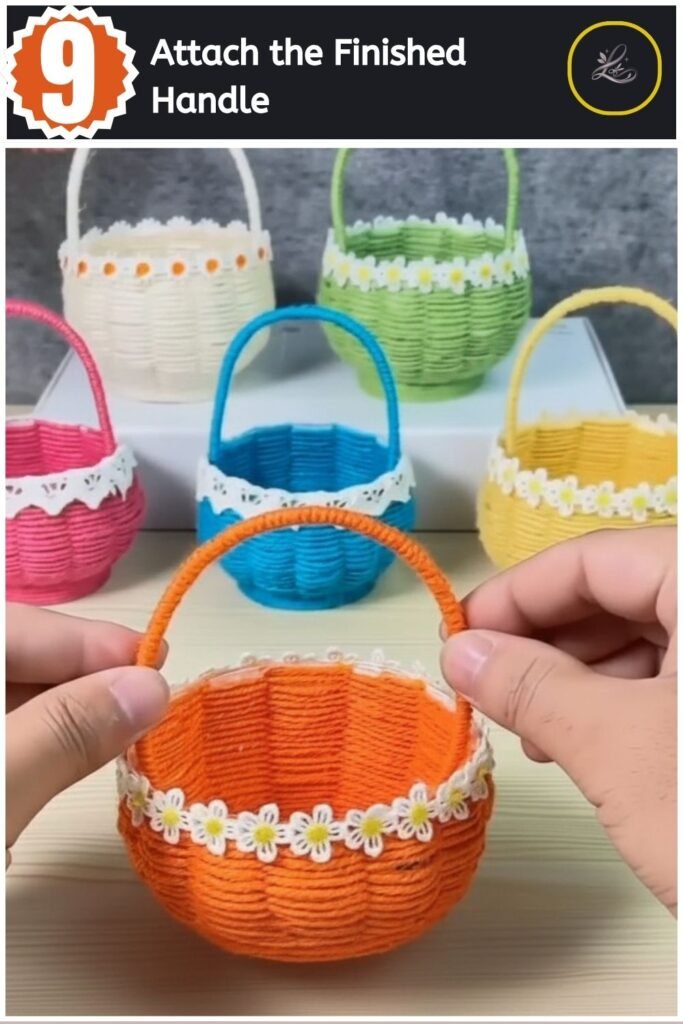
Pro Tip: Slip the handle ends slightly down into the woven layers inside the basket walls for a stronger hold.
TIPS & TRICKS
- Fixing Uneven Slats: If your paper strips look slightly different in width after cutting, do not panic. The thickness of the yarn will completely cover up small variations once you get a few rows deep.
- Preventing Slanted Walls: Keep the paper cup resting flat on your table during the early wall-building rows to keep your basket straight and symmetrical.
- Dealing with Loose Yarn: If your yarn feels loose or slippery on the paper slats, rub a little bit of glue-stick along the outer side of the paper strips before weaving to add instant grip.
- Changing Colours Smoothly: Want a multi-colored look? Snip your current yarn colour at the back of a paper strip, glue it down, and anchor a brand new color right next to it to continue weaving.
WAYS TO USE THIS CRAFT
These mini baskets make wonderful additions to your home. Place them on a windowsill filled with small faux flowers for a touch of garden charm, or use them on a vanity to hold rings and bobby pins. They are also excellent for seasonal gift-giving; fill them with tiny candies or treats to create custom party favours.
FREQUENTLY ASKED QUESTIONS
-
How long does this project take to complete?
This miniature project is very quick. It takes about 15 to 20 minutes from cutting the paper cup to gluing the final handle in place.
-
Where can I buy the materials for this project?
You can find every item needed at your local dollar store, craft shop, or online supermarket. Most crafters already have these common supplies at home.
-
Can kids make this paper cup basket safely?
Children can enjoy this activity under supervision. Switch out the hot glue gun for a bottle of standard school glue or craft glue to make the process kid-friendly.
CLOSING
You have turned a humble disposable cup into an elegant piece of handmade decor! Display your new creation proudly on your shelf or gift it to a friend to brighten their day. Ready for your next project? Try our DIY Birthday Paper Gift Bag You Can Make in 20 Minutes (No Experience Needed!) next!
Happy crafting! — LOUVADECORES
Follow us on: Pinterest
