

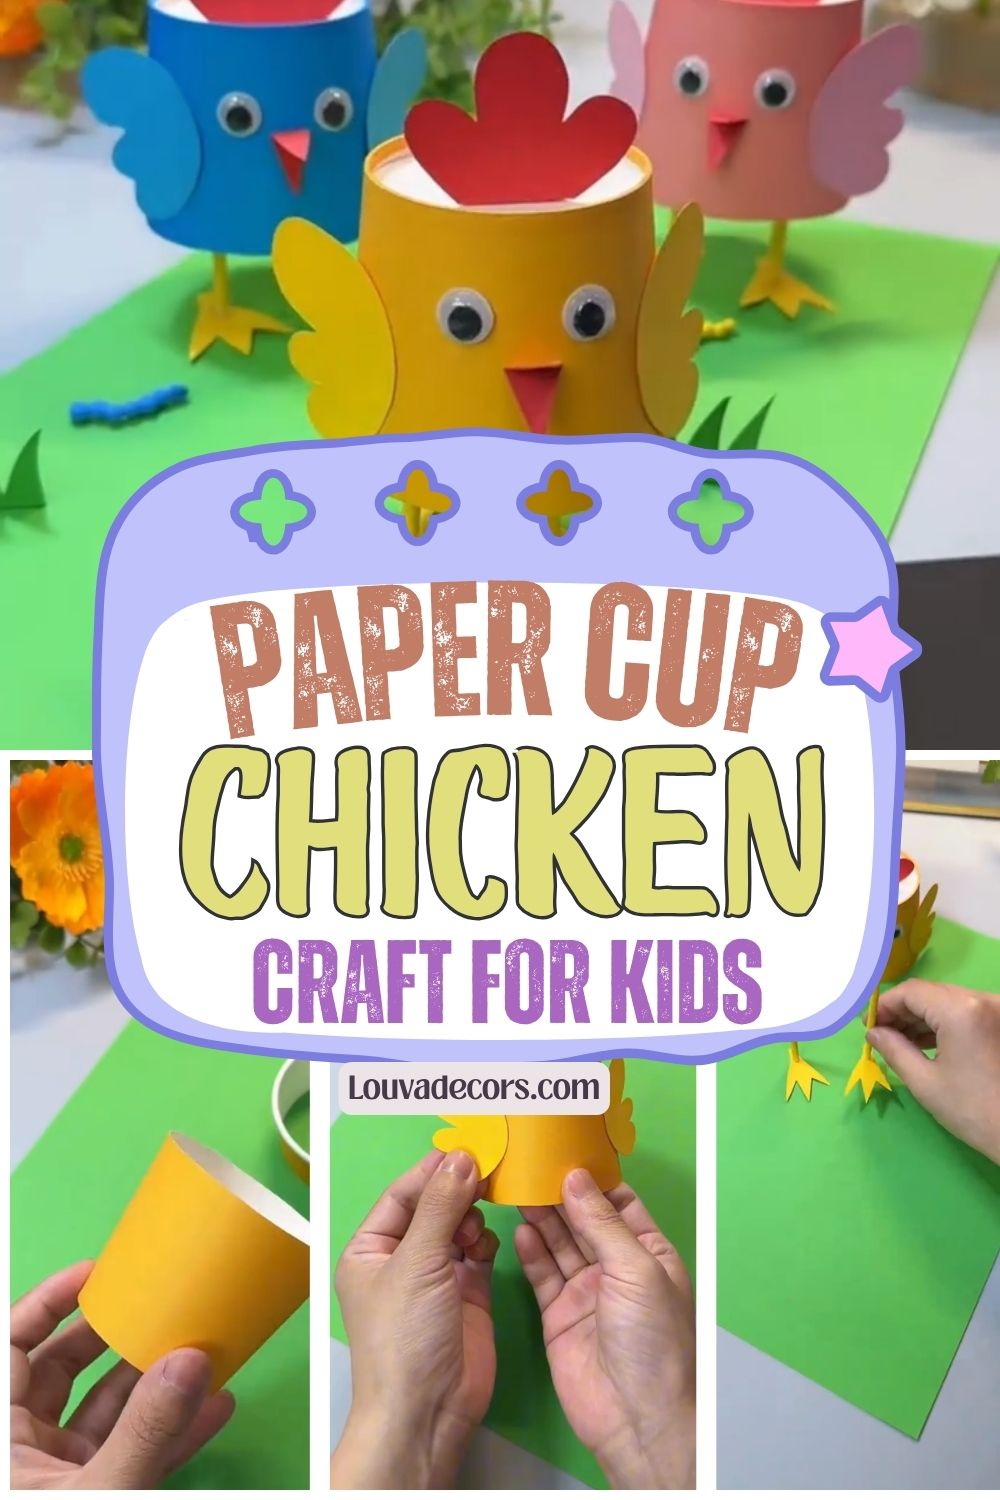
Transforming a plain party supply into a lively, bouncing friend is one of the most rewarding parts of crafting. This paper cup chicken craft turns ordinary paper cups and bright cardstock into delightful, interactive farm animals that dance across the table. Whether you want to brighten up a shelf or entertain creative little hands, these charming barnyard critters offer an ideal way to explore three-dimensional paper construction.
You do not need any experience to achieve beautiful results with this project. If you often worry about straight cuts or perfect symmetry, take a deep breath and let go of those expectations. Crafting is all about the joy of creating, and every single little chick you make will have its own unique, wonderful personality.
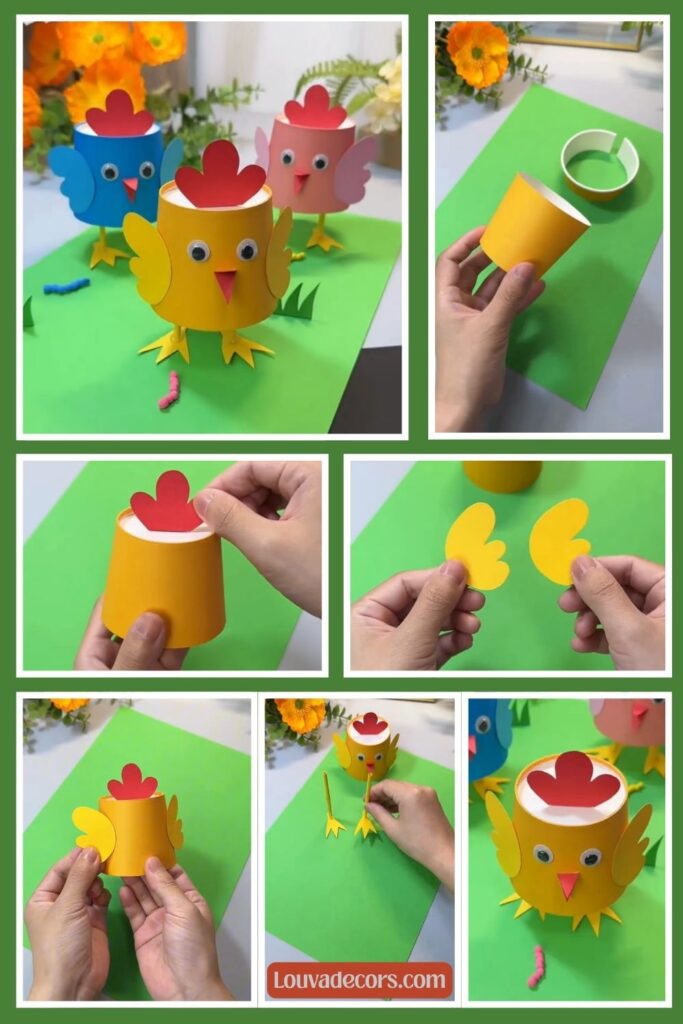
With only a handful of basic supplies and about fifteen minutes of your afternoon, you can assemble a whole flock of colorful birds. This budget-friendly project serves as a fantastic introduction to the colourful world of Kids Crafts, proving that you can create beautiful memories without expensive kits.
WHY YOU WILL LOVE THIS PAPER CUP CHICKEN CRAFT
This project requires minimal investment but delivers maximum entertainment value. It costs pennies to make, utilizes items you likely already have in your pantry, and yields an interactive toy that actually bounces when tapped. It is a fantastic option for a weekend family gathering or a festive afternoon table setting.
WHAT YOU WILL NEED
- 1 Paper cup (Yellow, pink, or blue) [Recycled plastic cup or clean yogurt container]
- 1 Sheet of Red cardstock [Red construction paper or colored printer paper]
- 1 Sheet of Yellow cardstock [Yellow construction paper]
- 2 Googly eyes [Black marker or hand-drawn paper circles]
- 1 Small scrap of orange paper for the beak [Colored marker over white paper]
- Craft glue or double-sided tape [School glue or glue stick]
- Scissors
- Pencil
All materials can be found at your local craft store or ordered online.
VIDEO TUTORIAL
Watch the full tutorial above before reading the written steps. The steps below match the video exactly.
STEP-BY-STEP INSTRUCTIONS
Step 1: Prep the Slits in Your Paper Cup
Turn your colored paper cup upside down so the wide mouth rests flat against your workspace. Carefully use the tip of your scissors to poke a narrow horizontal slit directly into the center of the top base. Next, cut two matching vertical slits on opposite sides of the cup’s body to prepare anchor points for the wings later on.
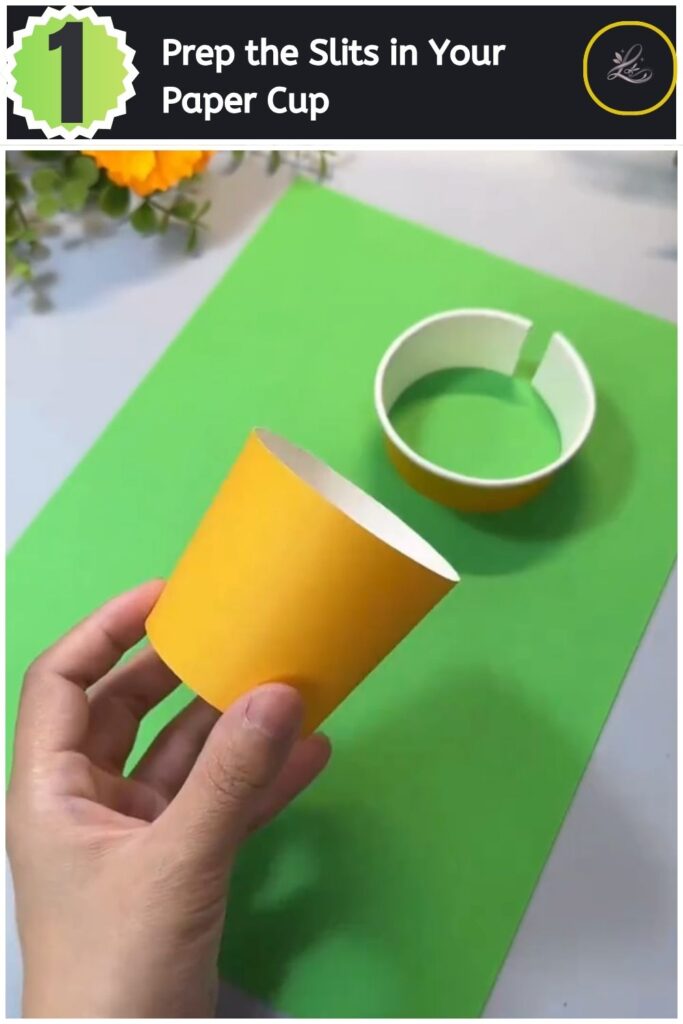
Pro Tip: Hold the cup firmly near the base while poking the slits to prevent the paper walls from denting or collapsing under pressure.
Step 2: Create and Insert the Red Comb
Draw a three-pronged wavy comb shape onto a piece of red cardstock using a pencil. Leave a small rectangular tab along the flat bottom edge of your drawing before cutting out the shape with your scissors. Fold this tab backward at a right angle, apply a small dot of glue, and slide the paper tab securely down into the top slit of your cup.
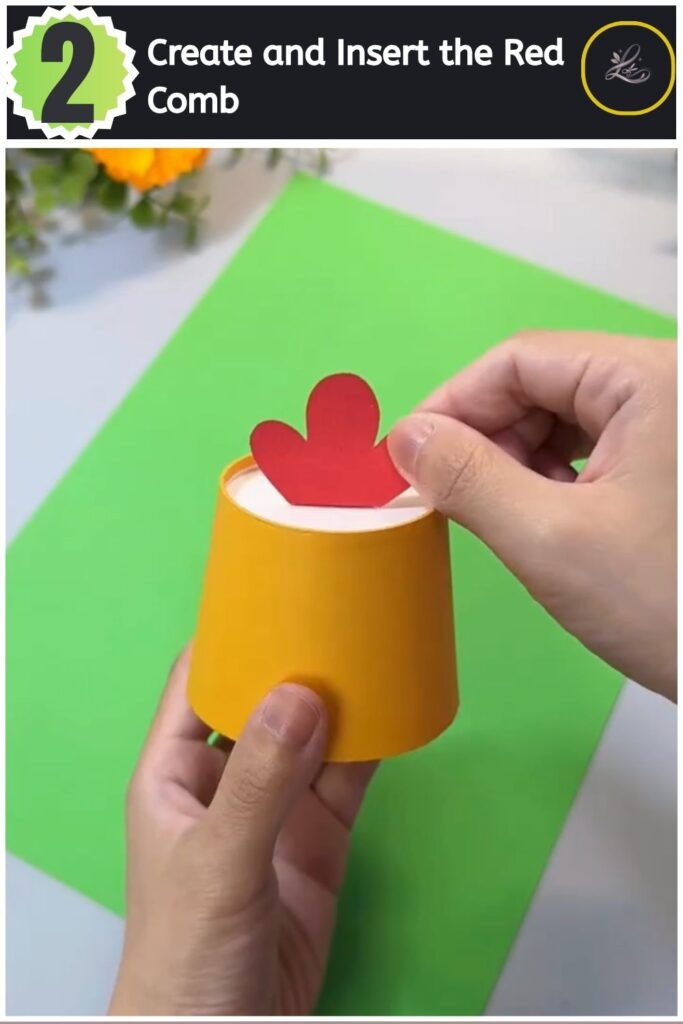
Pro Tip: If your comb feels floppy, use slightly thicker cardstock or double your paper layers to help it stand up straight.
Step 3: Shape and Attach the Wings
Fold a piece of yellow cardstock in half and sketch a scalloped wing shape resembling a fluffy cloud. Cut through both layers of paper simultaneously to ensure you have two identical wings. Slide the flat base of each wing into the side slits you cut earlier, pressing gently to make sure they flare outward properly.
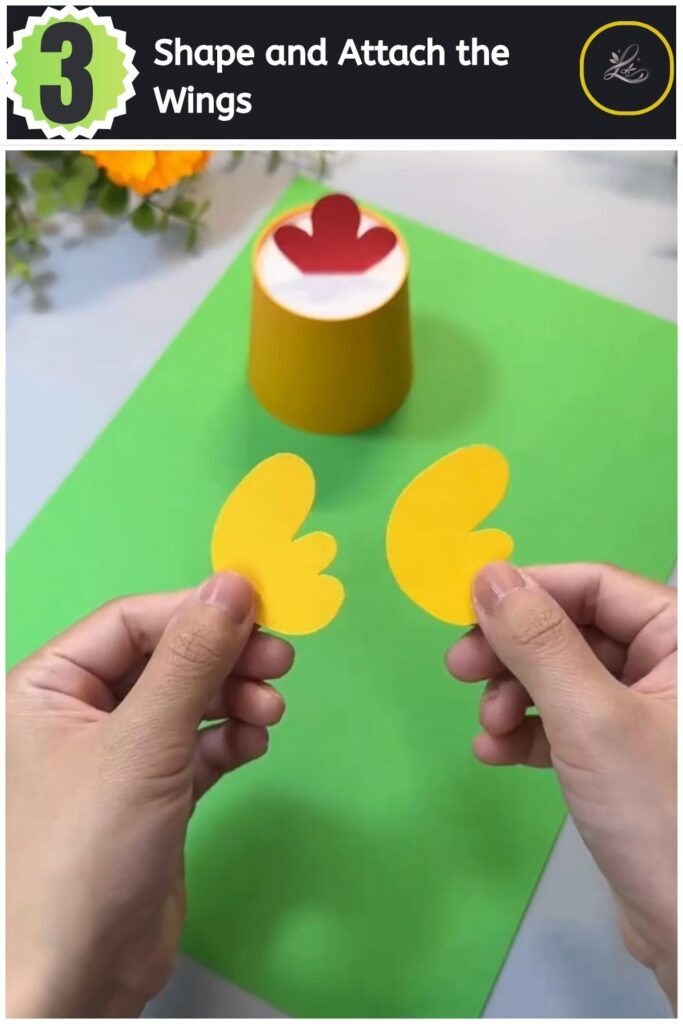
Pro Tip: Curve the outer tips of the paper wings over your pencil to give them a lively, three-dimensional bounce.
Step 4: Assemble the Face Details
Cut out a small diamond shape from orange or red paper, then fold it down the middle to form an open beak. Apply a tiny dot of glue to the fold line and press it onto the front center of your cup. Finish the face by peeling the backing off your googly eyes and placing them directly above the beak, pressing down firmly for a reliable hold.
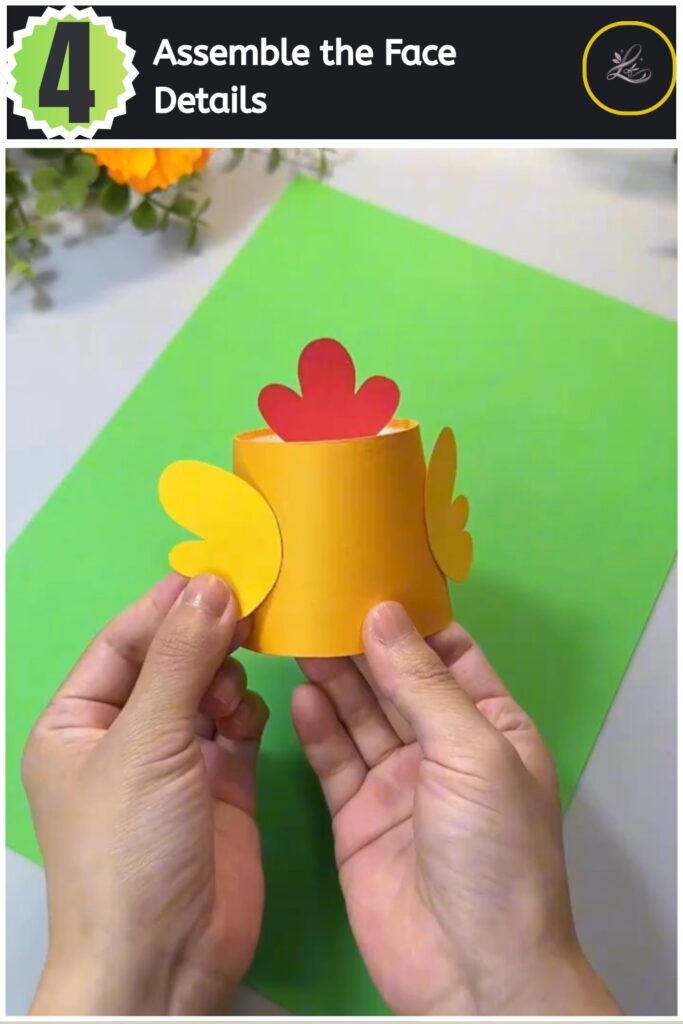
Pro Tip: If your googly eyes lack an adhesive backing, use a toothpick to apply white craft glue smoothly without making a mess.
- Easy DIY 3D Origami Christmas Tree (Cute Folded Holiday Decor)
- Easy DIY Origami Cruise Ship (5-Minute Paper Boat Tutorial)
- Easy DIY 3D Paper Heart Hot Air Balloon (5-Minute Kids Craft & Gift Card)
- Easy DIY 3D Pop-Up Flower Card (Exploding Floral Bouquet Tutorial)
- Easy DIY Paper Sunflower Card (With Surprise Flip Message!)
Step 5: Roll the Paper Legs
Take a square piece of yellow paper, fold it diagonally, and roll it tightly around a pencil to form a sturdy tube. Secure the loose edge with a smear of glue, slide the pencil out, and repeat the process to create your second leg support. Next, sketch two classic three-toed chicken feet onto yellow cardstock, cut them out, and glue one paper tube to the heel of each foot.
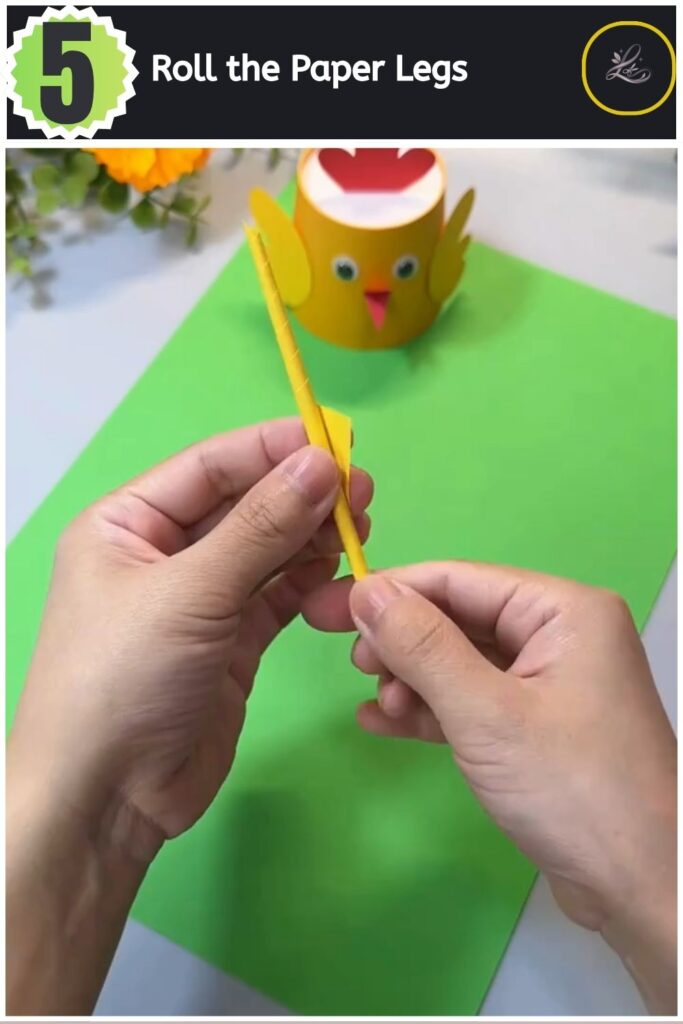
Pro Tip: Rolling the paper tightly ensures the legs remain strong enough to support the weight of the cup without bending over time.
Step 6: Connect the Legs to the Body
Poke two small holes into the inside rim at the open bottom edge of your cup. Slide the top raw ends of your rolled paper legs into these holes, fixing them securely with a drop of glue on the inside wall. Set your completed chicken upright on its paper feet, tap the top gently, and enjoy watching your new friend wobble!
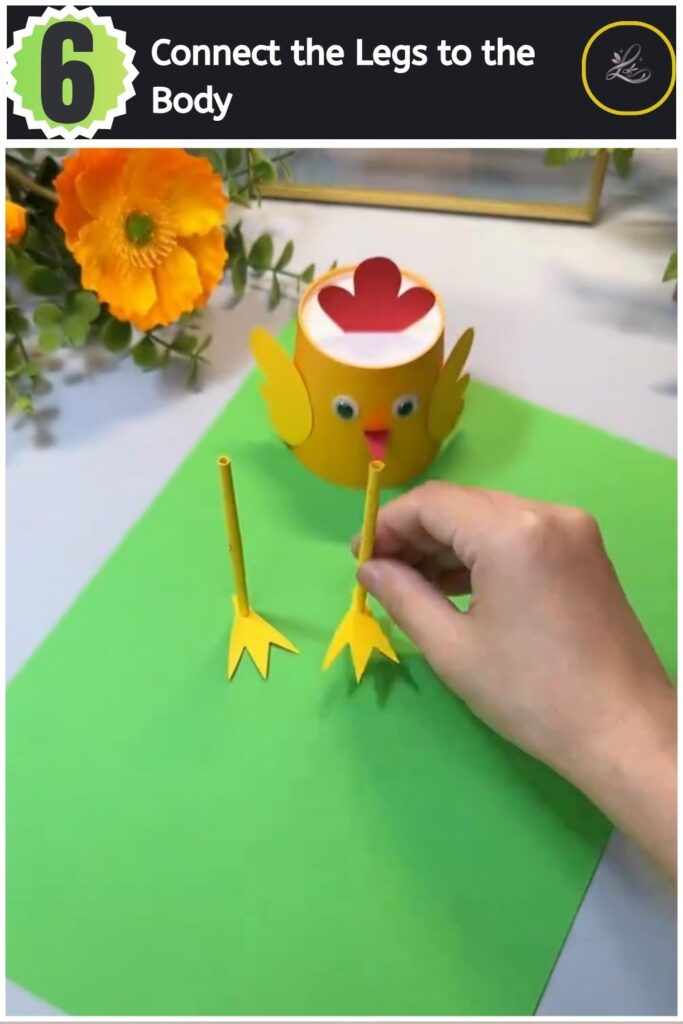
Pro Tip: Adjust the depth of the legs inside the cup to ensure your little chick stands completely level and uniform.
TIPS & TRICKS FOR SUCCESS
- Preventing Paper Tears: When poking slits into your cup, use a sharp craft knife or small precision scissors rather than bulky kitchen shears to keep lines clean.
- Securing Heavy Elements: If your paper tubes feel loose inside the base holes, apply a bit of hot glue inside the cup for an instant, permanent hold.
- Customizing Personalities: Experiment with different facial expressions by angling your googly eyes inward for a funny look or adding hand-drawn eyelashes.
- Managing Liquid Glue: Use glue sparingly; too much liquid wet glue will saturate thin paper components and cause them to warp or sag.
- Boosting Stability: If your chicken keeps tipping forward, glue a small penny or metal washer to the inside back rim of the cup to balance the weight.
WAYS TO USE THIS PAPER CUP CHICKEN CRAFT
These interactive birds function beautifully across multiple creative settings in your home. Arrange a vibrant trio of yellow, pink, and blue chickens down the center of your table to serve as an entertaining centerpiece for a family lunch. They also make delightful, interactive additions to dynamic play spaces or classrooms.
If you are planning an upcoming seasonal party, scatter these around the room to enhance your spring displays. You can even write individual names along the front rim to transform them into playful, personalized place cards for your guests.
FREQUENTLY ASKED QUESTIONS
-
How long does this project take to complete?
This project takes roughly fifteen minutes from start to finish once your materials are laid out. It is an ideal quick-craft option for short attention spans or busy afternoons. Take your time during the assembly process to enjoy each step without any rush.
-
Can I make this craft using plastic cups instead of paper cups?
Yes, plastic cups work beautifully for this project. Use a heated safety pin or a craft knife to melt or slice the leg slots carefully, as plastic tends to crack if forced with dull scissors. Use a strong double-sided tape or hot glue to secure your paper elements to the slick plastic surface.
-
How do I make the chicken legs look perfectly uniform?
Roll your paper pieces around the exact same pencil or wooden dowel to keep the diameters identical. Trim the ends of your rolled paper tubes with your scissors simultaneously before gluing them to the feet to guarantee your bird stands level.
CLOSING
Creating this delightful paper cup chicken craft brings a wonderful splash of color and playfulness to any crafting table. Taking ordinary household items and turning them into whimsical, animated characters reminds us how rewarding handmade projects can be. Display your new friends proudly on a sunny windowsill, or let them bounce around your workspace to bring a smile to your face throughout the day. Ready for your next project? Try our whimsical paper flower tutorial next!
Happy crafting! LOUVADECORES
Follow us on: Pinterest
