

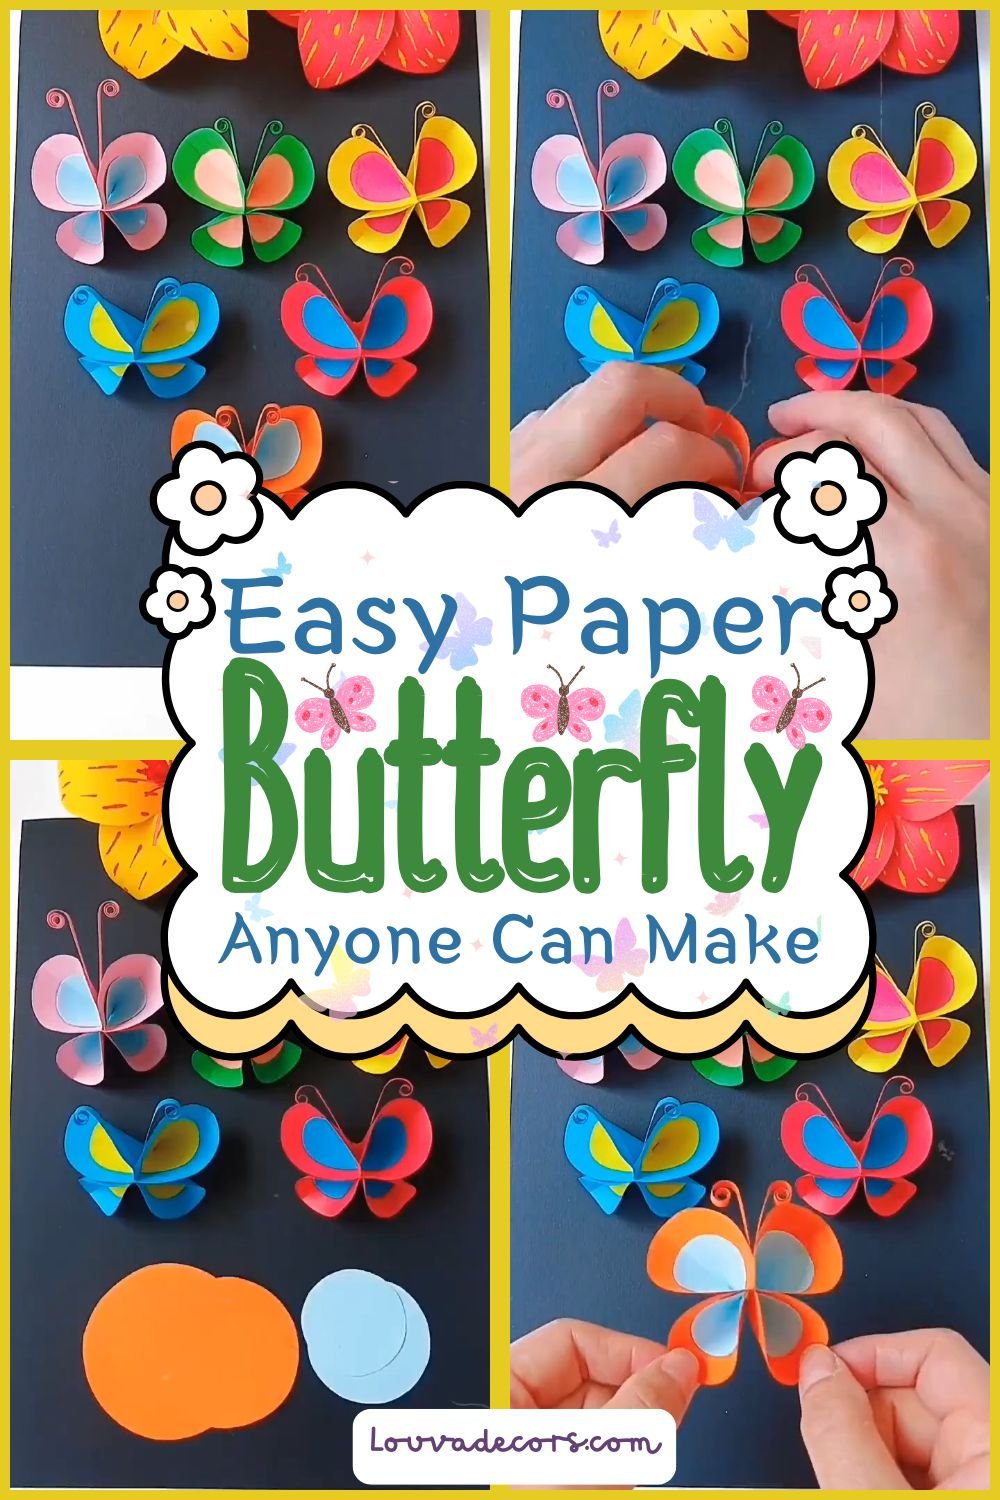
Imagine transforming a few simple sheets of bright cardstock into stunning, dimensional works of art that look like they are ready to fly right off your walls. Crafting these colorful paper butterflies adds an instant pop of joy to any room, nursery, or party backdrop. You can easily craft a whole kaleidoscope of colors to match your personal style or seasonal theme.
If you feel intimidated by intricate folding techniques, take your time and rest assured that you do not need any experience to succeed here. Crafters of all ages can achieve beautiful results on their very first try without stress. We will guide you through every fold so you can create with confidence.
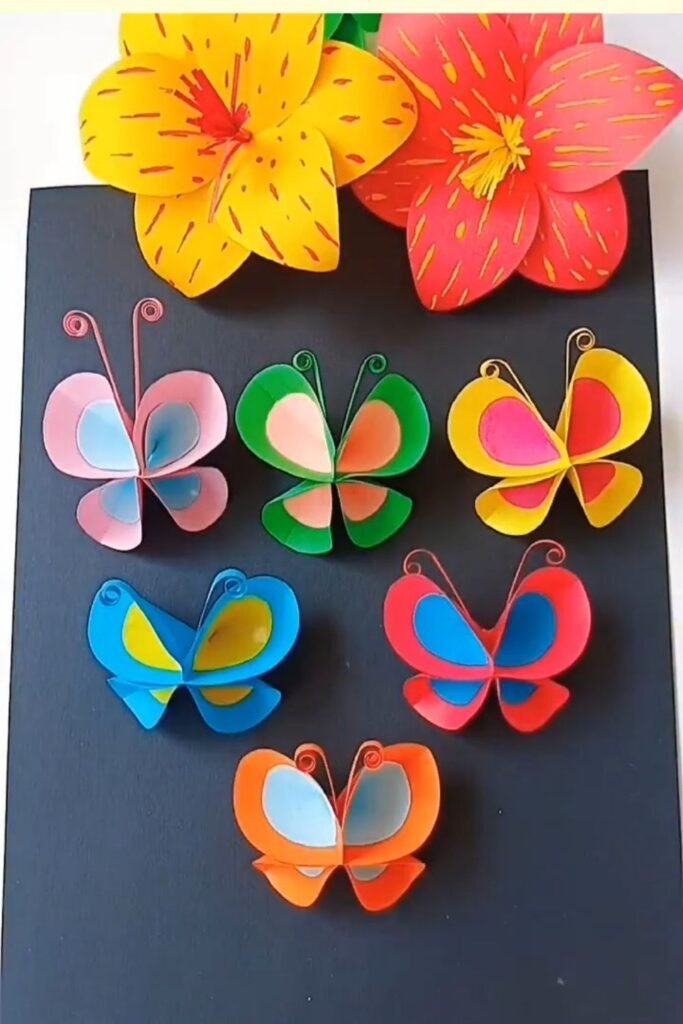
Gather a few basic circles of colored paper and some glue to begin this quick project that takes less than ten minutes. It serves as a fantastic foundation for larger home decor projects or personalized touches on your next creative endeavor. Let’s dive right into the fun details!
WHY YOU WILL LOVE THIS PROJECT (H2)
This project delivers high-impact visual results using budget-friendly materials that you likely already have in your recycling bin or craft closet. It requires absolutely no expensive cutting machines or specialized tools to achieve a striking 3D appearance. You can easily customize the color combinations to build a stunning display for seasonal celebrations, bedroom updates, or personalized gift tags.
WHAT YOU WILL NEED
- Colored paper circles in contrasting shades (e.g., Orange, Blue, Yellow, Pink) — [Construction paper or scrap paper works great]
- Thin strips of colored paper for the antenna — [Magazine pages or construction paper scraps]
- Craft glue or a glue stick — [School glue or double-sided tape]
- A small wooden stick or toothpick for curling — [A pen, pencil, or paintbrush handle]
All materials can be found at your local craft store or ordered online.
VIDEO TUTORIAL
Watch the full tutorial above before reading the written steps. The steps below match the video exactly.
STEP-BY-STEP INSTRUCTIONS
Step 1: Prep the Paper Base
Lay down a large colored paper circle and place a slightly smaller, contrasting paper circle directly on top of it. This establishes the two-tone color depth that makes the wings pop visually. Keep the circles centered relative to each other before moving forward.
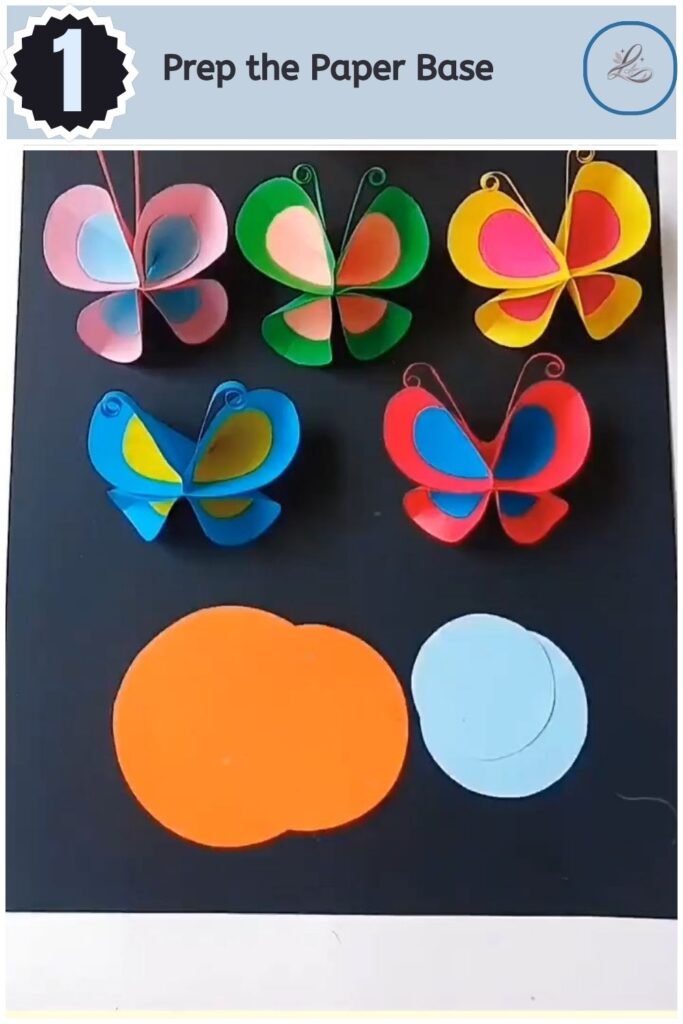
Pro Tip: Contrast bright primaries with soft pastels to make the interior patterns stand out beautifully.
Step 2: Fold the Circles in Half
Fold the stacked circles precisely in half to form a neat semi-circle shape. Press firmly along the folded edge to create a sharp, distinct crease through both layers of paper. This crease forms the central spine of your finished insect.
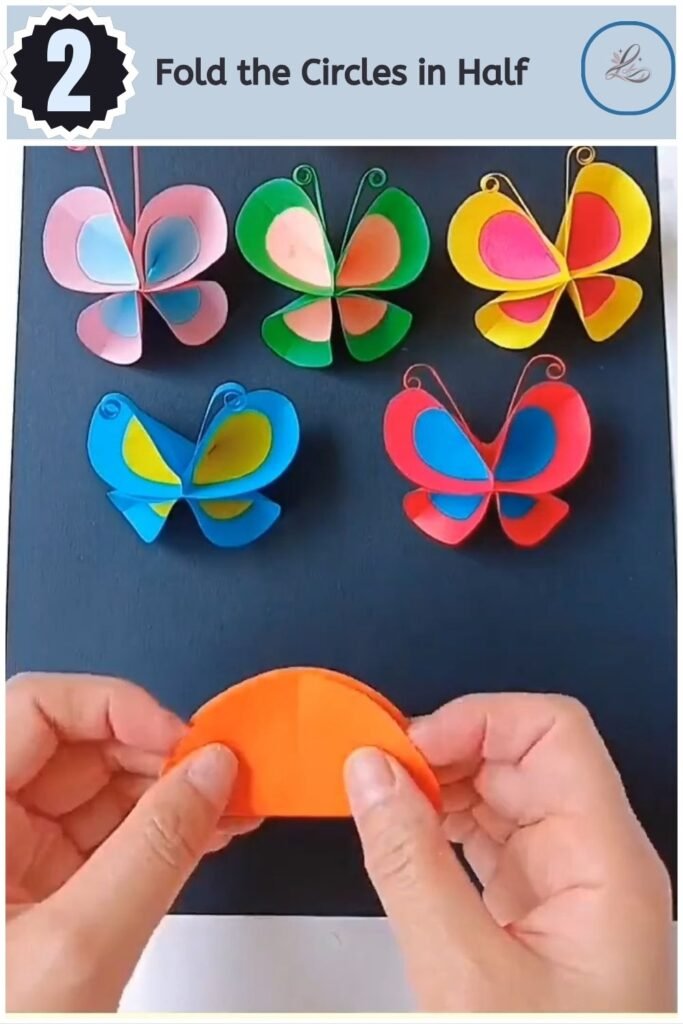
Pro Tip: Use the edge of a plastic ruler or your fingernail to slide across the fold for a perfectly crisp seam.
Step 3: Create the Wing Pleats
Fold the outer corners of the semi-circle inward toward the center to build the dimensional layers. This folding motion forms the overlapping upper and lower wing segments. Press down firmly to lock the new folds into place.
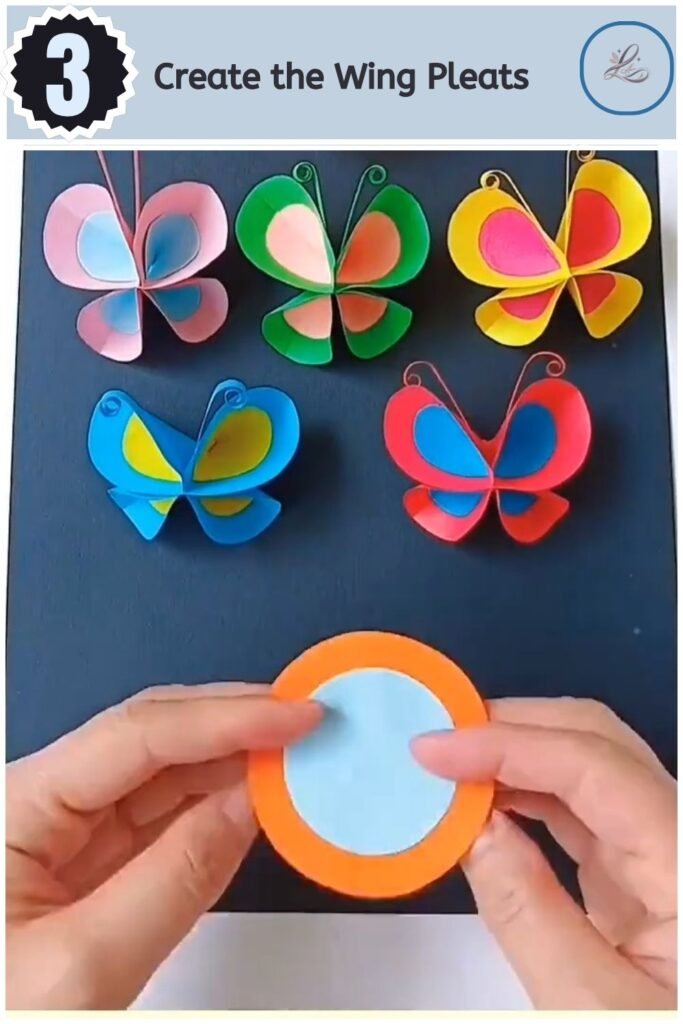
Pro Tip: Make sure the internal layers do not slip out of alignment while you press down on the new angles.
- 20 Easy DIY Santa Crafts to Make This Christmas (Cheap & Adorable)

- Lovely Paper Pop Up Tulip Card Anyone Can Make
- Cute Paper Chinese New Year Garland Anyone Can Make
- Adorable Halloween Paper Hat Craft for Beginners
- Make Sweet DIY Flower Greeting Card for Loved Ones
Step 4: Open and Shape the Wings
Gently unfold the sides outward while keeping the central structure intact to reveal the beautiful 3D wings. Adjust the inner paper layers so they flare out smoothly and display both contrasting colors. The insect shape should now be fully recognizable.
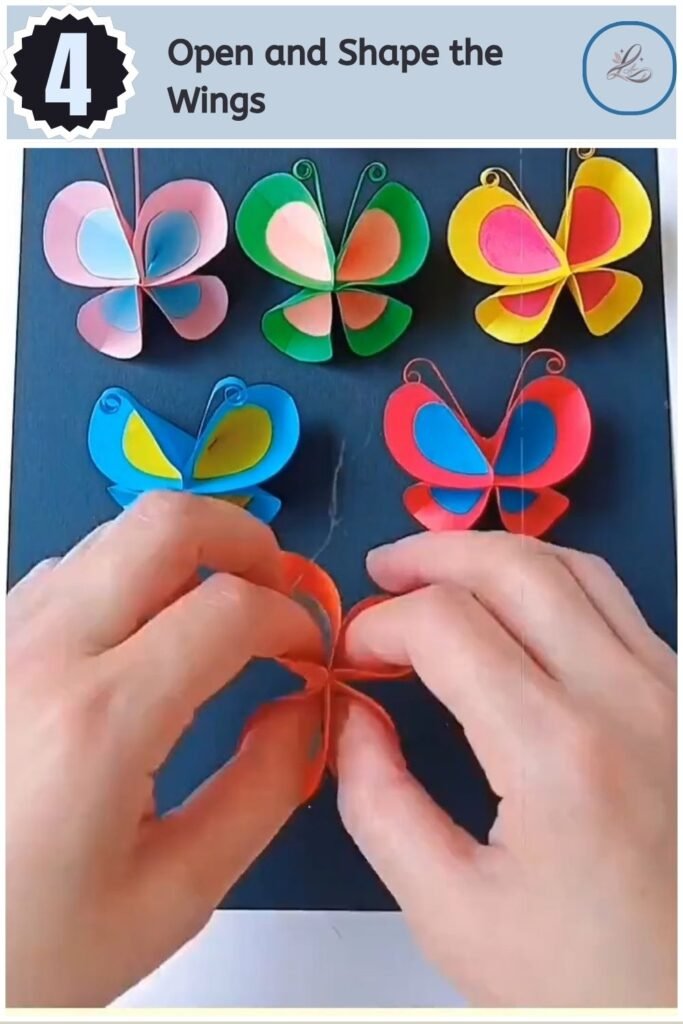
Pro Tip: Avoid pulling too hard on the delicate folds so you keep the natural springiness of the paper intact.
Step 5: Roll the Antennae
Wrap a thin strip of colored paper tightly around a small wooden stick or toothpick to form a spiral. Gently slide the paper off the stick to leave behind a perfectly curled antenna piece. Repeat this action on the opposite side of the strip if creating a single connected unit.
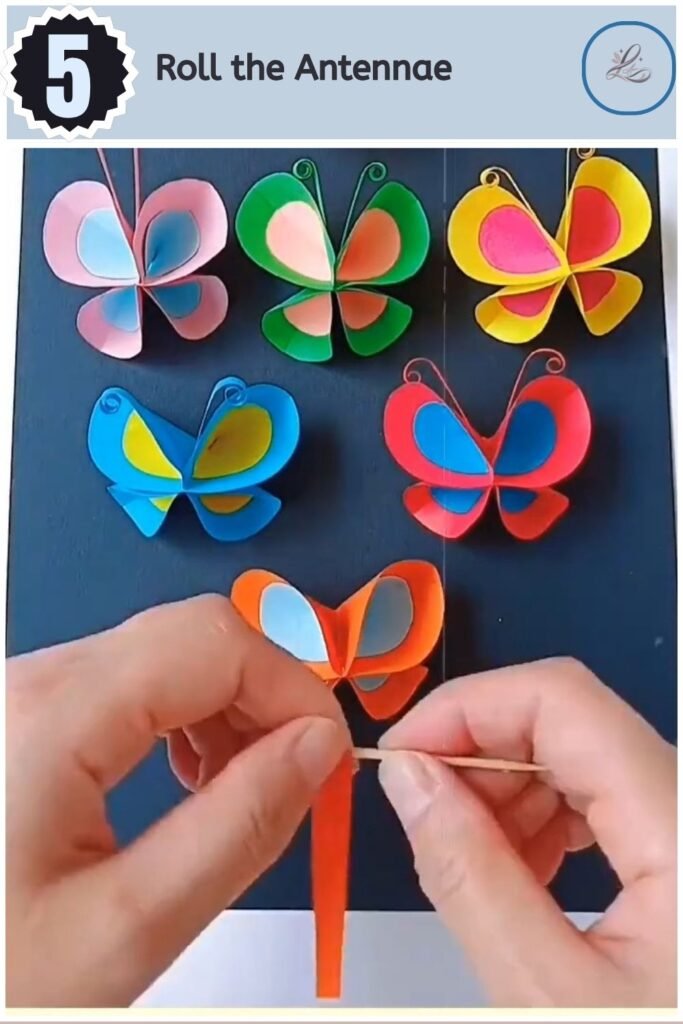
Pro Tip: Pull the paper strip gently while wrapping to achieve a tighter, more resilient spiral coil.
Step 6: Attach the Antennae
Apply a tiny drop of craft glue to the base of your curled antennae and press it firmly against the top center of the wings. Hold the pieces together steadily for a few moments to allow the adhesive to bond completely. Adjust the curls to your liking once the glue sets.
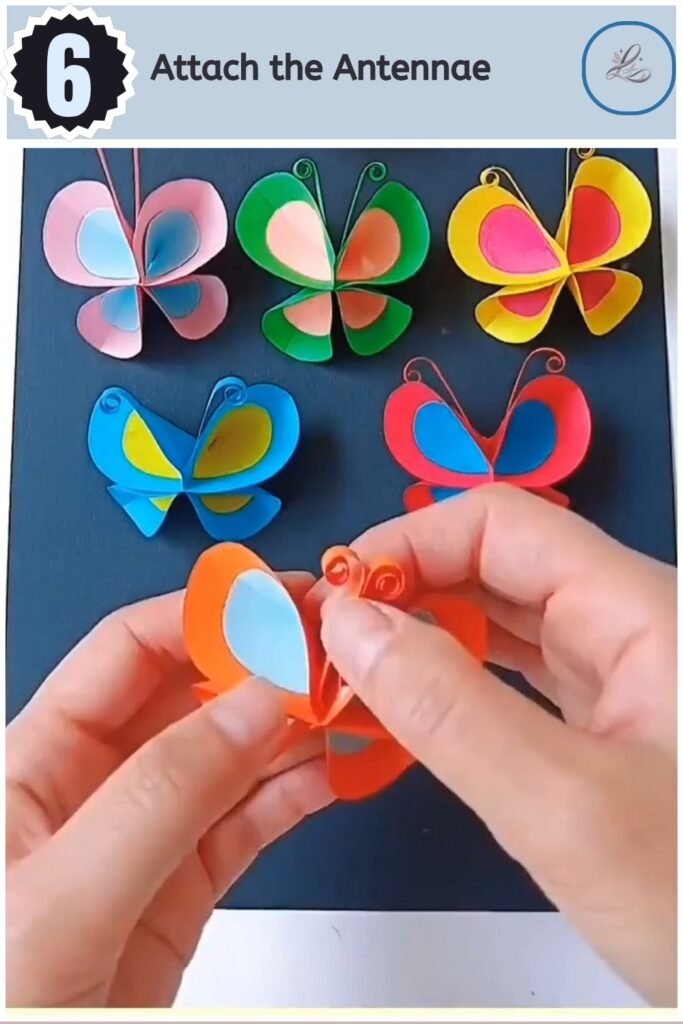
Pro Tip: Use a toothpick to apply the glue so you avoid messy overflows on your clean paper surfaces.
TIPS & TRICKS
- If your paper layers keep popping open too wide, add a microscopic dot of glue between the inner folds to secure them without flattening the 3D effect.
- Avoid using heavy cardstock for the antennae, as thick paper resists curling smoothly and can easily tear during the rolling process.
- If your glue causes the colored paper to warp or wrinkle, switch to a dry glue stick or double-sided scrapbooking tape for a perfectly flat bond.
- To create varied sizing in your display, use household objects like bowls, cups, and coins to trace a wide range of circle dimensions.
WAYS TO USE THIS CRAFT
These colorful paper butterflies look amazing when attached to a bedroom wall using removable mounting tape to create a flying swarm effect. You can also glue them onto plain gift boxes or handmade greeting cards to add an eye-catching 3D element that replaces traditional ribbons. For a seasonal twist, try stringing a dozen of them onto a long piece of twine to create a gorgeous spring garland for a mantelpiece or window frame.
FREQUENTLY ASKED QUESTIONS
Q1: How long does this project take to complete?
This project requires very little time. You can easily complete a single butterfly in under five minutes once your circles are cut out.
Q2: What if I make a mistake — can I fix it?
You can easily fix minor folding mistakes. Simply flatten the paper out completely and smooth out the incorrect crease before attempting the fold again.
Q3: Where can I buy the materials for this project?
You can find all these basic supplies at any local dollar store, craft shop, or online supermarket. Scrap paper from home works perfectly too.
Q4: How do you hang paper butterflies on a wall without damaging the paint?
Use small pieces of removable poster putty or low-tack painter’s tape on the back of the folds. This holds the lightweight paper securely while protecting your drywall when it is time to rearrange them.
CLOSING
You have successfully created a gorgeous piece of three-dimensional art out of basic paper circles! Celebrate your new crafting skills and consider experimenting with different patterns, textures, or metallic papers next time. Ready for your next project? Try our Colorful Origami Transforming Star Anyone Can Make next to keep your creative momentum going!
Happy crafting! — LOUVADECORES
